Tutorial: Viewing the Studio Wall Slideshow
When you double-click an image on the studio wall or click the slideshow button on the studio wall toolbar ( ), the photographs on the studio wall will display in the slideshow. The slideshow displays the photos individually, larger, and you can use the arrow keys or buttons at the right and left edges to change between the pictures.
PDF files, videos, and text items will not appear in the slideshow.

If you mouse to the top of the screen, the toolbar will display:

The buttons on the toolbar do the following:
- If you are updating a studio wall, the Comments button (
 ) will display the Comments dialog box so you can view and leave comments on this photo. For more information, see "Commenting on the Studio Wall."
- The Undo Crop and Crop buttons (
 ) let you crop the image, and the cropped image will display on the studio wall and in the slideshow. For more information, see "Cropping in the Studio Wall Slideshow."
- The EXIF Information button (
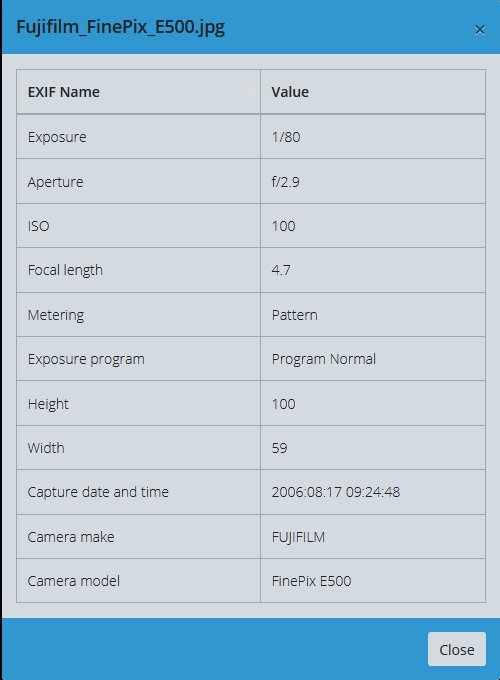
 ) displays after you have saved the image on the studio wall. Clicking it will display a dialog box with the EXIF (Exchangeable Image file) information for the photograph:

Your camera or mobile device saved this information in the image file when you took the photograph. The exact information that your camera saved will vary by camera type.
- Three buttons (
 ) control the background color of the slideshow. The background color defaults to black, but you can also set it to white or grey. This only affects the slideshow--remember, you set the background color of the studio wall itself using the Change Background Color button (
 ). Also note that this change will only last as long as you view the slideshow--if you close the slideshow, the next time you open it, the color will again default to black.
- The Star button (
 ) will apply (or remove) a star on the photo just as the context menu option does.
- The Download button (
 ) opens a file chooser so you can download this photo to your computer.
- The Copy button (
 ) copies the image to your computer's clipboard. You can then paste it into your preferred photo editor.
- The Zoom buttons (
 ) help you zoom in or out on the photo. You can also click the image itself to zoom in. Note that if you're zoomed out all the way, the Zoom Out button will not display, and if you're zoomed in all the way, the Zoom In button will disappear.
- The Full Screen button (
 ) will display the slideshow using the full screen--sometimes called kiosk mode. Note that this is different from viewing the studio wall in full browser view, which only uses the whole browser. Full screen mode expands your browser, and hence the photos, to take up the whole monitor.
- The Close Slideshow button (
 ) returns to the normal studio wall view.
The bottom right corner of the slideshow has a record button ( ) you can use to record an audio comment for this photograph without having to open the Comments dialog. For more information on comments, see "Commenting on the Studio Wall."
The slideshow offers a great way to display the photographs you want to share with your classmates.