Release Notes
Features
2022.09.21
- Tutorials!
-
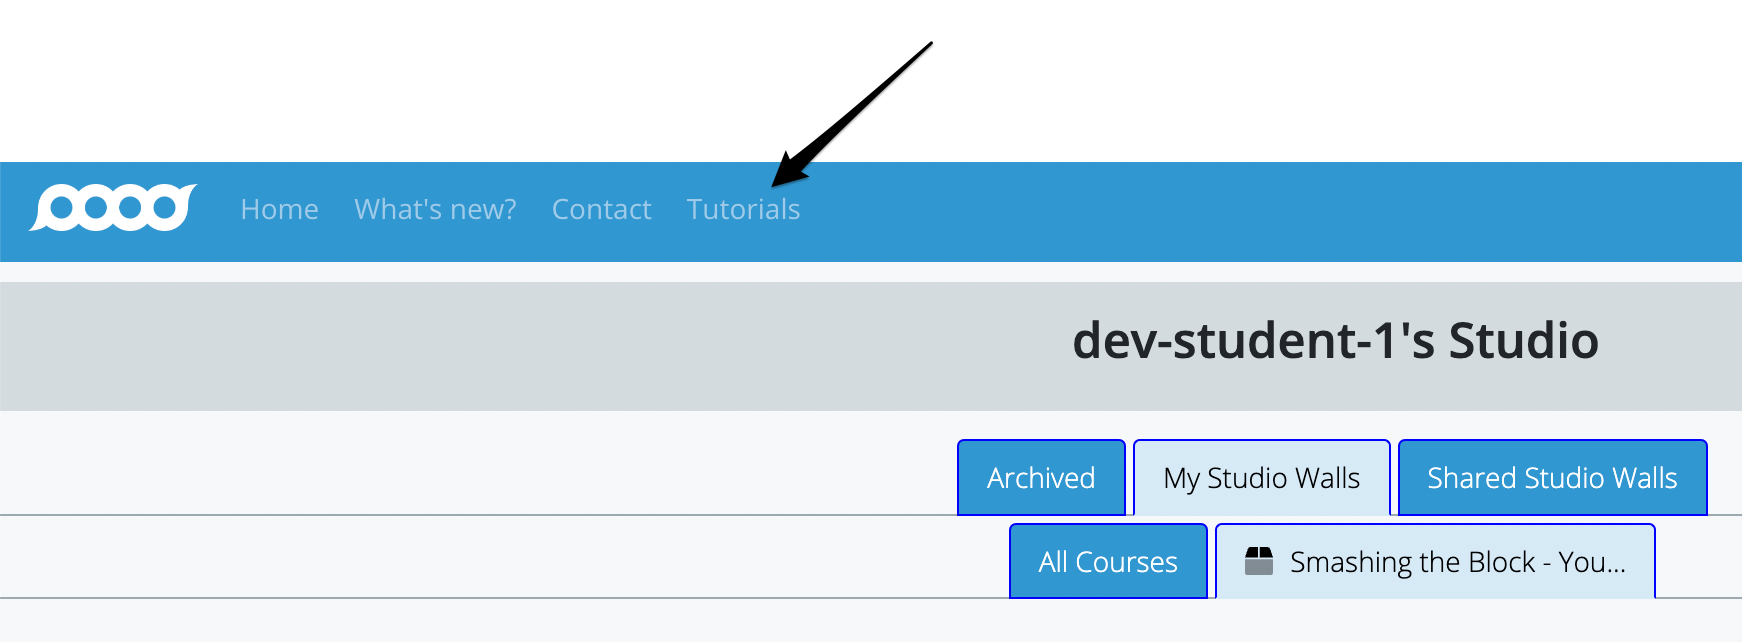
By popular demand, we've started adding tutorials for popular topics. Just click on "Tutorials" in the menu bar!
-
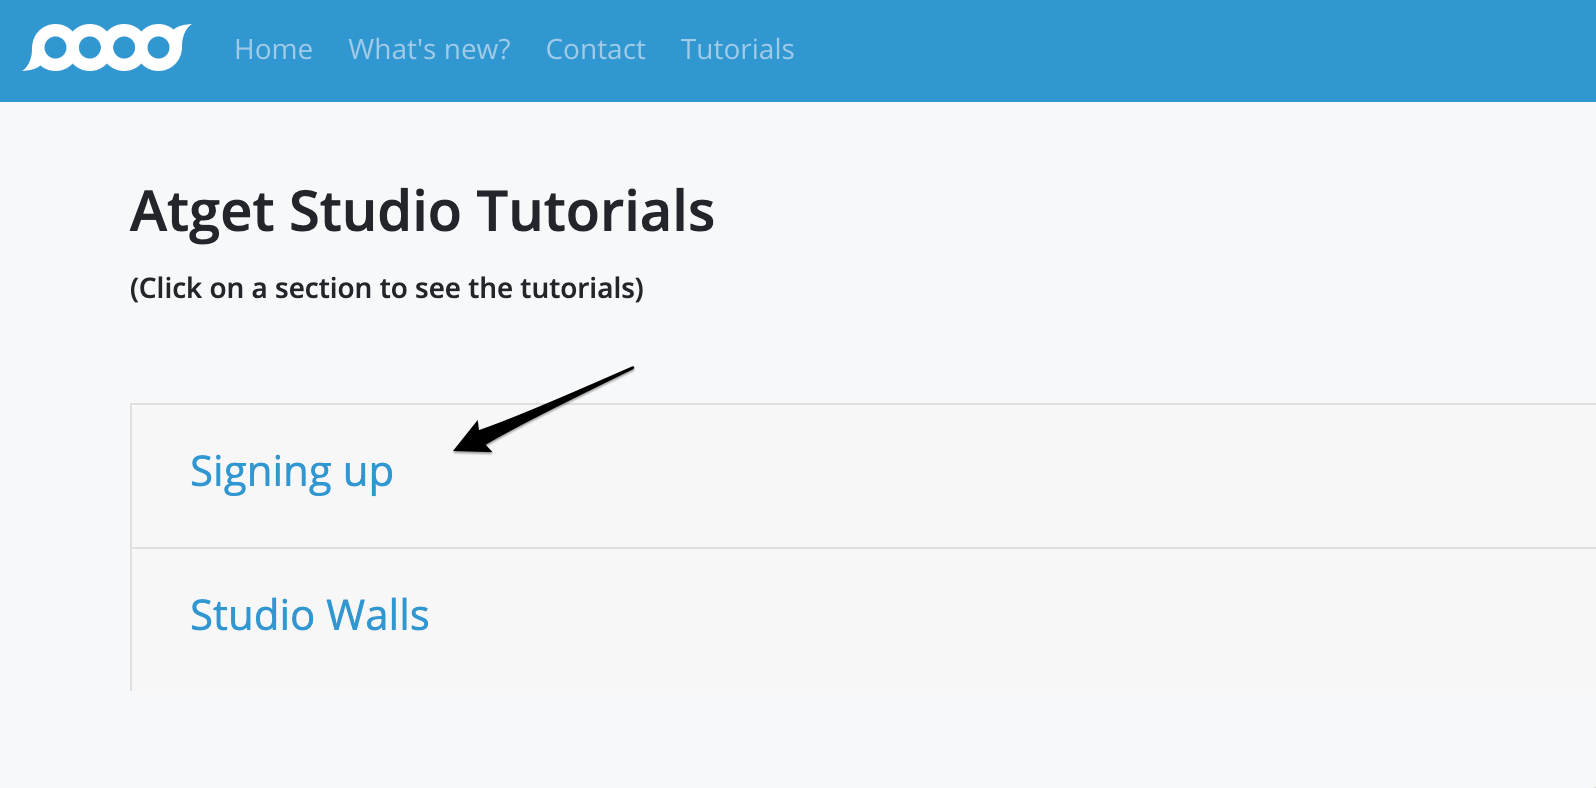
You'll see a list of topics. Click on one to see the tutorials available.
-
Click on the desired tutorial to see it:

-
And the tutorial appears!

- Fewer buttons!
-
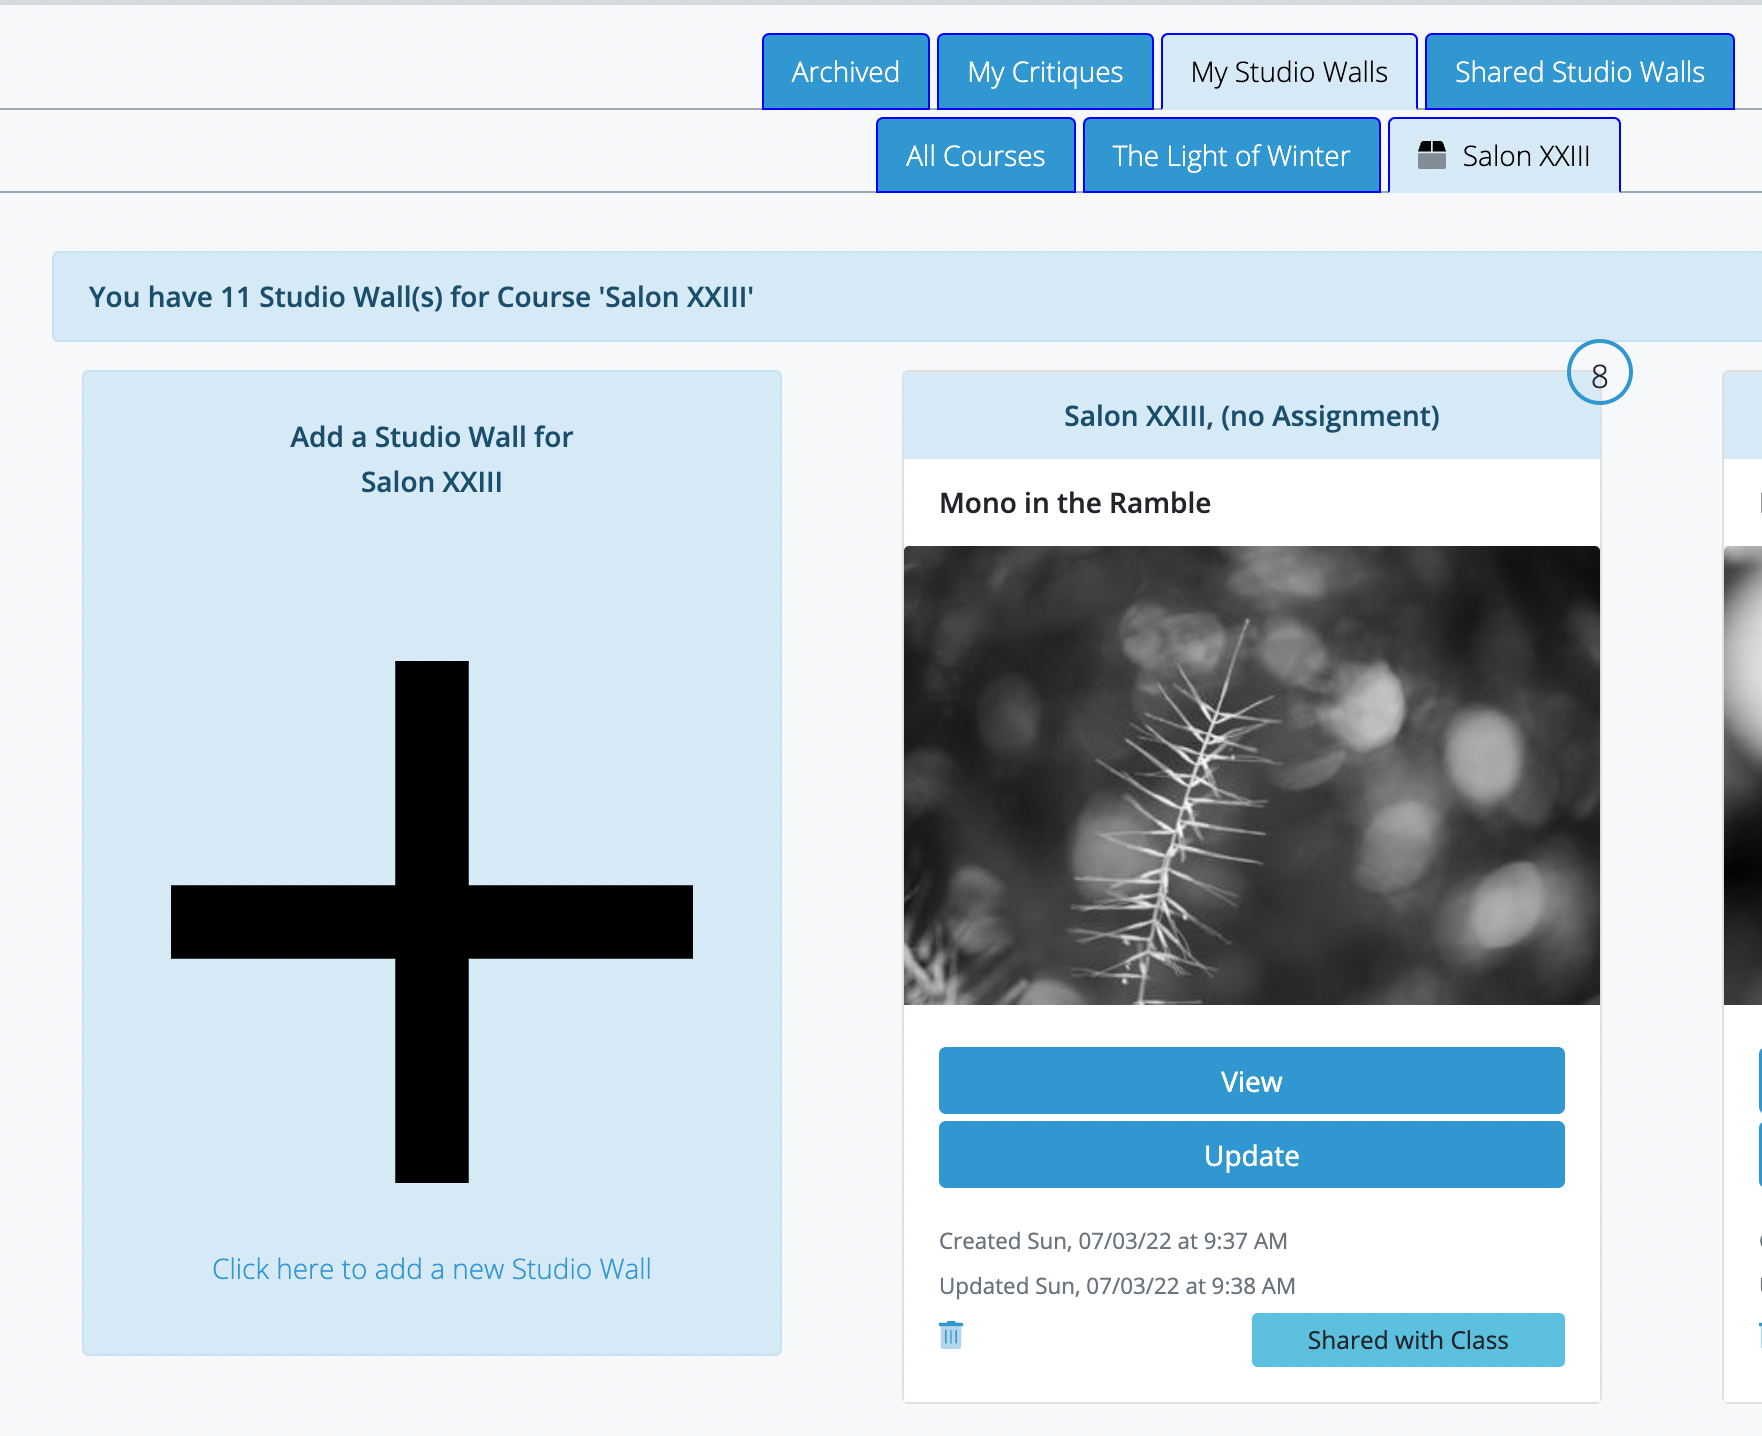
Before, there were a lot of buttons, which was kind of confusing. For example, on the Studio Wall
card shown below there were 3 buttons: "View", "Update", and clicking on the image which is the same as
"Update".
-
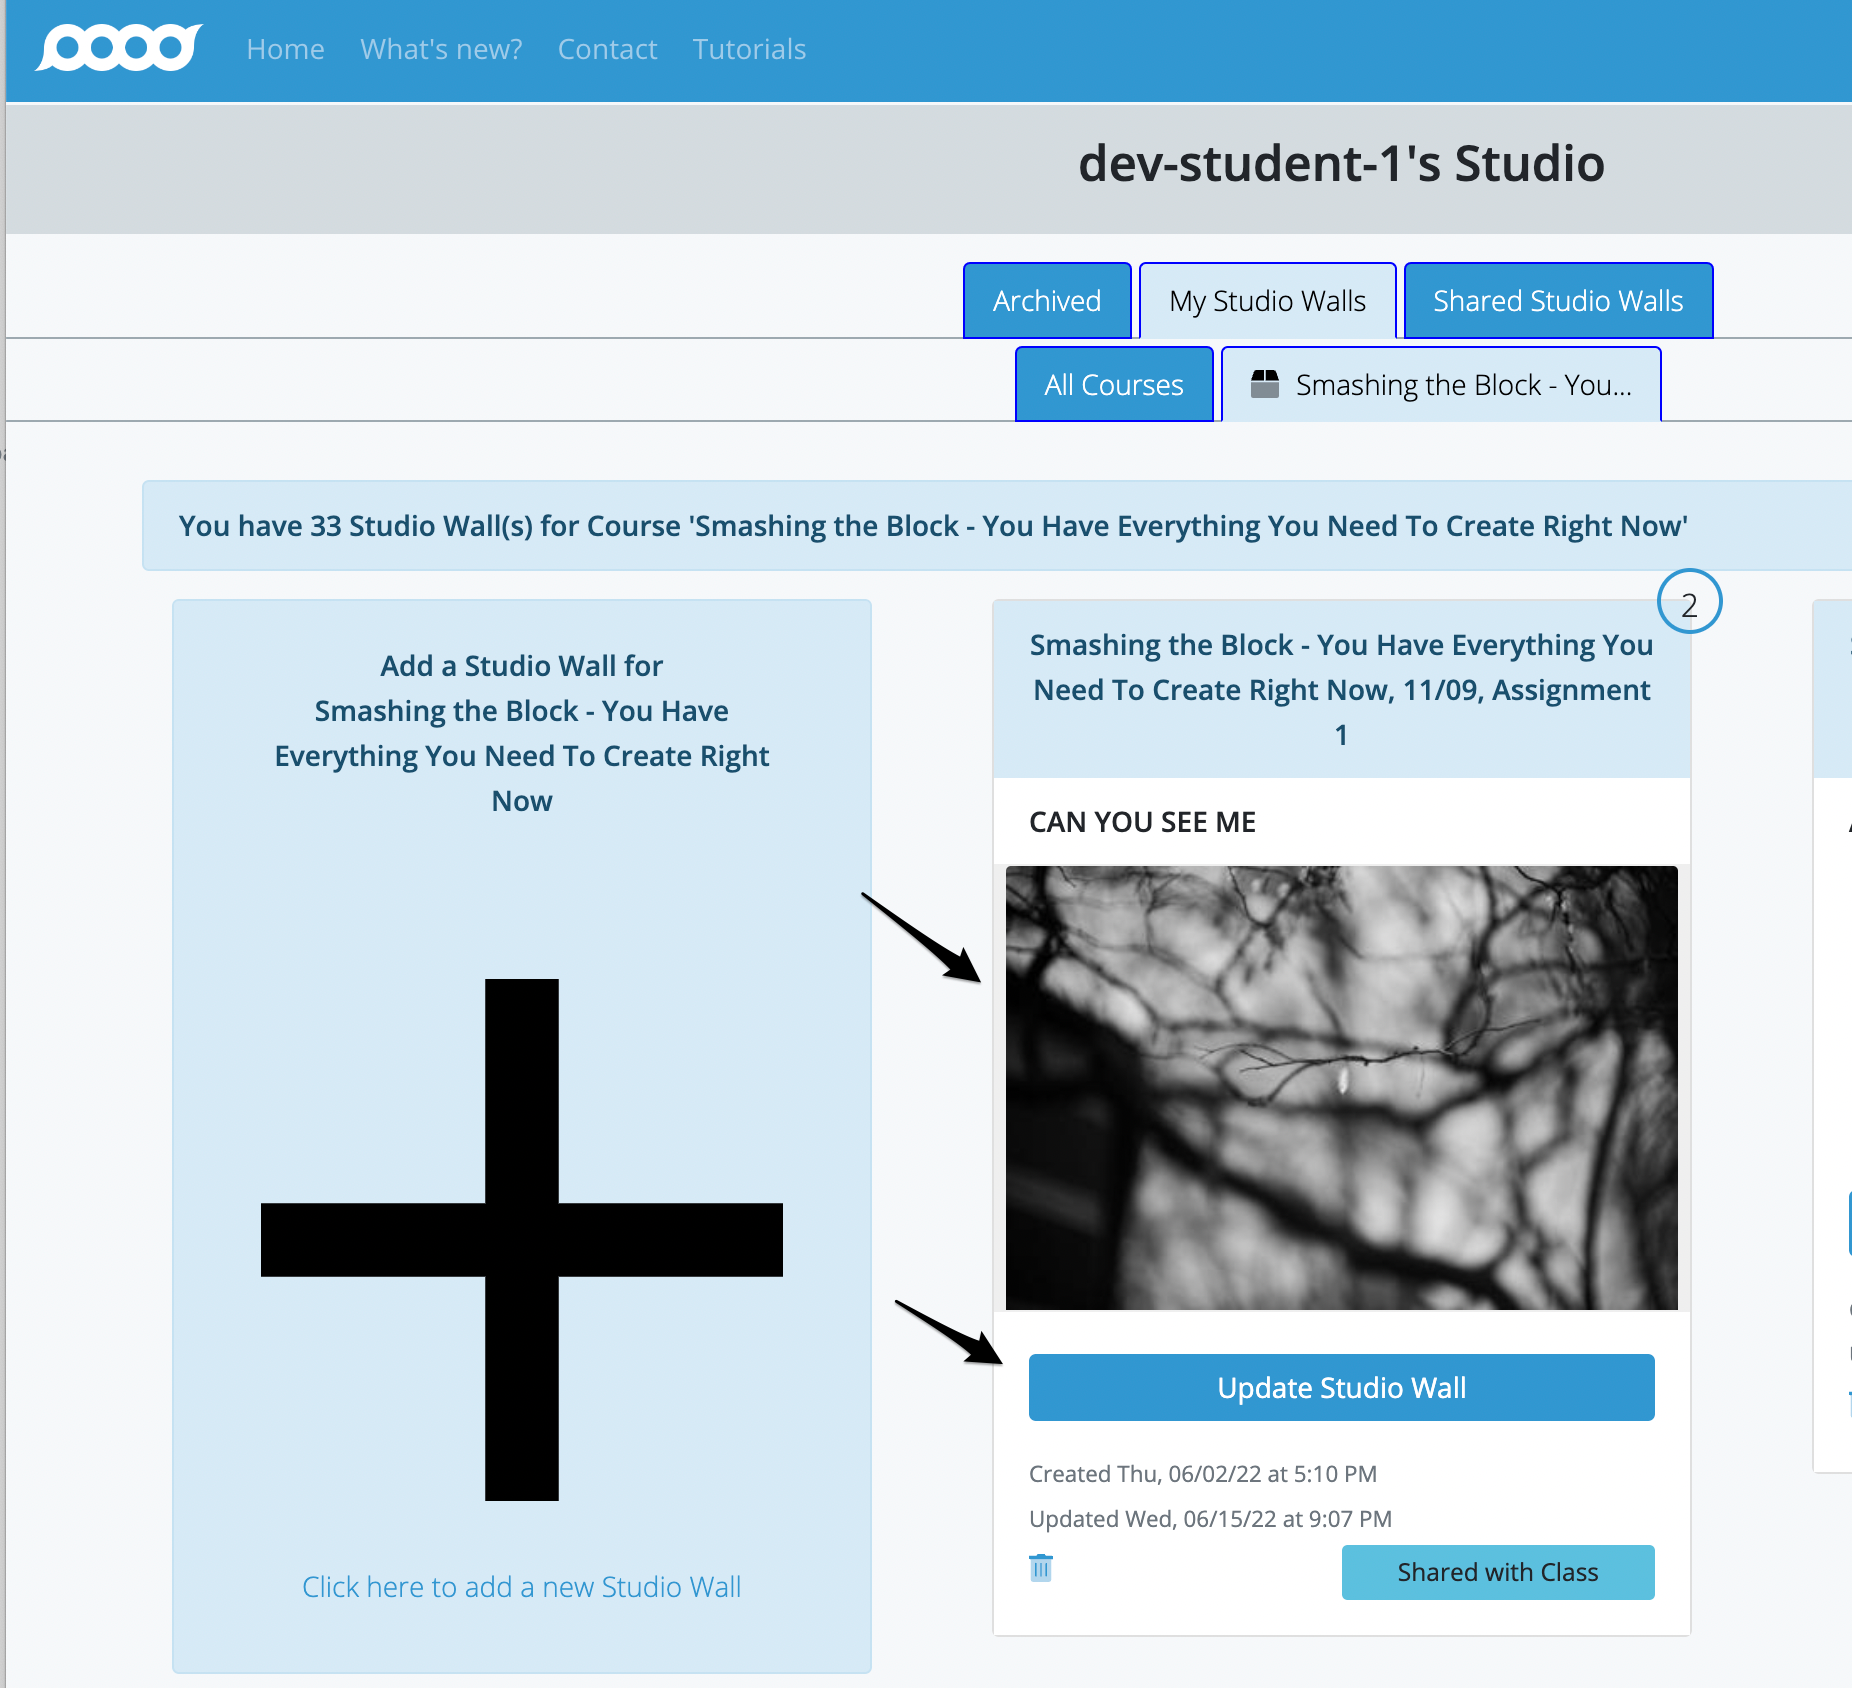
We thought about it and figured that if it's your Studio Wall it makes sense to always give you
the ability to update the Wall when you look at it. So we got rid of the "View" button: now you just click
on "Update" or click the image and the Studio Wall will be opened for update.
-
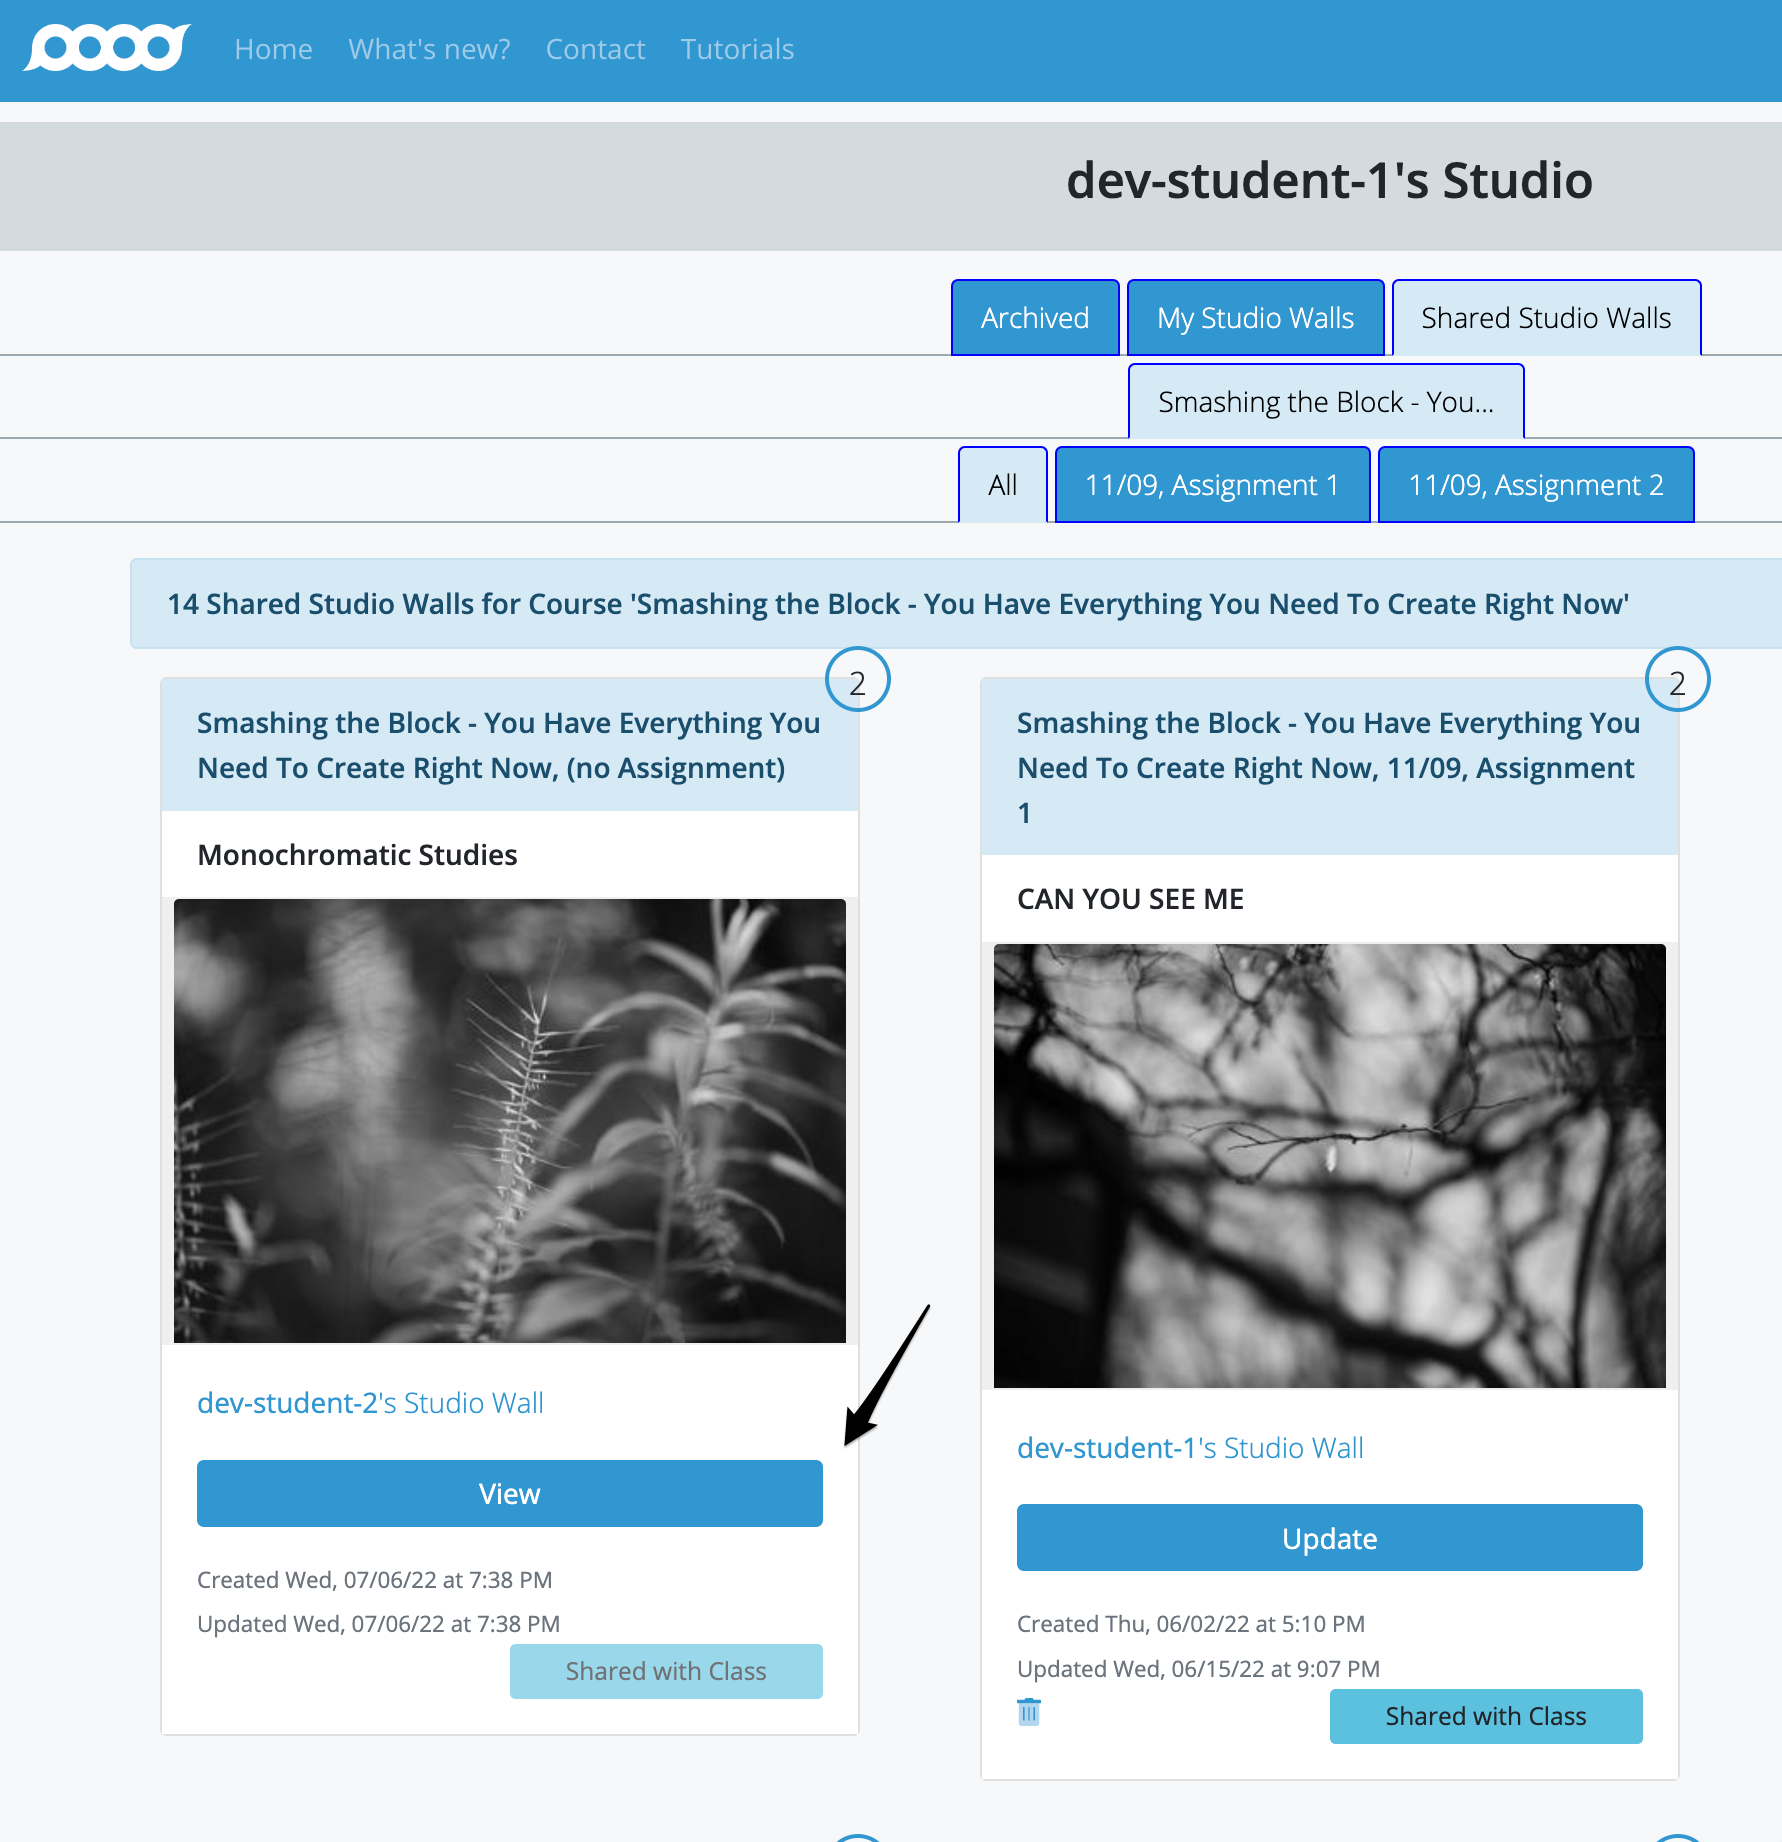
For shared Studio Walls, the same applies: If it's your Studio Wall, there's just an
"Update" button. If it's not yours, there's just a "View" button:
-
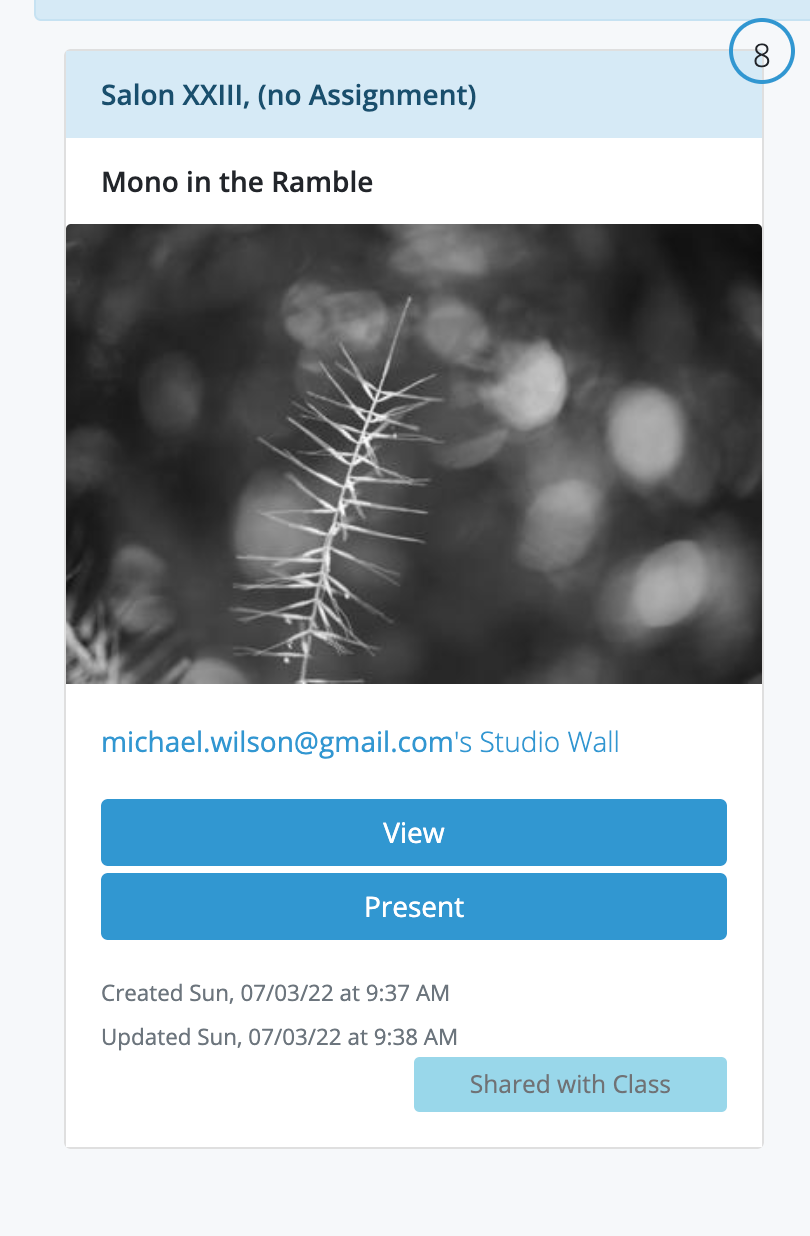
For Instructors there were even more confusing choices. In the shared Studio Wall below, you
can see that there was a "View" button, a "Present" button, and clicking on the image, which was the same
as "View". Unfortunatly, when presenting a student's Studio Wall in class, "View" was not what
the instructor would want since they couldn't do things like "Starring" favorite images:
-
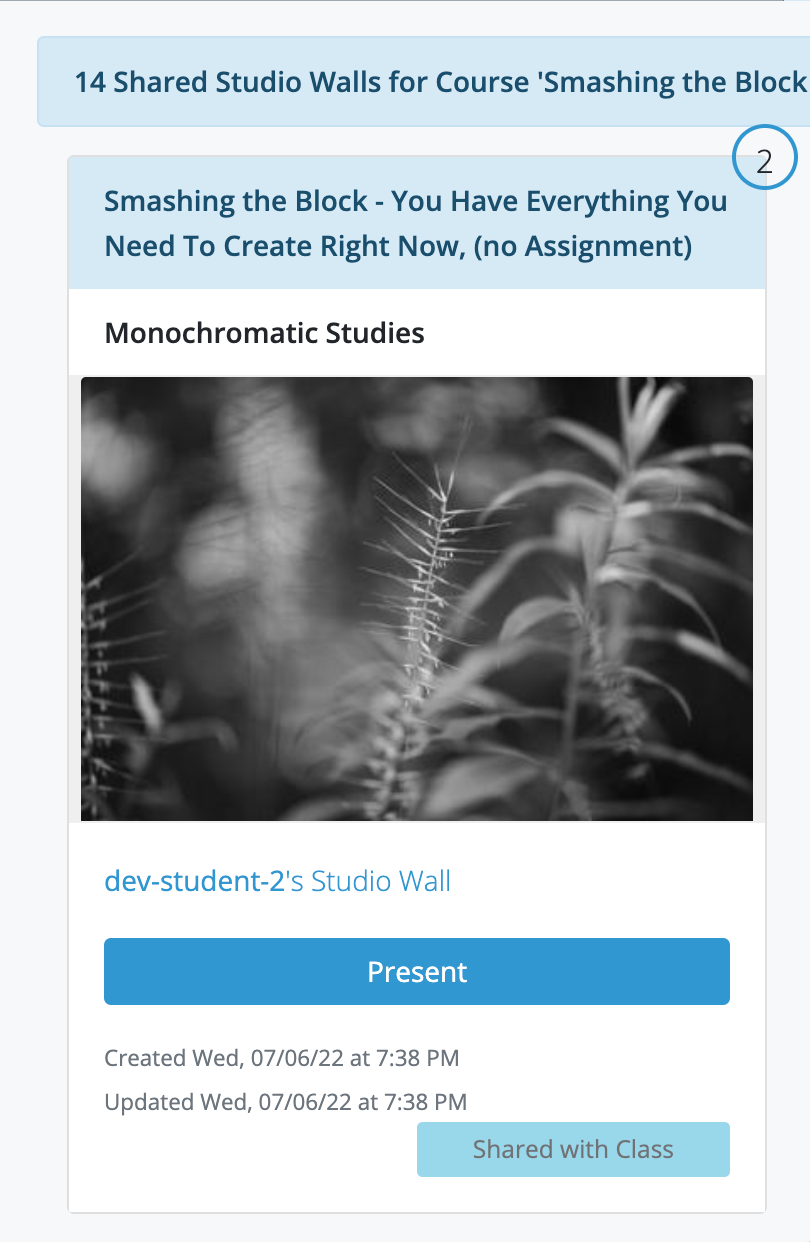
Now, the Instructor will see just the "Present" button. Clicking on the image will also
present the Studio Wall.
-
Finally, there was a concept of a "presentation edit" for Shared Studio Walls. This was
a copy made by an instructor of a Studio Wall with changes made by the instructor.
Again, this was confusing, since it was "kind of" like saving a copy, but not the same.

-
We got rid of the concept of a "presentation edit": now the instructor will see a "Save"
and a "Save As" button, just like students do, and they mean the same thing. It's up to
the Student and the Instructor if the Instructor should make suggested changes on the
original Studio Wall, or save a copy and make the changes there.

- Improved Slide Show!
- Atget Studio uses the amazing Photoswipe for it's slide shows. We've updated to the latest version - Photoswipe 5 - and made a few improvements of our own.
-
We rearranged the buttons at the top of the slide show a bit:
-
There's now a zoom-in () and a zoom-out
() buttons. See "Better Zoom" below for
more on this.

-
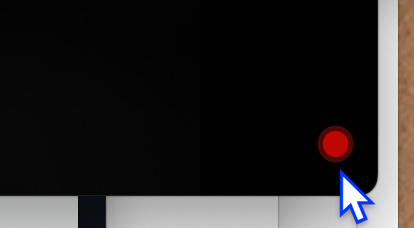
We moved the record () button, used
to record audio comments, to the bottom right hand corner of the screen. This keeps things
from getting too crowded at the top of the screen when you're recording an audio comment.

-
There's now a zoom-in () and a zoom-out
() buttons. See "Better Zoom" below for
more on this.
- Better Zoom!
- Previously, you could only zoom in on an image once during a slide show, either by clicking the zoom-in () button or clicking the image itself.
-
Now you can zoom in up to 100X. Adjust the zoom level by:
- Clicking the zoom-in () and
zoom-out () buttons at the top of the screen.
Note that when you're completely zoomed out the zoom-out () icon will disappear, and when you're completed zoomed in (100X!) the zoom-in () icon will disappear.

- Using the mouse wheel on your mouse (if you have one).
- If you're using a laptop with a trackpad, use two fingers to swipe down to zoom in, and swipe up to zoom out.
- Clicking the zoom-in () and
zoom-out () buttons at the top of the screen.
- OSX High Sierra support Dropped.
- OSX "High Sierra" (version 10.13) was announced in 2017 and, while it was great when it was released, has not been updated for a long time. In addition the version of Safari which came with it lacks many of the features of modern browsers, some of which are used by Atget Studio.
- Therefore, as of 09/21/2022, Atget Studio is no longer supported on OSX High Sierra. Note that it will probably work for most things, but you can count on running into problems, especially with more advanced features like voice, downloading images, etc.
2022.05.20
- Archived Courses
-
We added the ability for you to "archive" Courses in your Studio under an "Archived" tab:
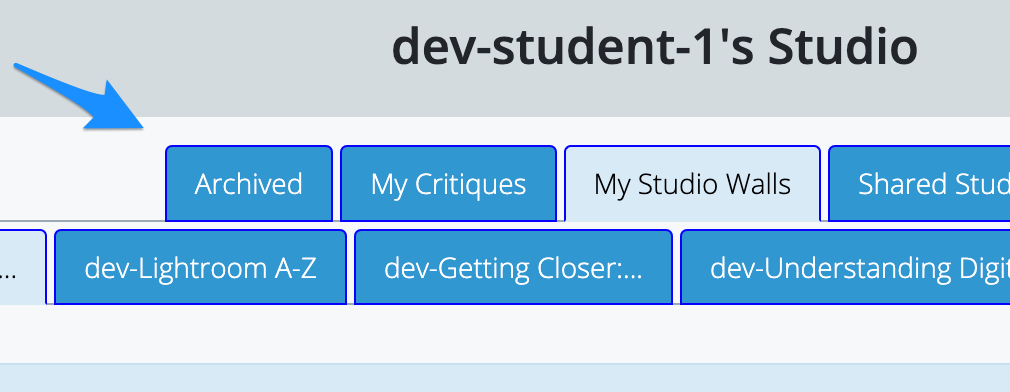
-
To archive a Course, click on it's tab and then click on the icon:
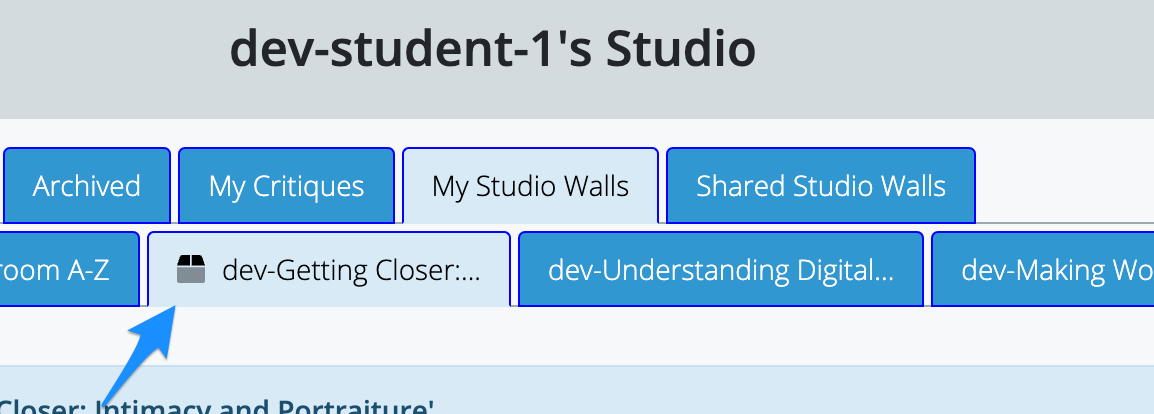 When you click on the icon, the tab will be moved to the "Archived" tab.Note: Archiving is only supported for Courses which support Studio Walls at this time.
 -
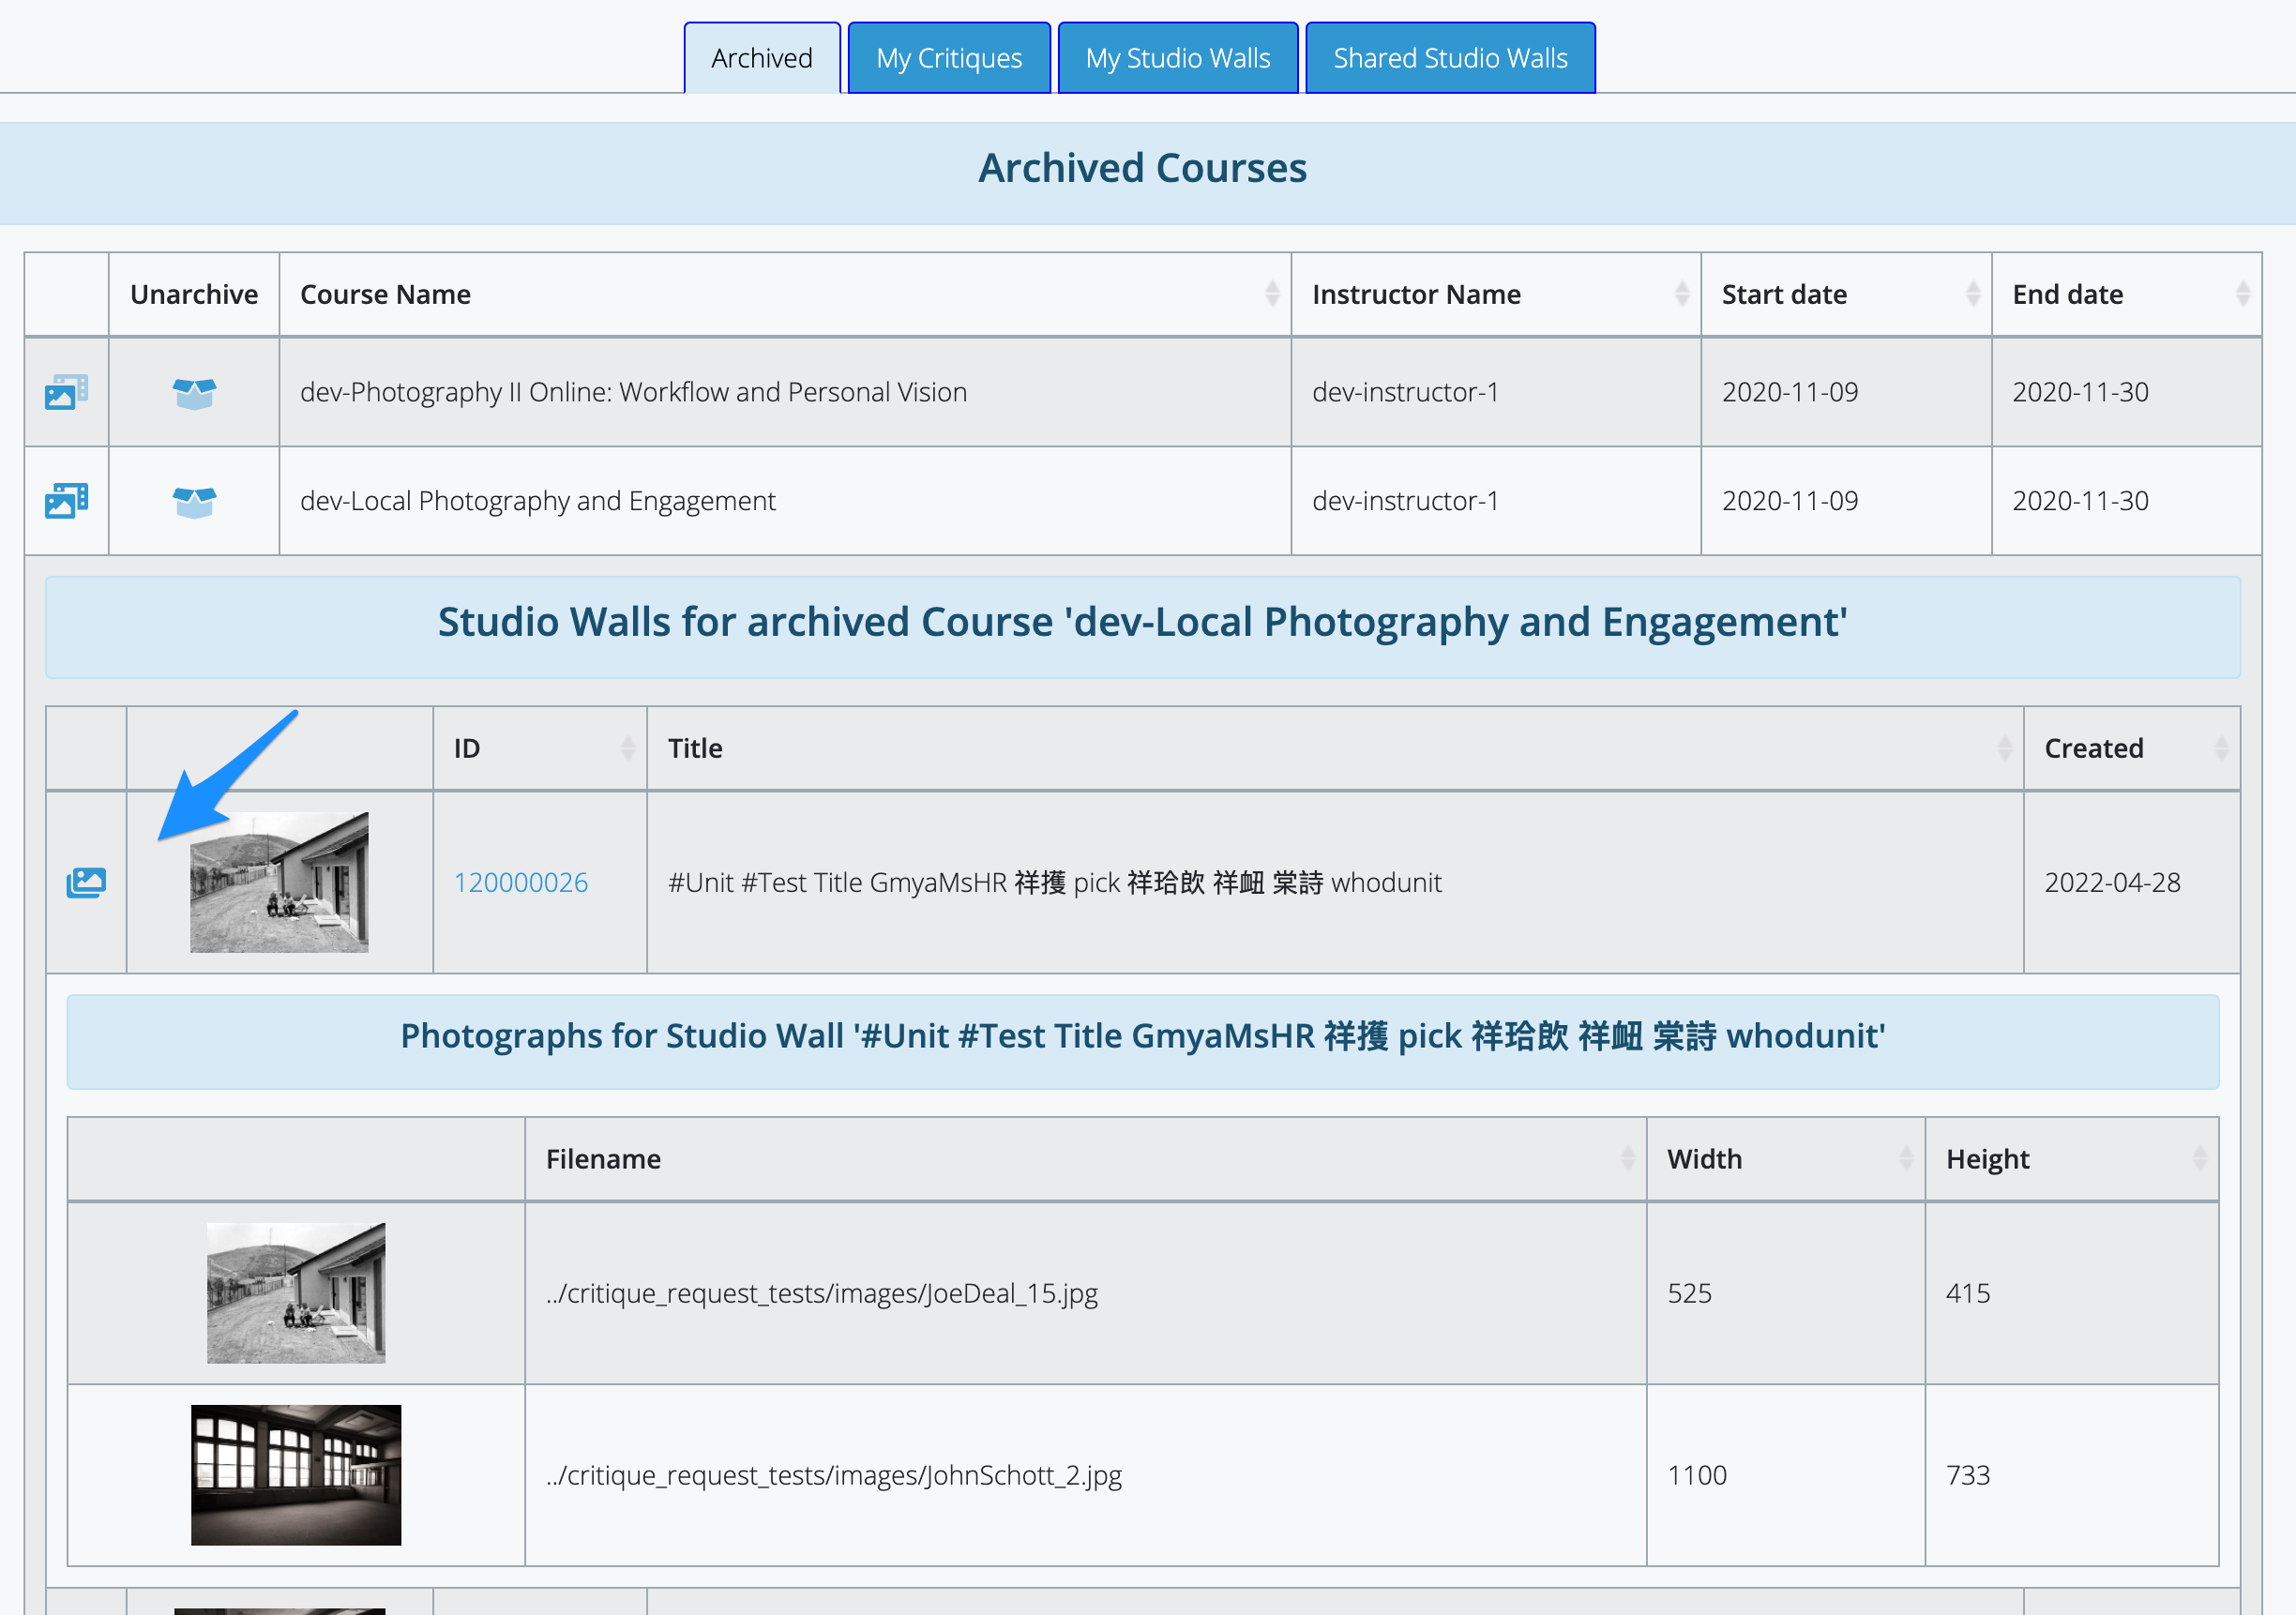
If you want to see your archived Courses, just click on the "Archived" tab:
 To "un-archive" a course, just click on the icon. The Course will be "un-archived" and will appear in your Studio as it did before.
 -
To a list of the Studio Walls in each archived class, click on the icon.
To close the list, click it again.
 You can click on the Studio Wall ID to go directly to the Studio Wall.
 -
To see a list of photographs on each archived Studio Wall, click on the icon.
Click on it again to close the list.
2022.01.28
- Revised Terms of Service (TOS) and privacy policy.
- We cleaned up some typos and mis-spellings in our TOS and Privacy Policy.
- We also clarified how Atget Studio can use content which your post on the Service (spoiler: we made it clear that we can only use your content to (a) Show it to your classmates and instructor, and (b) back it up in case we have a disk failure and have to recover it).
2022.01.08
- New sharing user experience
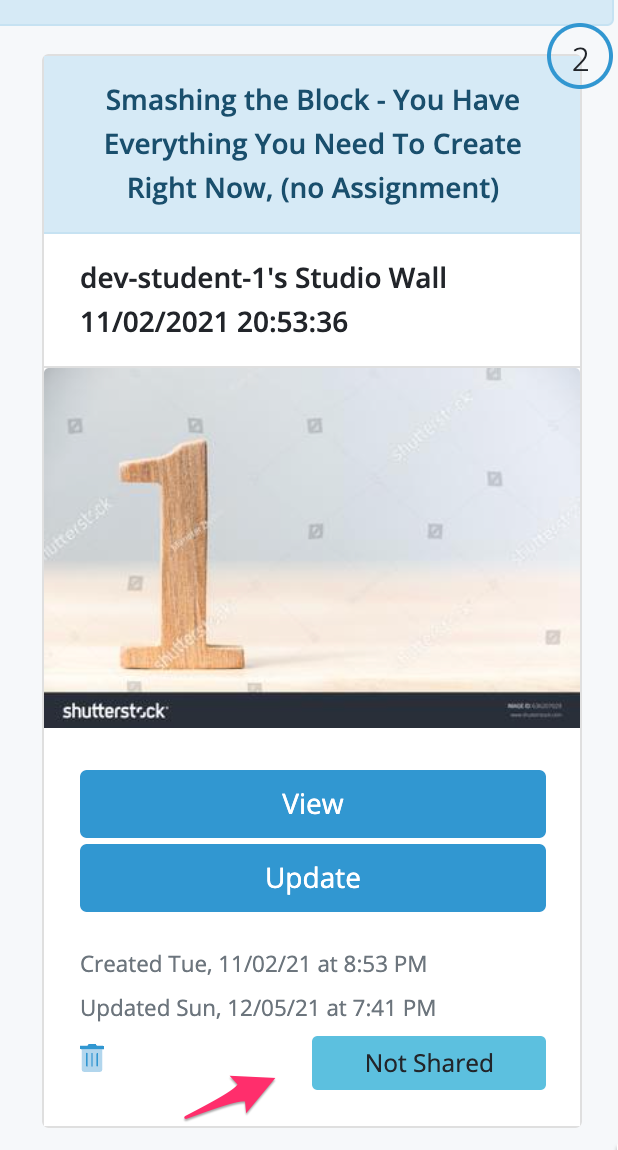
- In the past you set how your Studio Wall was shared by repeatedly clicking on the "sharing" button on the lower right of the Studio Wall's card, or the uppper right side of the Studio Wall update page.
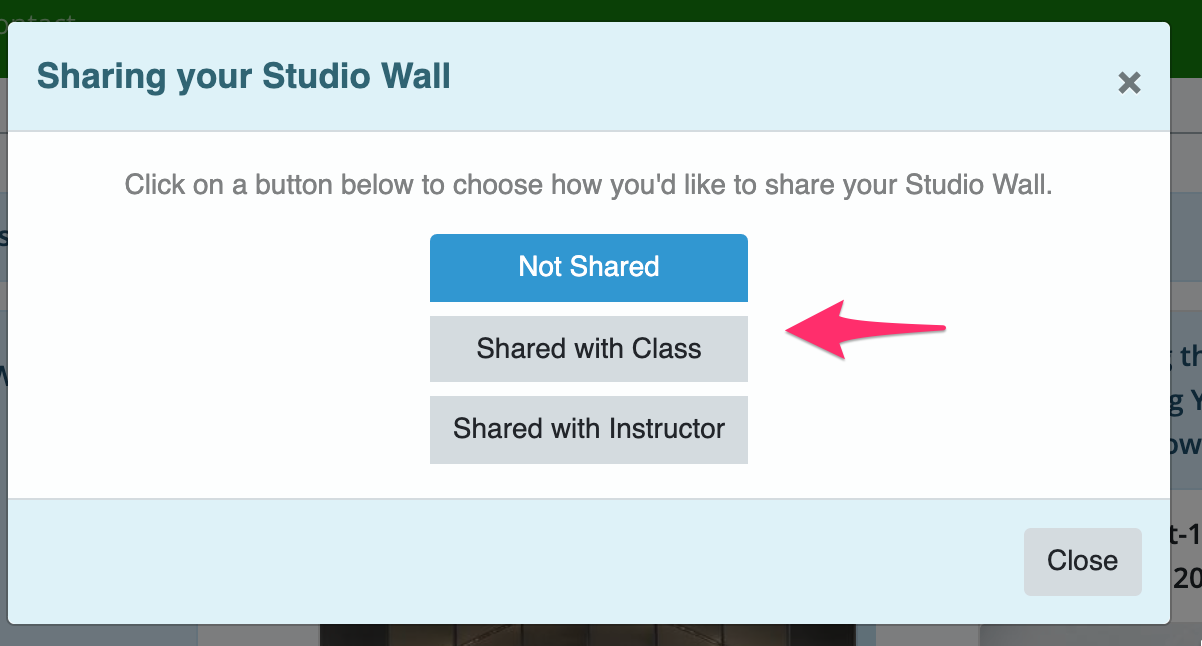
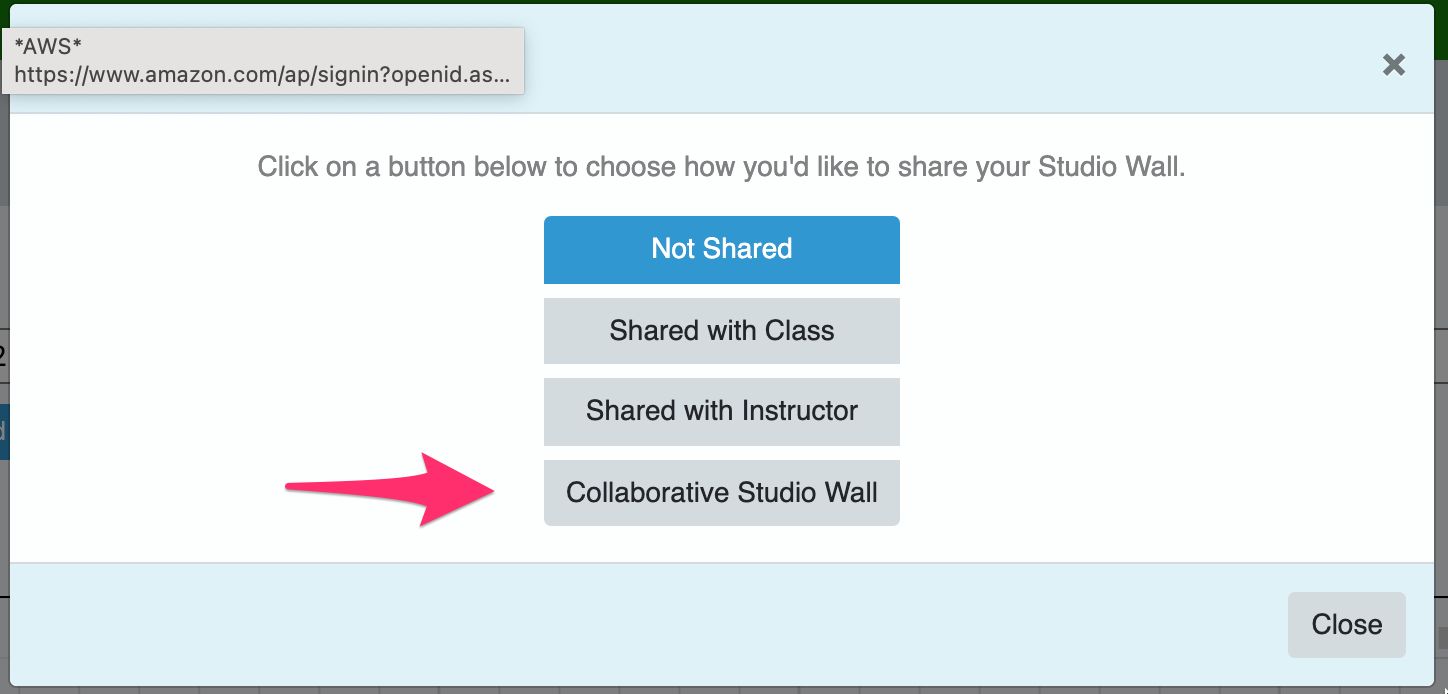
- Now, when you click on the button you will get a pop-up dialog with a button for each sharing choice:
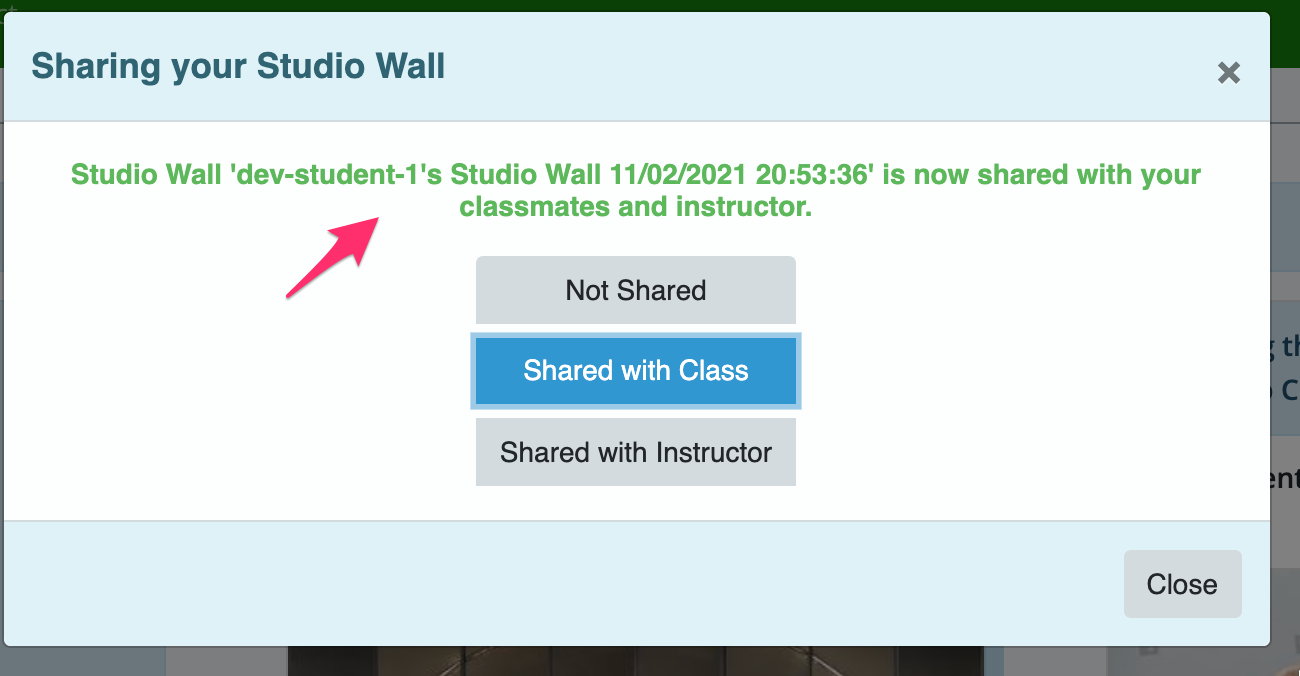
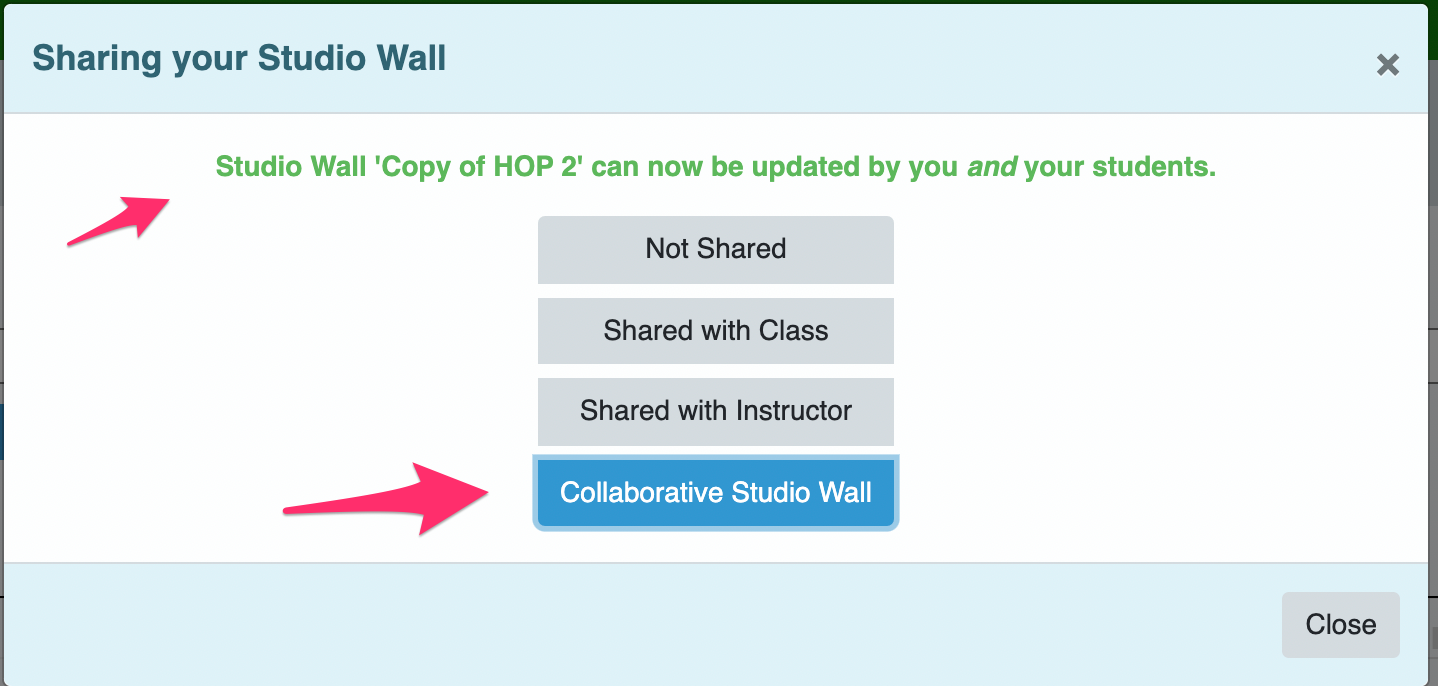
- Once you select your choice, a message will appear at the top of the dialog letting you know all went well:
- Collaborative Studio Walls!
- Some folks have asked for the ability share authorship of a Studio Wall with their classmates as a collabarative experience.
- Now we're excited to introduce "Collaborative Studio Walls". Created by an instructor, anyone in the class, including the instructor, has the ability to update the Collaborative Studio Wall. In other words, anyone can manipulate (add, delete, move, etc) photographs, videos, texts or PDFs on the wall.
-
While this is very exciting it's important that classmates sharing a Studio Wall work together to make sure there are no misunderstandings or hurt feelings. They might want to set simple rules like "don't delete someone else's photographs from the wall", or "don't obscure other people's photographs without their permission".
On the other hand, some classes might want to make no rules - it's all up to the instructor and the class.
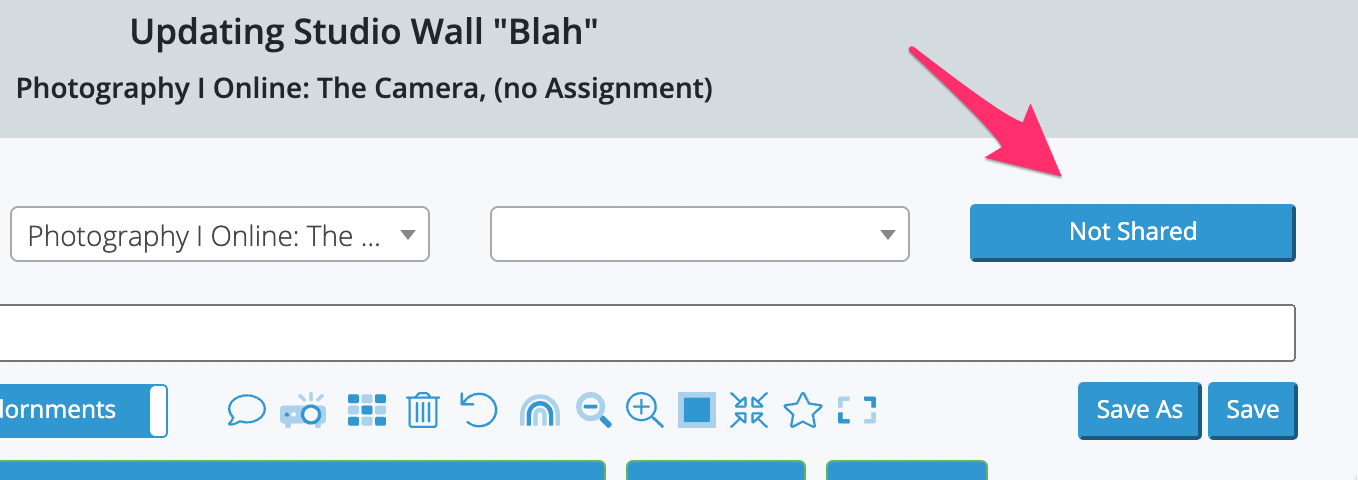
- To create a Collaborative Studio Wall, the instructor clicks the "sharing" button:
- When the dialog appears, the instructor chooses "Collaborative Studio Wall":
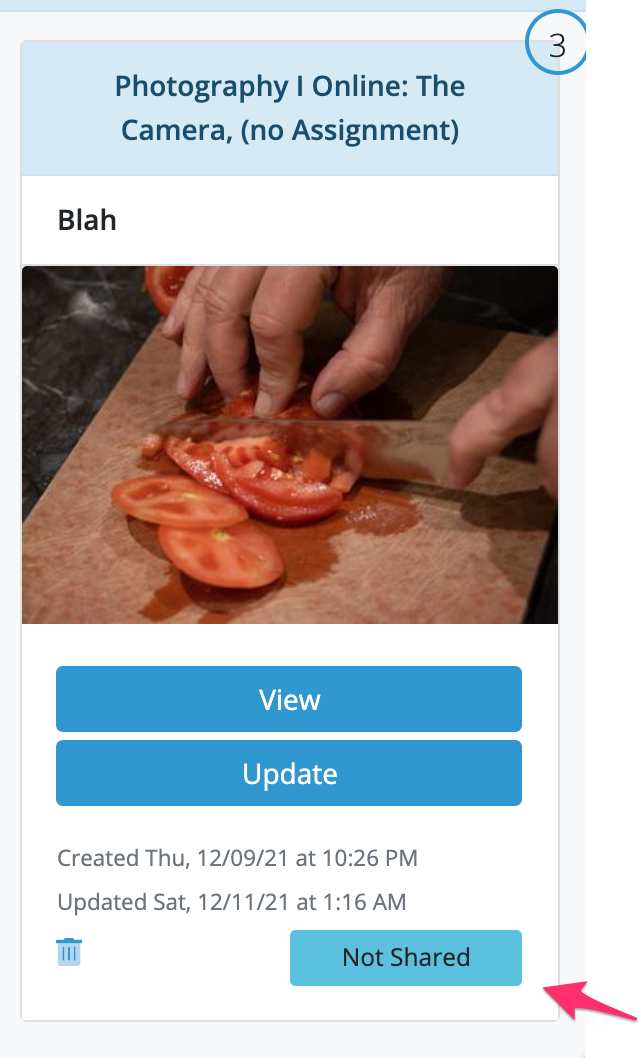
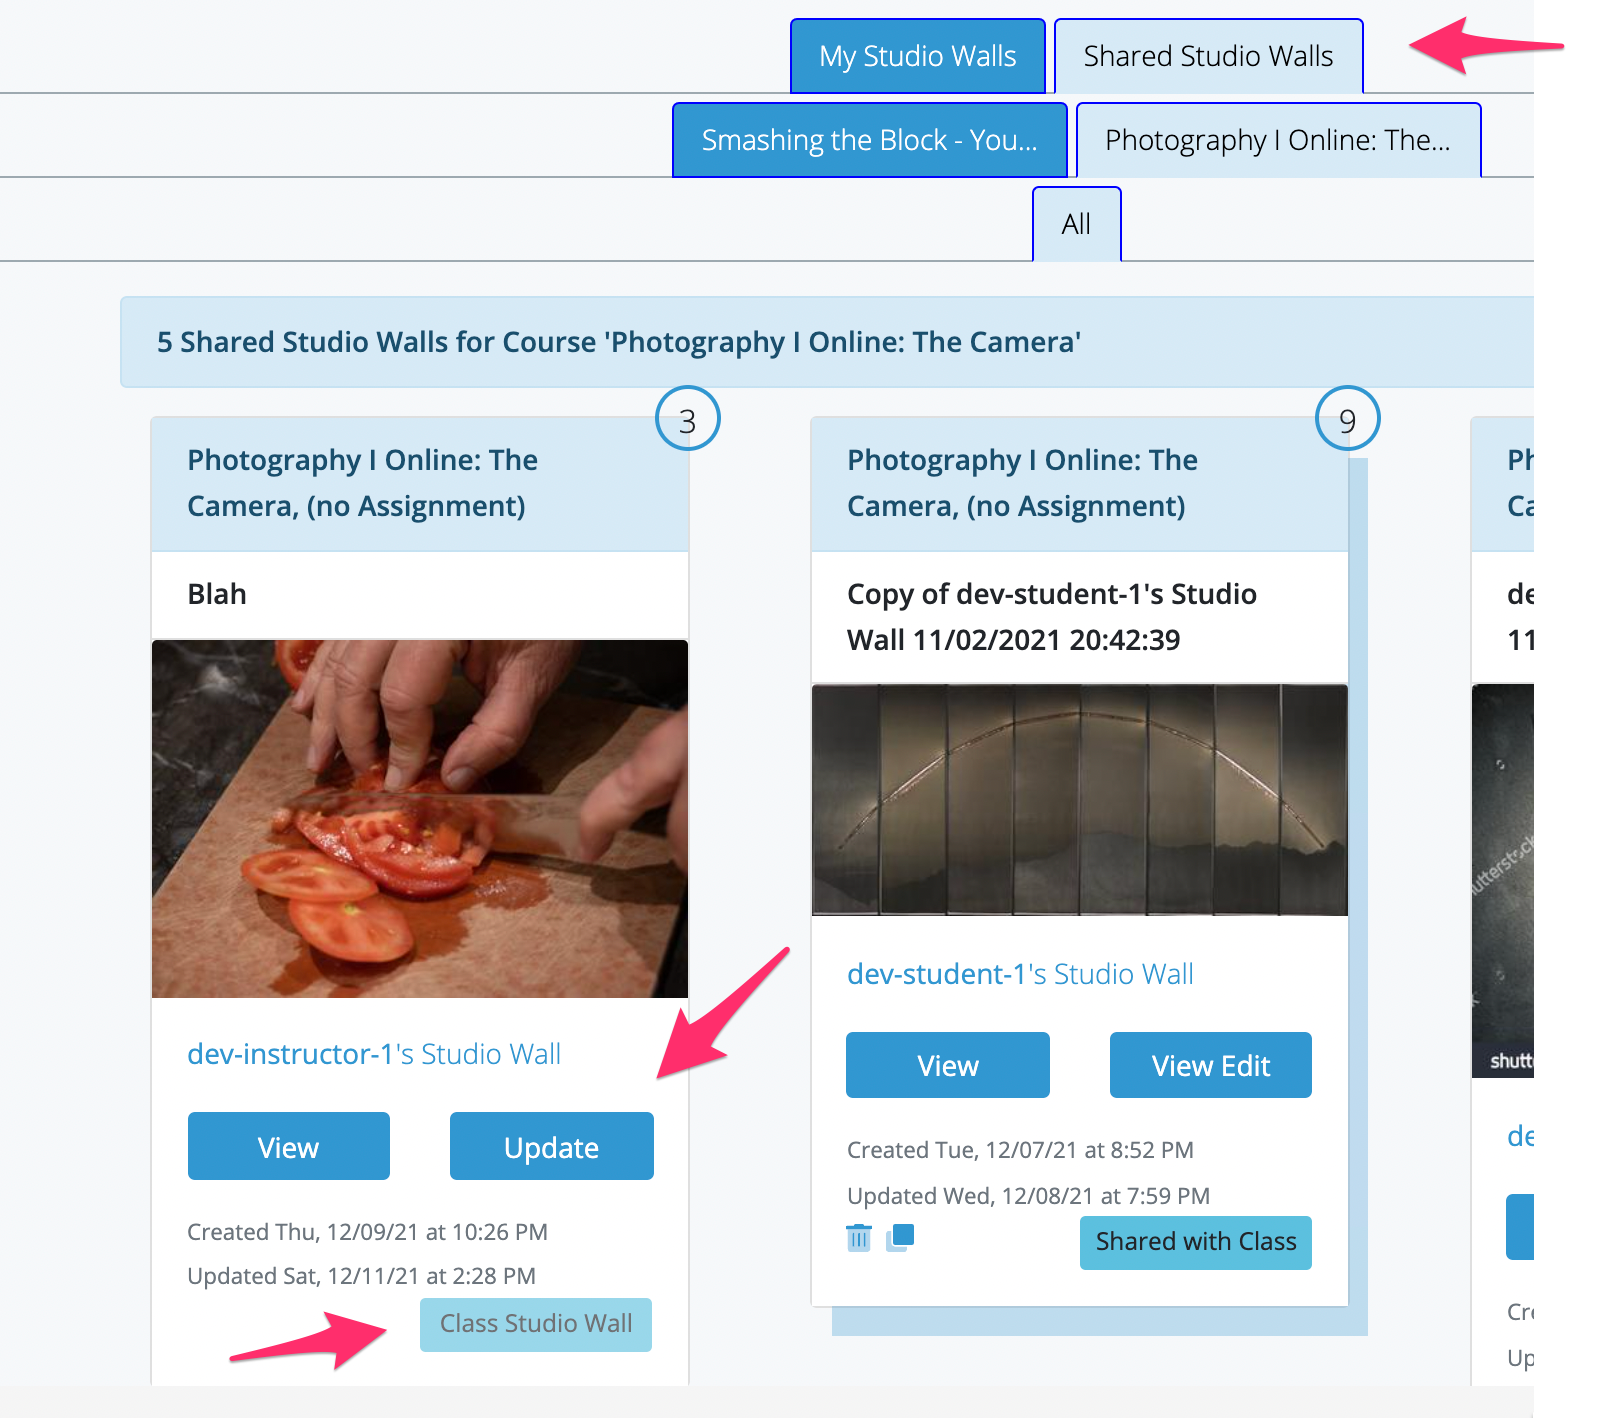
- Then the Studio Wall will appear in the "Shared Studio Walls" tab for the class. As you can see in the image below, everyone in the Class will see an button they can use to update the wall:
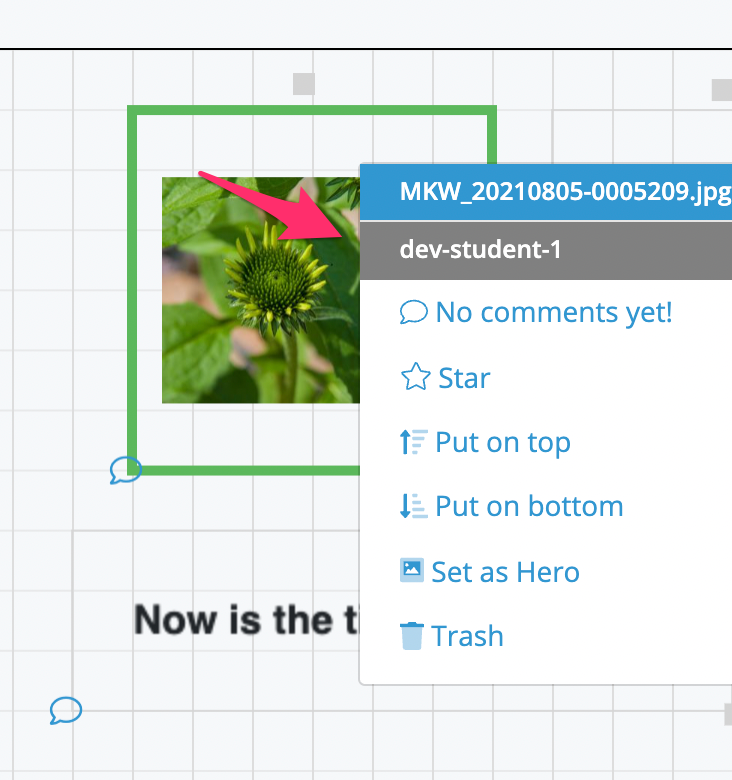
- When you're viewing or updating a Collaborative Studio Wall, right clicking on an item will also include the name of the member who owns it:
- Controls. All the Controls.
-
When you are updating or viewing a Studio Wall in "fullscreen"
( ) mode,
not all the controls were available at the top of the screen. We've
added the remaining controls, iconifying a few of them to make them
fit:
- Click to add a photograph to the Studio Wall.
- Click to add a video to the Studio Wall.
- Click to add text to the Studio Wall.
- Click to save a copy of the Studio Wall under a different name.
- Click to save the Studio Wall.

2021.11.09
- Studio Wall Hero support!
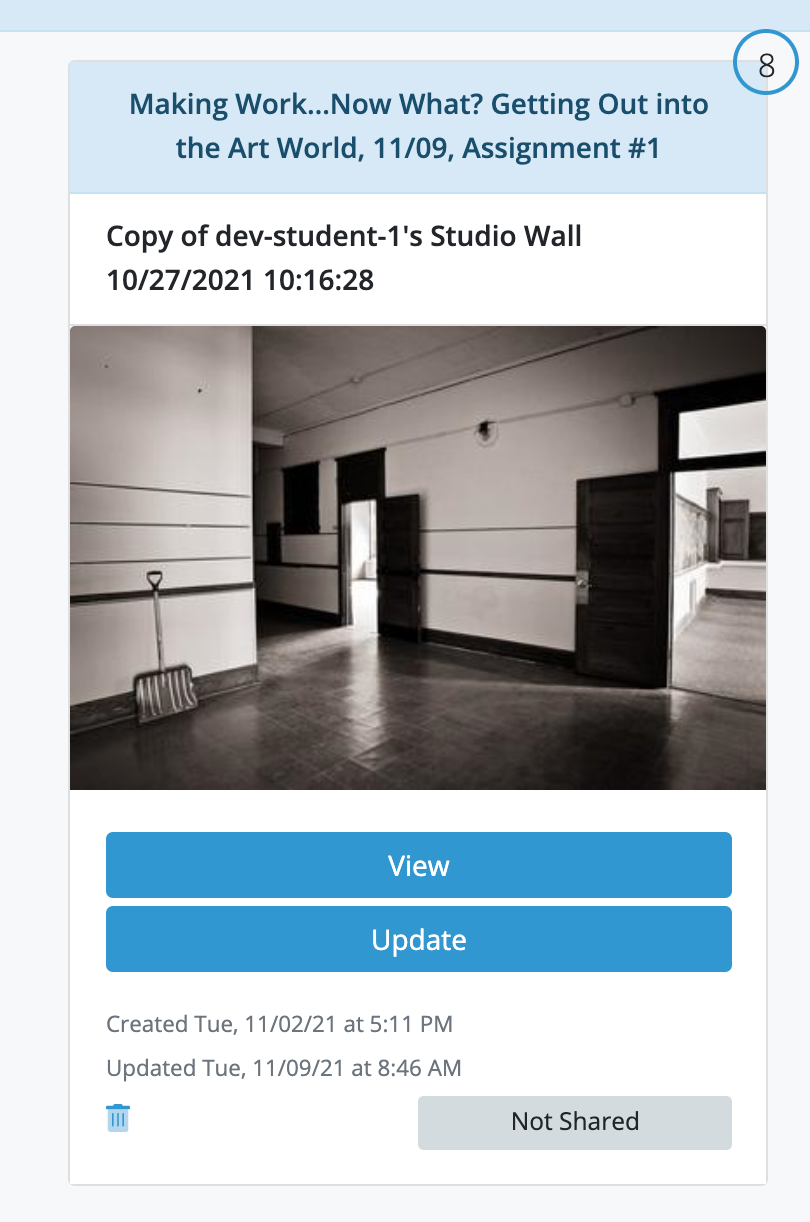
- The "hero" for a Studio Wall is the photograph or video thumbnail which appears on the "card" for the Studio Wall. Previously, Atget Studio would automatically select the first photograph or video thumbnail as the hero, now you can select it yourself.
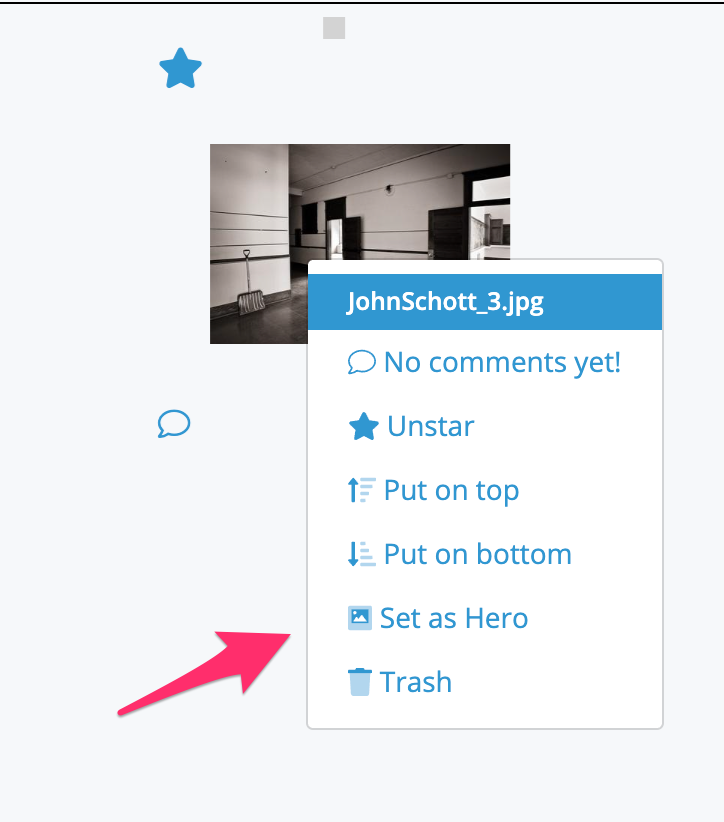
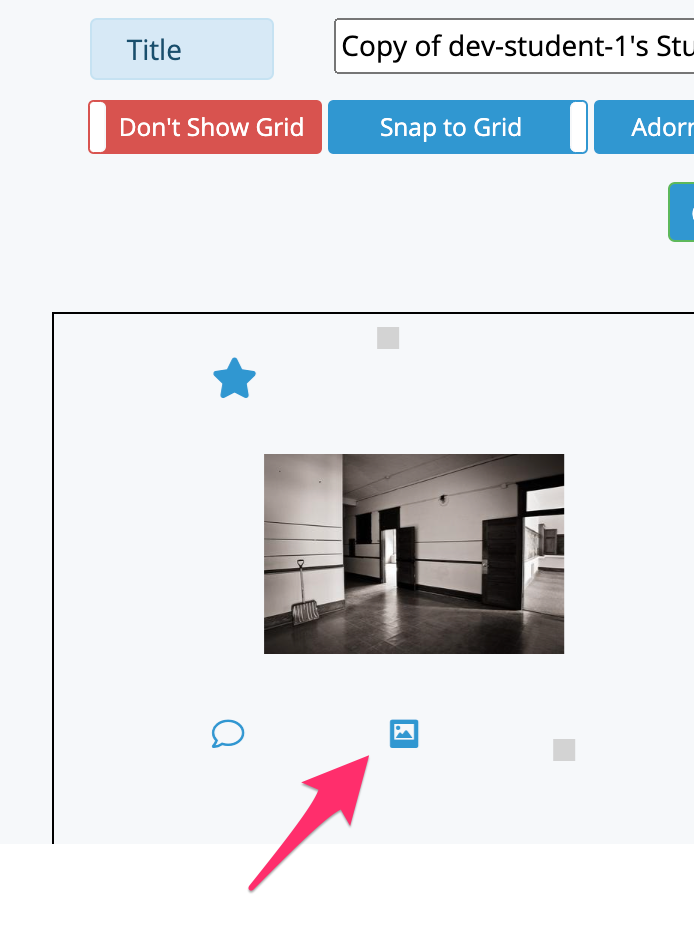
- To set the hero, right click on the photograph or video you want to be the hero. As usual, a context menu will appear and you'll see "Set as Hero". Once you click it, a small photo icon - - appears at the bottom so you know which photograph is the hero.
- Once you set the hero photograph, it shows up on the card for the Studio Wall:
- Update Presentation Edit support!
- In the past the instructor could make a "Presentation Edit" of your Studio Wall and do things like moving photographs around, resizing, or even deleting them as suggested edits for your Studio Wall.
- Unfortunately, you couldn't update the edit, so if you wanted to show a progression of your work by updating the Presentation Edit, you'd have to edit the origional or create a whole new Studio Wall, make it look like the edit, and go from there.
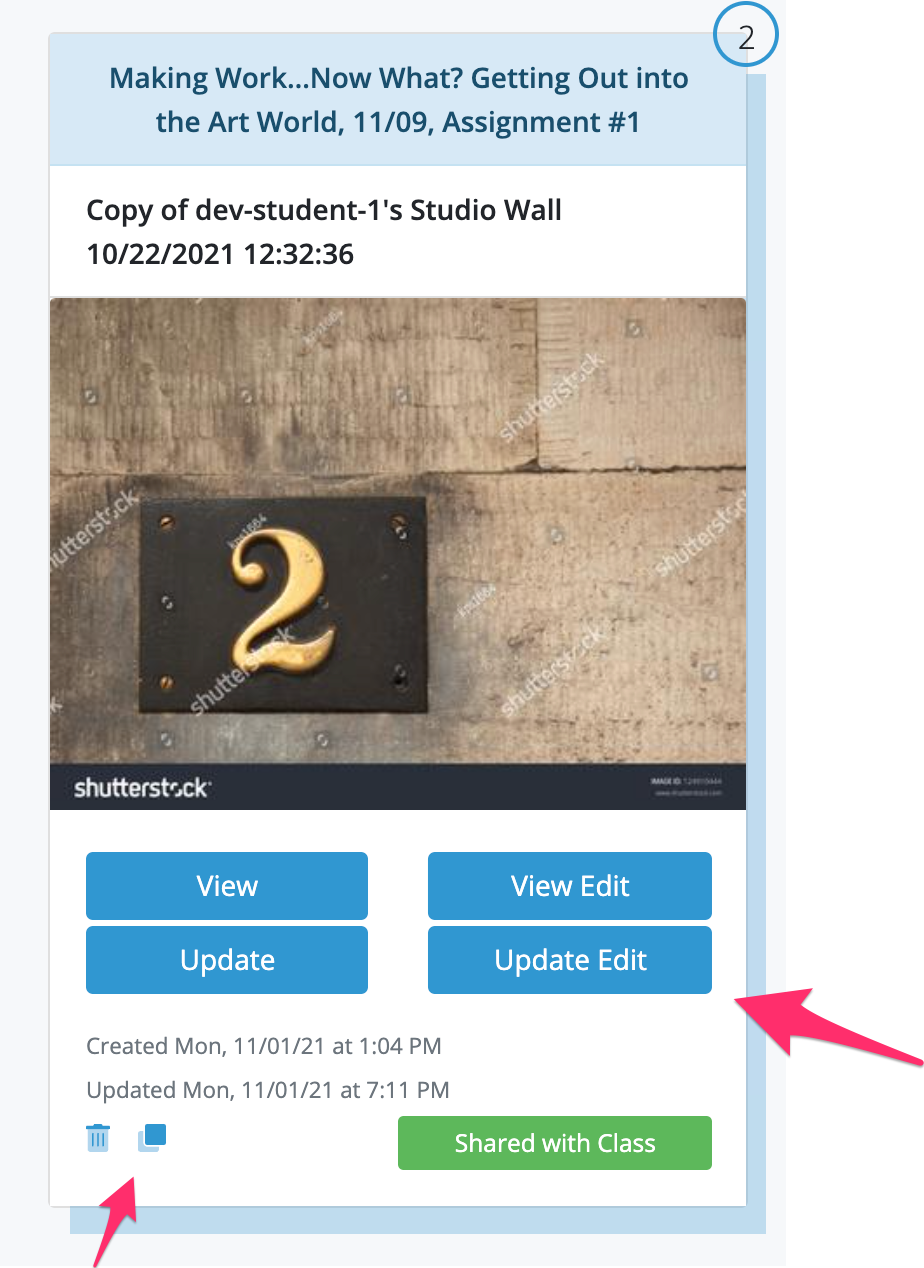
- Now, there's a new button which allows you to update the Presentation Edit, including adding new photographs, videos, etc to it. This should be much more convenient for moving forward with a Studio Wall.
2021.10.22
- Studio Wall text support!
- You can now add text to Studio Walls just as you would a photograph, video, etc.
-
Start off by clicking the button when you're adding or updating a Studio Wall:
 You'll be presented with a editor dialog which looks like the image below.
- On the toolbar you'll see a row of buttons/icons you can use to format your text. From left to right, they are:
- Bold/Un-bold the text.
- Italicize/Un-italicize your text.
- Underscore/Un-underscore your text.
-
Strikethrough/Un-strikethrough your text. - A dropdown which allows you to select your text size.
- A color-selector to set the text color.
- A color-selector to set the text's background color.
- A dropdown to select the text font.
- Buttons to align your text in the textarea:
- Align left.
- Align center.
- Align right.
- Justify.
- Enter your text in the input area below the toolbar where it says "Enter text here...".
- Hit to save the text.
-

- The text object will appear on your wall.
-
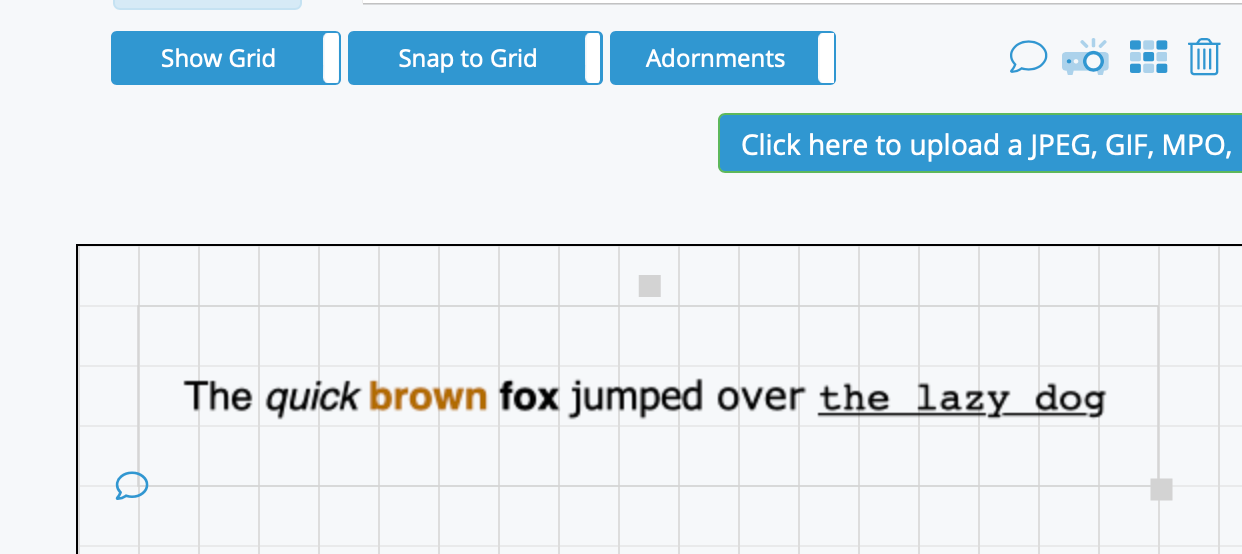
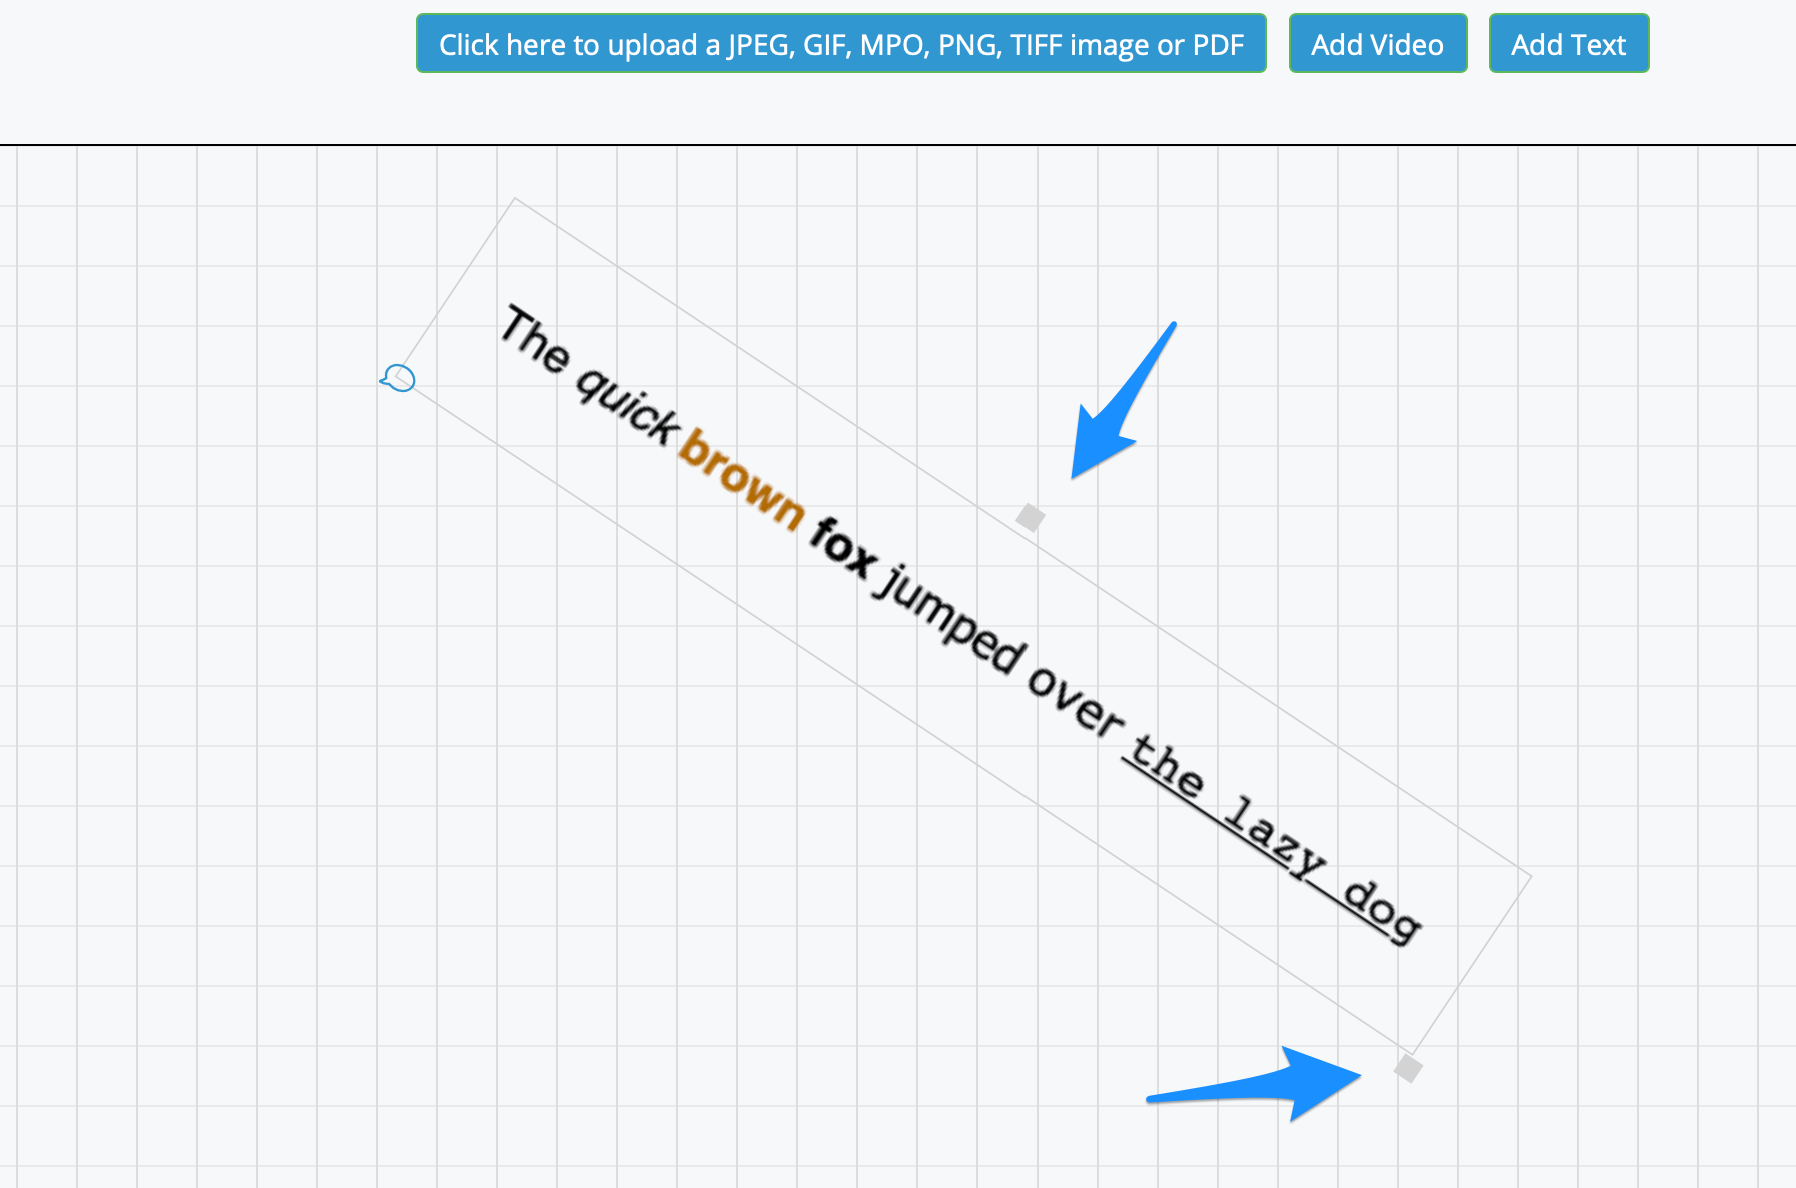
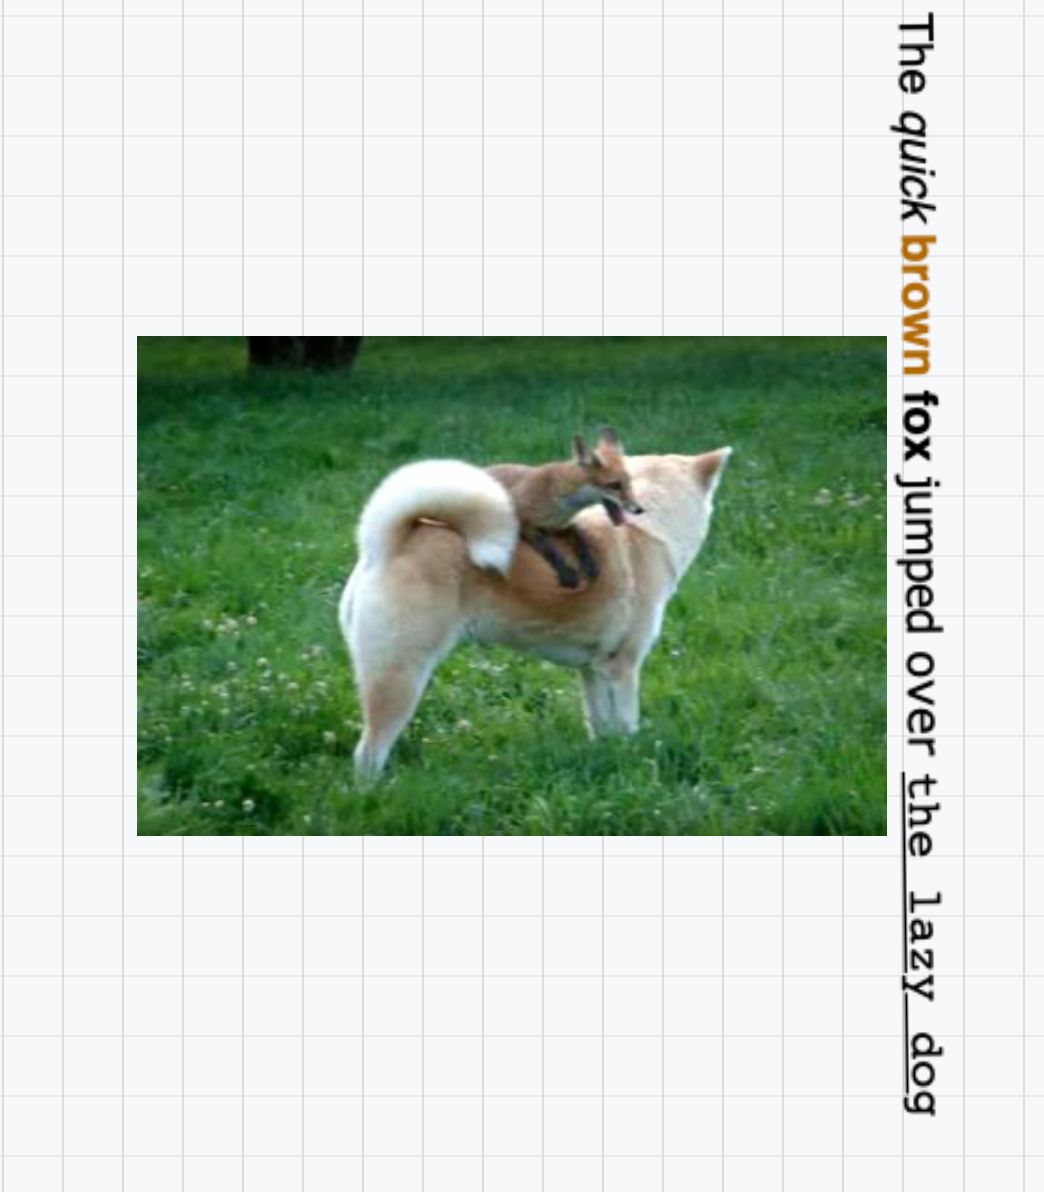
- You can drag the text around, rotate it using the top handle, and resize it using the handle on the lower right.
-
- "Save As" support for Studio Walls!
-
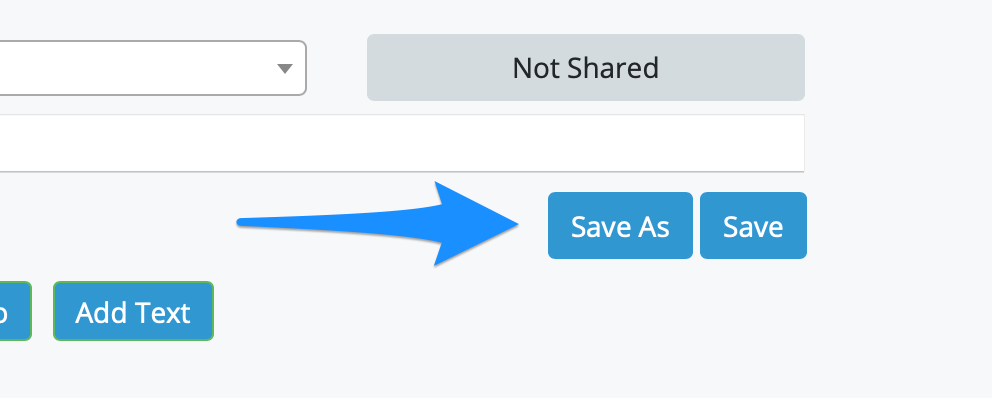
- You can now save a copy of your Studio Wall under another name. This works just like the "Save As" in other applications, with the following caveats:
- Make sure you pick a unique name for your copy. Atget Studio doesn't mind if you save 2, 3, or even 100 Studio Walls with the same name, though it might be a little confusing for you.
- If you have photographs, movies, PDFs, or text selected, only those items will be saved.
- If you have "Show only starred photos" selected" ( ) selected, only the starred items will be saved.
- If none of the above are true, then all photographs, movies, PDFs, and text will be saved.
- Cryptic Icons on "Present" screen replaced with buttons.
- Instructors will recall the the "Present" screen had a couple of cryptic icons on the right to create and save a "presentation edit" of the Studo Wall. These have been replaced by easier-to-understand buttons:
-
When you (as an instructor) first present a Studio Wall, you'll see this in the right hand corner. Clicking on the will create a copy - or "edit" - of the wall with the changes you made during the presentation. It looks like this:
-
After you Save the Presentation Edit, you can continue to update it - moving things around, resizing, etc. Once you're done, you can save the changes by hitting the button.
It looks like this:
2021.09.27
- Studio Wall "Mouse overs" replaced with "right-click dropdown menus"
- Previously, when you moved your mouse over a photograph on a Studio Wall a blue bar would appear at the bottom with several icons (star, move up, move down, etc). This worked great in the beginning, but now that there are more options it has become unwieldly.
- Now, when you move the mouse over a photograph, you can right-click or Control-click and a dropdown menu will appear with the photograph's file name and the star, move up, etc options you're used to.
- PDF support!
- In addition to photographs (JPEG, PNG, etc), you can now add Adobe PDF files to your Studio Wall. Just select your PDF(s) the same way you'd select a JPEG, PNG, file.
- When a PDF file is double-clicked on a Studio Wall, we use the Adobe PDF viewer to show it. The PDF viewer has lots of it's own cool options for viewing PDFs so we think you'll enjoy it.
- Slideshow improvements! Less distraction, more photograph!
- The menu bar, left, and right arrows in the slideshow will now fade away and will only re-appear when you move the mouse to top of the image or over the left or right arrow.
- Notification options for Comments
- You can now receive an email and/or text (SMS) notifications when you leave a comment on someone's Studio Wall, or a photograph on a Studio Wall, and, more importantly, when someone leaves a comment for you!
- To set this up, head over to the Edit Notification Preferences page, select (or unselect) your choices for "When I leave a Comment:" and "When someone leaves a comment for me:", and hit the button.
- You can always reach the Edit Notification Preferences by clicking on your user id on the right side of the menu bar.
2021.09.07
- "Critique" and "Studio Wall" tabs only show up where appropriate.
- Previously, all Students and Instructors would always see tabs for "Critiques", "Studio Walls", and "Shared Studio Walls". Now, you will see them only if you have classes which support them. For example, if none of your classes use "Critiques", you won't see any tabs related to "Critiques".
2021.08.17
- More photographs allowed on the Studio Walls!
- You can now have up to 200 photographs and/or videos on a Studio Wall (old limit was 50).
2021.08.13
- Rotating Photographs on Studio Walls!
- You can now rotate photographs on the Studio Wall by using the little square handle at the top of the photograph.
- Rotated photographs will appear in normal orientation when copied to the clipboard or downloaded to disk.
- When you re-grid ( ) a Studio Wall all photographs will return to their normal orientation.
- Bug: Cropping rotated photographs doesn't work properly at this time.
- Video on Studio Walls!
- You can now add links to Video Clips on your Studio Walls.
- When adding or updating a Studio Wall, click on the button:
- A dialog box will pop up.
- Enter the URL of your video into the dialog and click the button.
- If the video hosting service supports it (Vimeo, YouTube, etc), we'll fetch a thumbnail for the video if it's available. Otherwise a generic image of a movie projector will be used.
- To play a video, double click on its thumbnail on the Studio Wall.
- If possible, the video will be played in a pop-up window.
- If the video can't be played in the pop up, there will be a link at the bottom to open it in a new tab or window.
- Terminology changes!
- We've updated the terminology on the site to more closely match an educational environment:
- "Class" becomes "Course"
- "Session" becomes "Class"
- "Your Classes" becomes "Your Courses"
- "Assignment title" becomes "Assignment Name"
- "Session start" becomes "Class date"
- You'll see these updates on the site, in emails, and in SMS messages.
2021.07.09
- Studio Wall Assignment selector change.
- You are now required to select an assignment or "No assignment selected" when creating or updating a Studio Wall.
- This allows you to create a Studio Wall which isn't part of an assignment, say as a creative exploration or one-off.
2021.07.06
- Studio Wall background colors.
- When you're editing your Studio Wall click on the icon to show the color picker.
- Click anywhere in the box to set the saturation.
- Click on the left vertical slider to set the hue.
- Click on the right vertical slider to set the transparency.
- You can enter a color name in the input box (red, green, magenta, etc, for example) or even get really fancy and enter "rgba(r, g, b, a)" where r,g,b, and a are values for the red, green, blue, and transparency values.
- Click on one of the color swatches at the bottom to pick a preset color like black, 50% black, etc.
- When you or the background color will be saved with it.
- When you are viewing you Studio Wall, you can change the background color, but it won't be saved.
- When an instructor is presenting a Studio Wall, background color changes will be saved with the presentation copy.
- EXIF data!
- In the slideshow view you can click to see important information about the photograph.
- File name
- Exposure (shutter speed)
- Aperture (f/stop)
- ISO
- Lens focal length
- Capture date and time
- Camera make and model
-
Important!
- EXIF data is only available for photographs added after 07/06/2021.
- Depending on your camera and how your photographs was exported, not all EXIF data may be available for all photographs.
- Some cameras may record some data in unfamiliar formats so the data might appear in unexpected ways. For example, a camera may record the exposure as "10/483", which is approximatly 1/48th second. We are still improving this feature so we will be able to chip away at these edge cases as time goes on.
2021.06.03
- New Studio Wall sharing options! Studio Walls may now be shared in 3 different ways!.
- : The Studio Wall isn't shared with anyone. Only the owner can see it.
- : The Studio Wall visible to the Class's instructor and members of the class.
- : The Studio Wall visible to it's owner and the Class's instructor. No one else, including the other class members, can see it.
- Student and instructor stars on Studio Wall Photographs are now different colors:
- When a student "stars" a photograph on their Studio Wall, it will be blue:
- When an instructor "stars" a photograph on the Studio Wall, it will be green:
- When both the student and instructor "stars" a photograph on the Studio Wall, both stars will show, stacked on each other.
2021.05.18
- New behaviour for re-grid and the visibilty of un-starred photographs .
- If un-starred photographs are visible then re-grid behaves as it does today: images are sorted left-to-right, top-to-bottom.
- If un-starred photographs are not visible then re-grid will sort starred photographs first, followed by un-starred photographs.
- Previously, if un-starred photographs were not visible , regrid would first make all photographs visible and then sort them. Now, un-starred photographs will remain not visible.
2021.05.15
- New options for Studio Wall comments!
- Studio Wall comments can now be public ( ) or private ( ).
- Public comments are visible to your instructor, your classmates, and yourself.
- Private comments are visible only to the Studio Wall's owner, and yourself.
- You can set a comment's visibilty when you post it by clicking the icon to make it private. Hit it again can make it public again.
- After a comment is posted, you change it's visibility at any time by clicking the or icon to toggle it's visibility.
- Studio Wall comments can now be editted!
- Once a comment is posted, you can edit it by clicking the icon next to it.
- When you're done, just click to update the comment or to cancel the update.
- Studio Wall comments can now be deleted!
- Once a comment is posted, you can delete it by clicking the icon.
- Changed the sense of the Studio Wall "Hide un-starred photographs" icon:
- indicates ''only'' starred photographs are shown. Click it to show all photographs.
- indicates ''all'' photographs are shown. Click it to hide un-starred photographs.
- New behaviour and options for the "full browser" () view!
- The "full browser" view now enlarges the Studio Wall instead of zooming it to fit the browser, giving the Studio Wall all the space in the browser window.
- Buttons. All the Buttons. The Full Browser Studio Wall view now has all the buttons (, , , , , , etc ) you see in the normal view.
2021.05.01
- New Zoom for Studio Walls!
- Studio Walls can now be zoomed in or out by hitting the or icons, respectivly.
- You can return the wall to normal size by hitting .
2021.04.25
- Cropping support for Studio Walls!
- When you're in the slideshow () view, click on the to start a crop.
- Click and drag to define the crop area.
- You can drag and resize the crop area to adjust.
- Click to accept the crop.
- Click to cancel the crop.
- If you change your mind you can click the undo-crop icon to cancel the crop, or just hit "undo" once you're back in the Studio Wall.
- Notes:
- You can only crop images when you're updating or, for instructors, presenting a Studio Wall.
- You can only crop an image once. Allowing crops of crops gave us ugly, grainy images.
- If your cropped image is very narrow, the adornments (the icons at the bottom of the image) will look ugly and all squished together. We're working on it!
- When viewing a Studio Wall, if you press the "Alt" key, the adornments - the border, icons at the bottom, and star icon in the upper left - will show for all photographs. Makes it easy to see which photographs have comments on them!
- When viewing a Studio Wall, you can click on the icon to bring all photographs on the wall into view.
- When viewing a Studio Wall, you can click on the icon to hide all un-starred photographs, click it again to show them.