Tutorial: The Annotation Controls
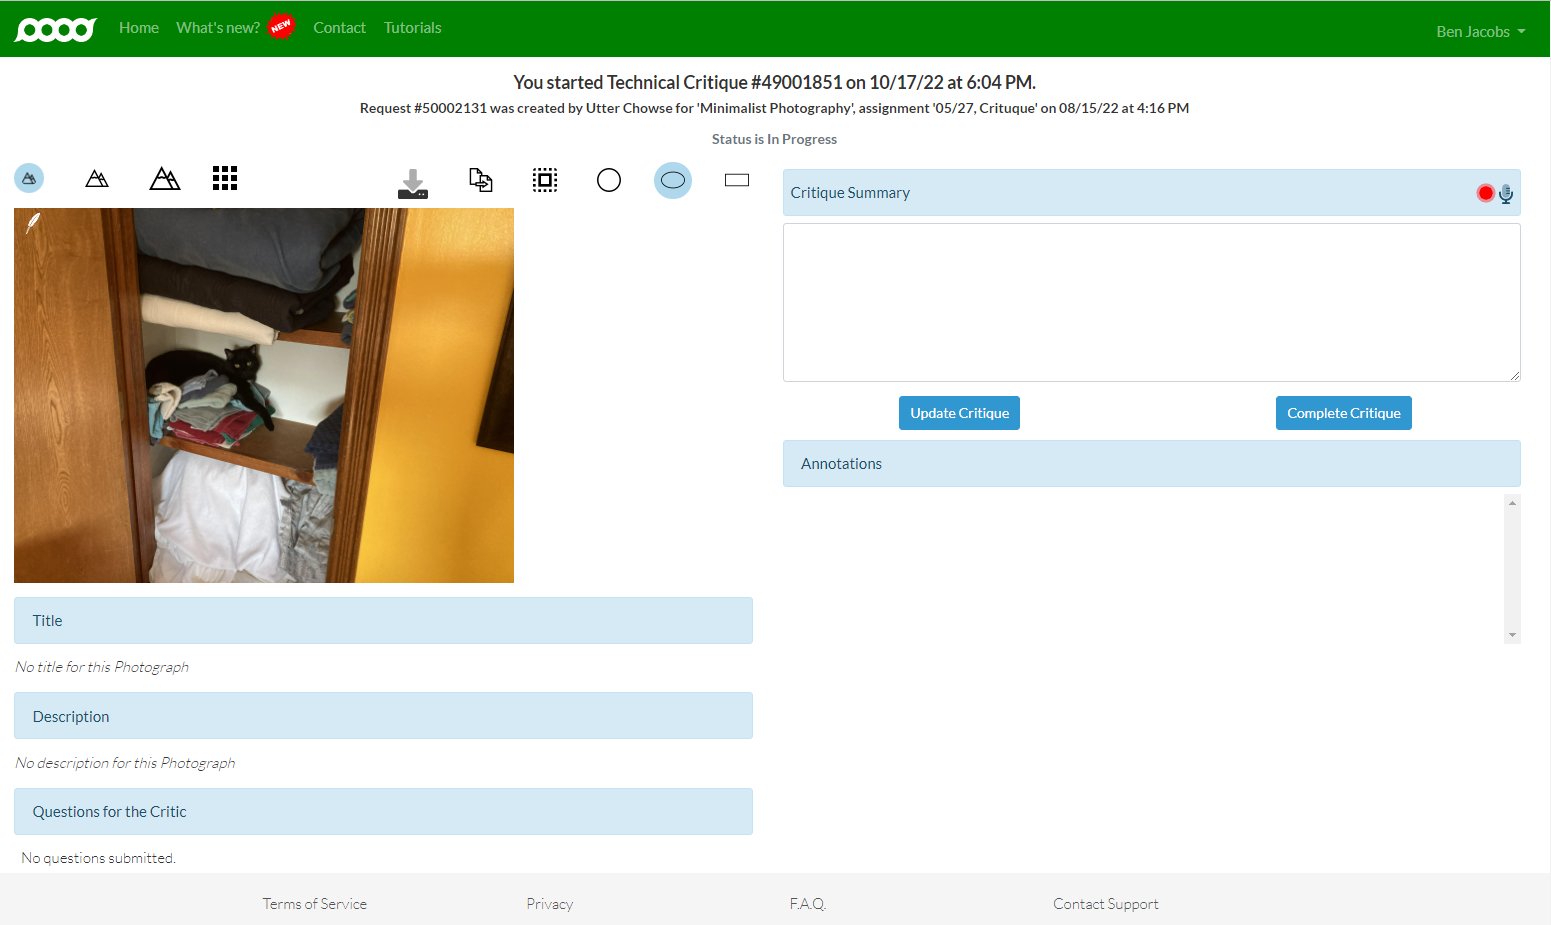
When you click a photo on the Critique form, the photo displays on the left by itself with an annotation toolbar:

The buttons on annotations toolbar do the following:
- The mountain buttons (
 ) changes the size of the photo.
- The grid button (
 ) displays all the photographs in the critique again.
- The download button (
 ) opens a file chooser so you can save this photo, but not the annotations, to your local file system.
- The copy button (
 ) will copy a JPG of this photo, but not your annotations, to your device's clipboard. Note that this button does not display in Firefox.
- The whole image annotation button (
 ) will create an annotation that applies to the whole photo. Other annotation types require you to click and drag to mark an area on the photo for your comment. When you click this button, a thin box displays just inside the photo--so you just need to click Edit to edit your annotation.
- The circle annotation button (
 ) lets you click and drag to make a circle on the photo. When you use a circle, you will click and drag from the center point and the circle expands as you drag.
- The oval annotation button (
 ) lets you click and drag to make an oval on the photo. Like the circle, you will click and drag from the center point and the circle expands as you drag.
- The rectangle annotation button (
 ) lets you click and drag to make a square or rectangle on the photo. When you use the rectangle, you will click and drag from one corner to the opposite corner, such as from the top left to the bottom right.
All right, now that you are familiar with the buttons, let's annotate.
Up next: Annotating a Photo
Previously: Accepting a Critique Request