Tutorial: Annotating a Photo
You can create four kinds of annotations on a photo:
- Whole image annotations, which apply to the whole image.
- Circles, which draw a circle around a feature you want to comment on.
- Ovals, which draw an oval around something you want to annotate.
- Rectangles, which frame something you want to highlight.
So, to make an annotation:
- Click the toolbar button of the shape of the annotation you want to make.
- For circles, ovals, and rectangles, click and drag to create the border/frame around the item you want to comment on.
For example, if you have selected a rectangle, click the top left corner and drag to the lower right corner. You will see a border display as you drag:
- When you release the mouse button, the annotation dialog box displays:
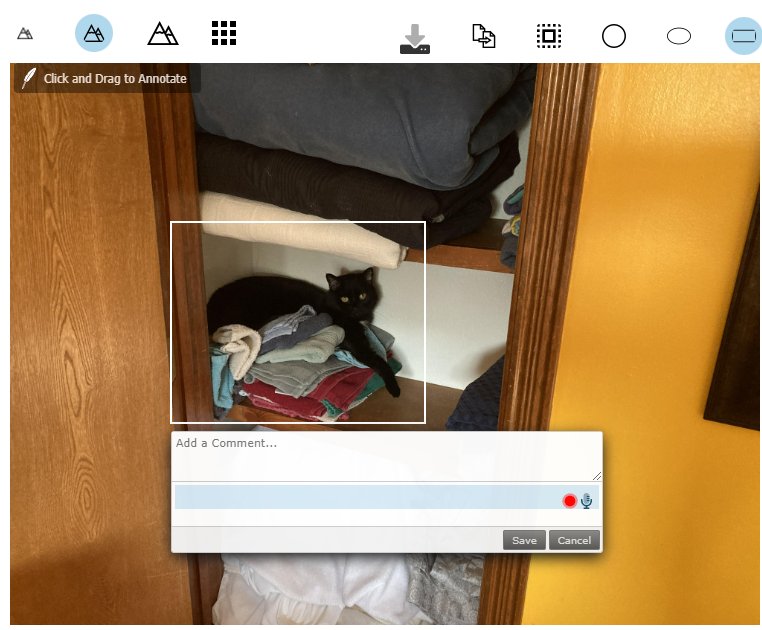
- If you click the red button, audio controls display:
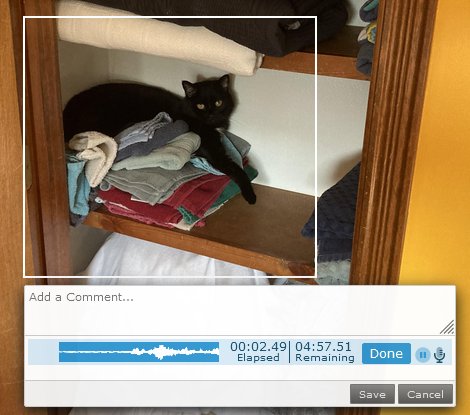
- When you have typed and recorded all the commentary you want to provide, click Save.
When you save an annotation, you will see the outline over the photograph; you can mouse over the annotation on the photo to read or play back what you've said. You will also find the annotations for this photograph in a table at the right beneath the title and description:
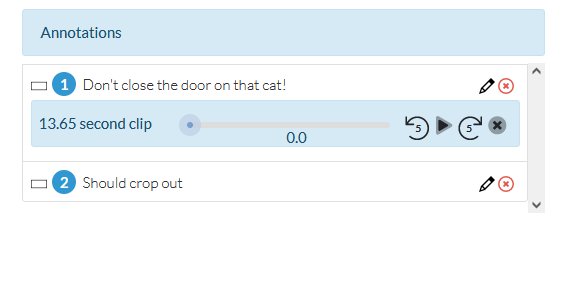
You can edit an existing annotation by clicking the little pencil button ( ) or you can delete it by clicking the delete button (
 ).
).
When you have finished making annotations on this photo, you can click the grid button ( ) to see all the photos again.
Once you have made all the annotations you want on the photos in the critique, you're ready to make a Critique Summary.
Up next: The Critique Summary
Previously: The Annotation Controls