Tutorial: Other Information on the Studio Wall
Other Information
Overview
We've covered the key things about the studio wall, but you might see some other things and wonder what's going on.
-
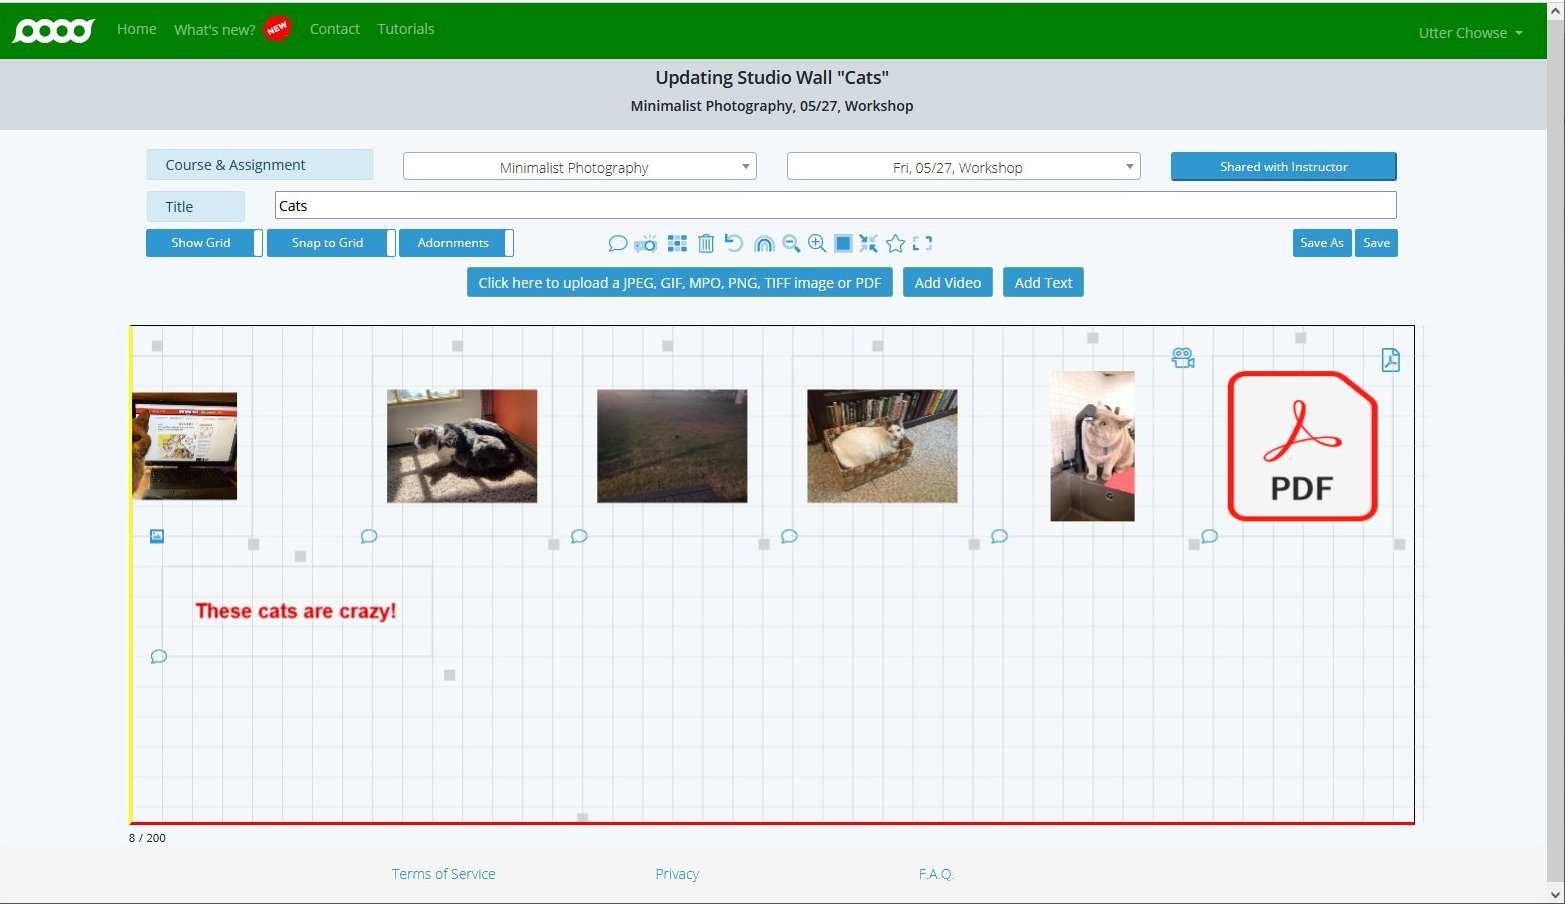
📊 Item Counter
The bottom left corner of the studio wall tells you how many items you have on your studio wall and the maximum number you can have. Pro Tip:I find this information vital as I have way more than 200 cat pictures.
 -
🚨 Border Color Indicators
The borders of the studio wall change colors if you have an item that's partially obscured by the border (which turns the border yellow) or if you have something that is completely outside the part of the studio wall you're viewing (which turns the border red).
In this case, the picture of Roark is partially outside the left border of the studio wall (which is yellow), and an item is on the studio wall below where I can currently see it (the bottom border is red).
What to do: When you see the border change colors, you can click and drag to move around on the studio wall or use the toolbar buttons to zoom out or to zoom the studio wall so all items are visible.
-
👥 Collaborative Editing Indicators
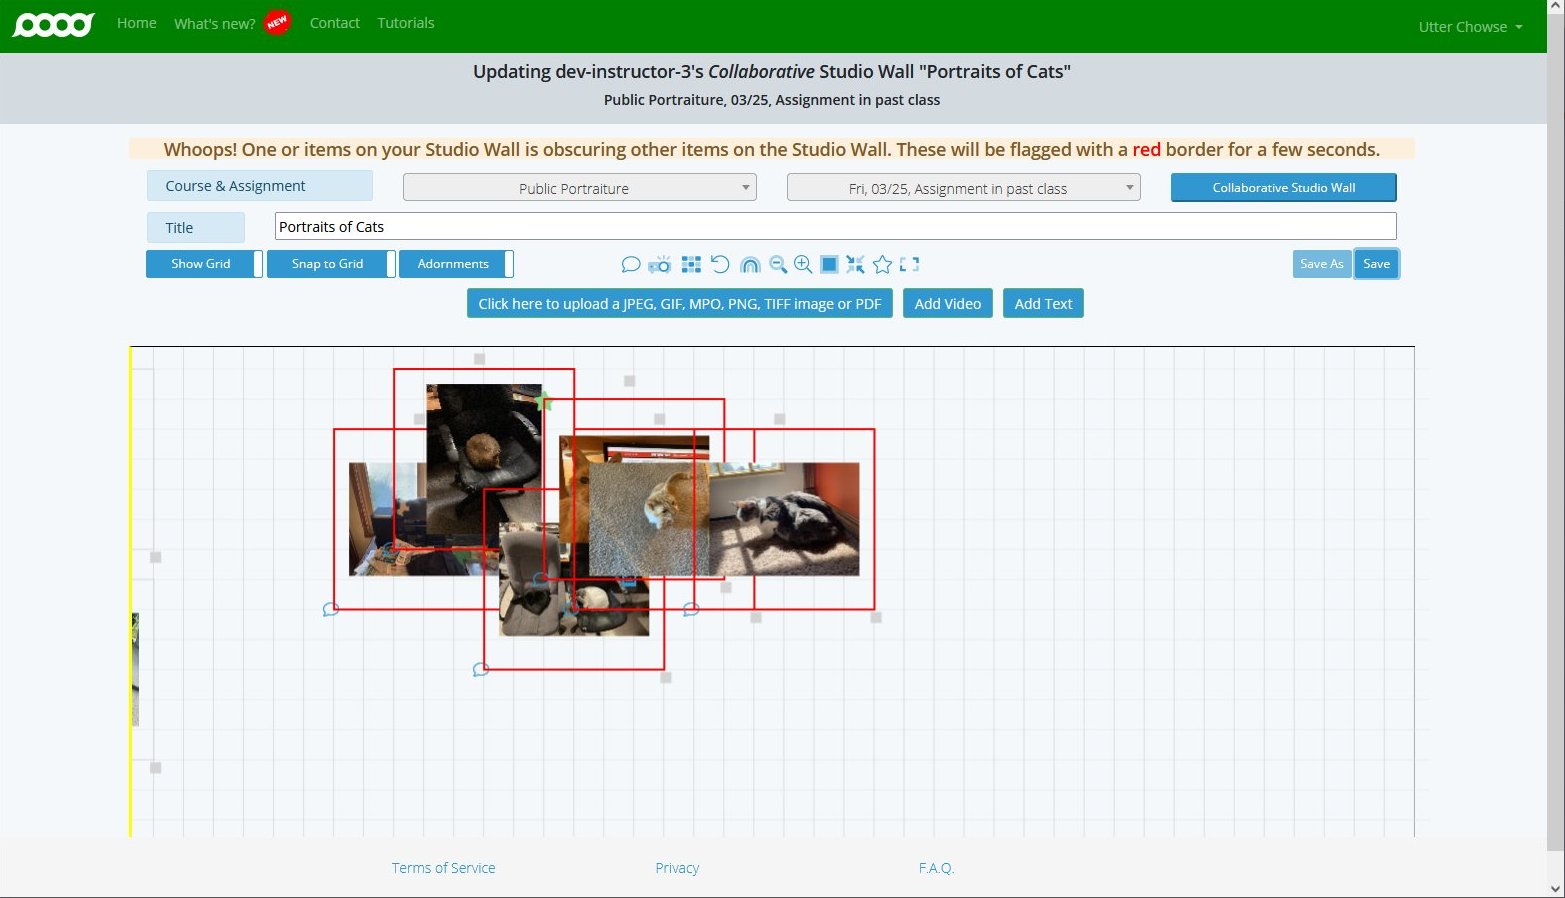
If you're working on a collaborative studio wall or a studio wall shared with your instructor, you can both make changes at almost the same time. When two people are working on a studio wall and one saves the studio wall, when the second tries to save the studio wall, the borders of the items on the studio wall will change colors briefly, and a message at the top will tell you what the colors mean.For example, when items overlay each other, the borders of the objects will display as red briefly when you save the studio wall:
 These color indicators help prevent conflicts when multiple people are editing the same studio wall simultaneously.
Conclusion
This concludes our tour of the studio wall. Enjoy sharing your work with your classmates!