Tutorial: Creating a Studio Wall
Getting Started with Studio Walls
This tutorial will guide you through the complete process of creating your first Studio Wall, from logging in to sharing your work with classmates and instructors.
-
Log in to Atget Studio: In your browser, go to https://atget.studio. You'll see the login screen below.

Hit the Log In button to proceed. -
Enter Your Credentials: You'll see a login screen where you need to enter your member information.
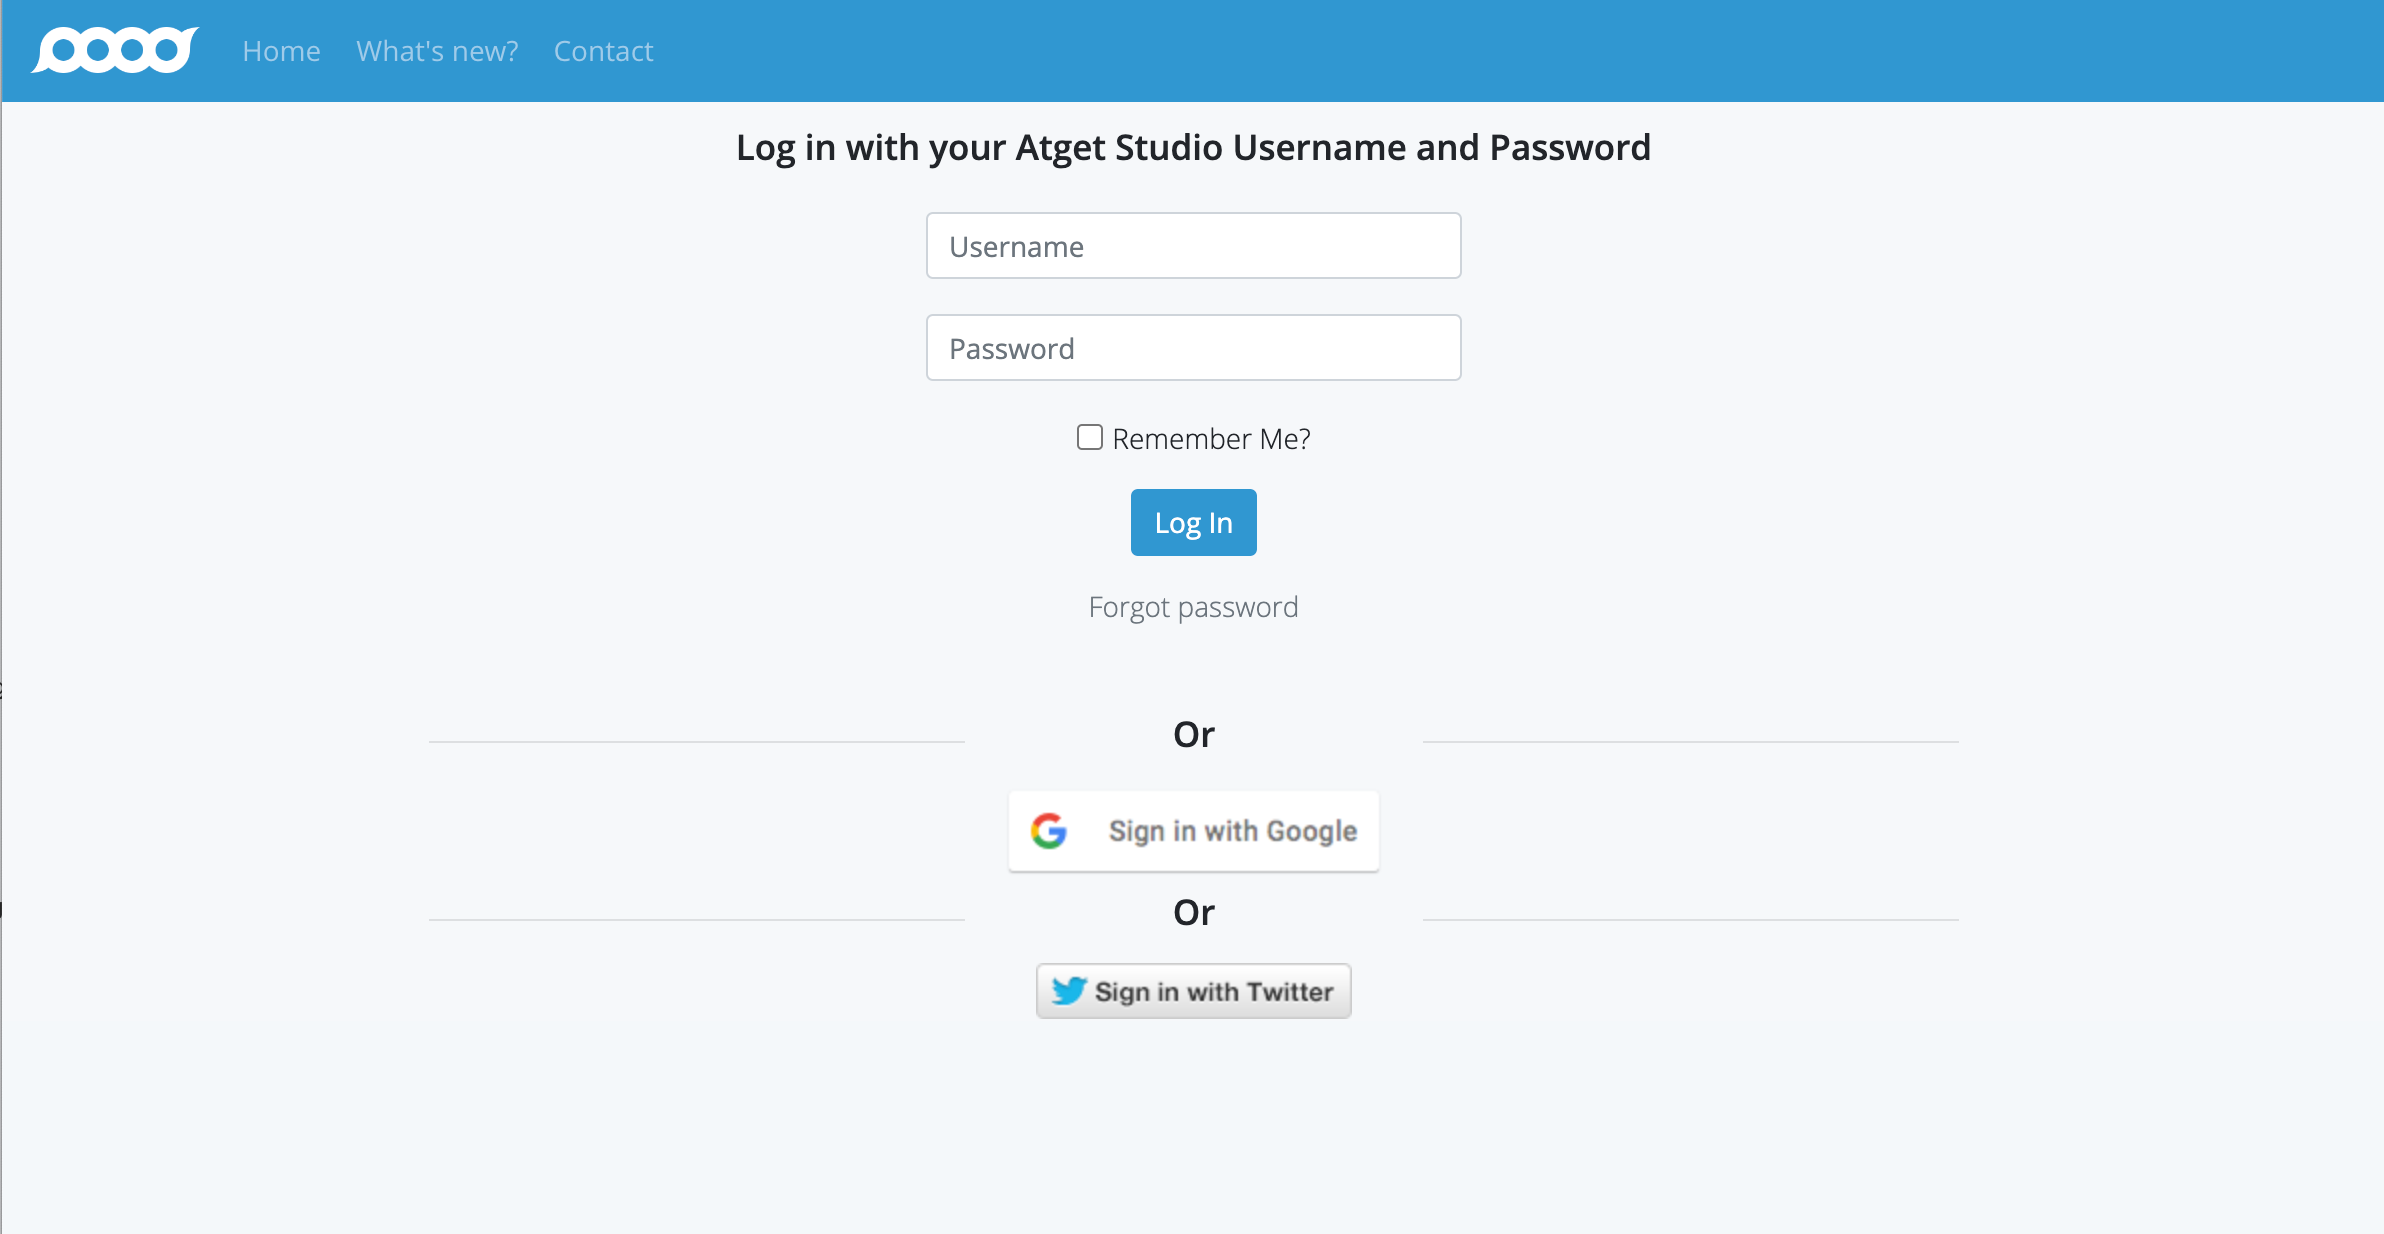
Fill in your member name (usually your email address) and password, then click the "Log In" button. -
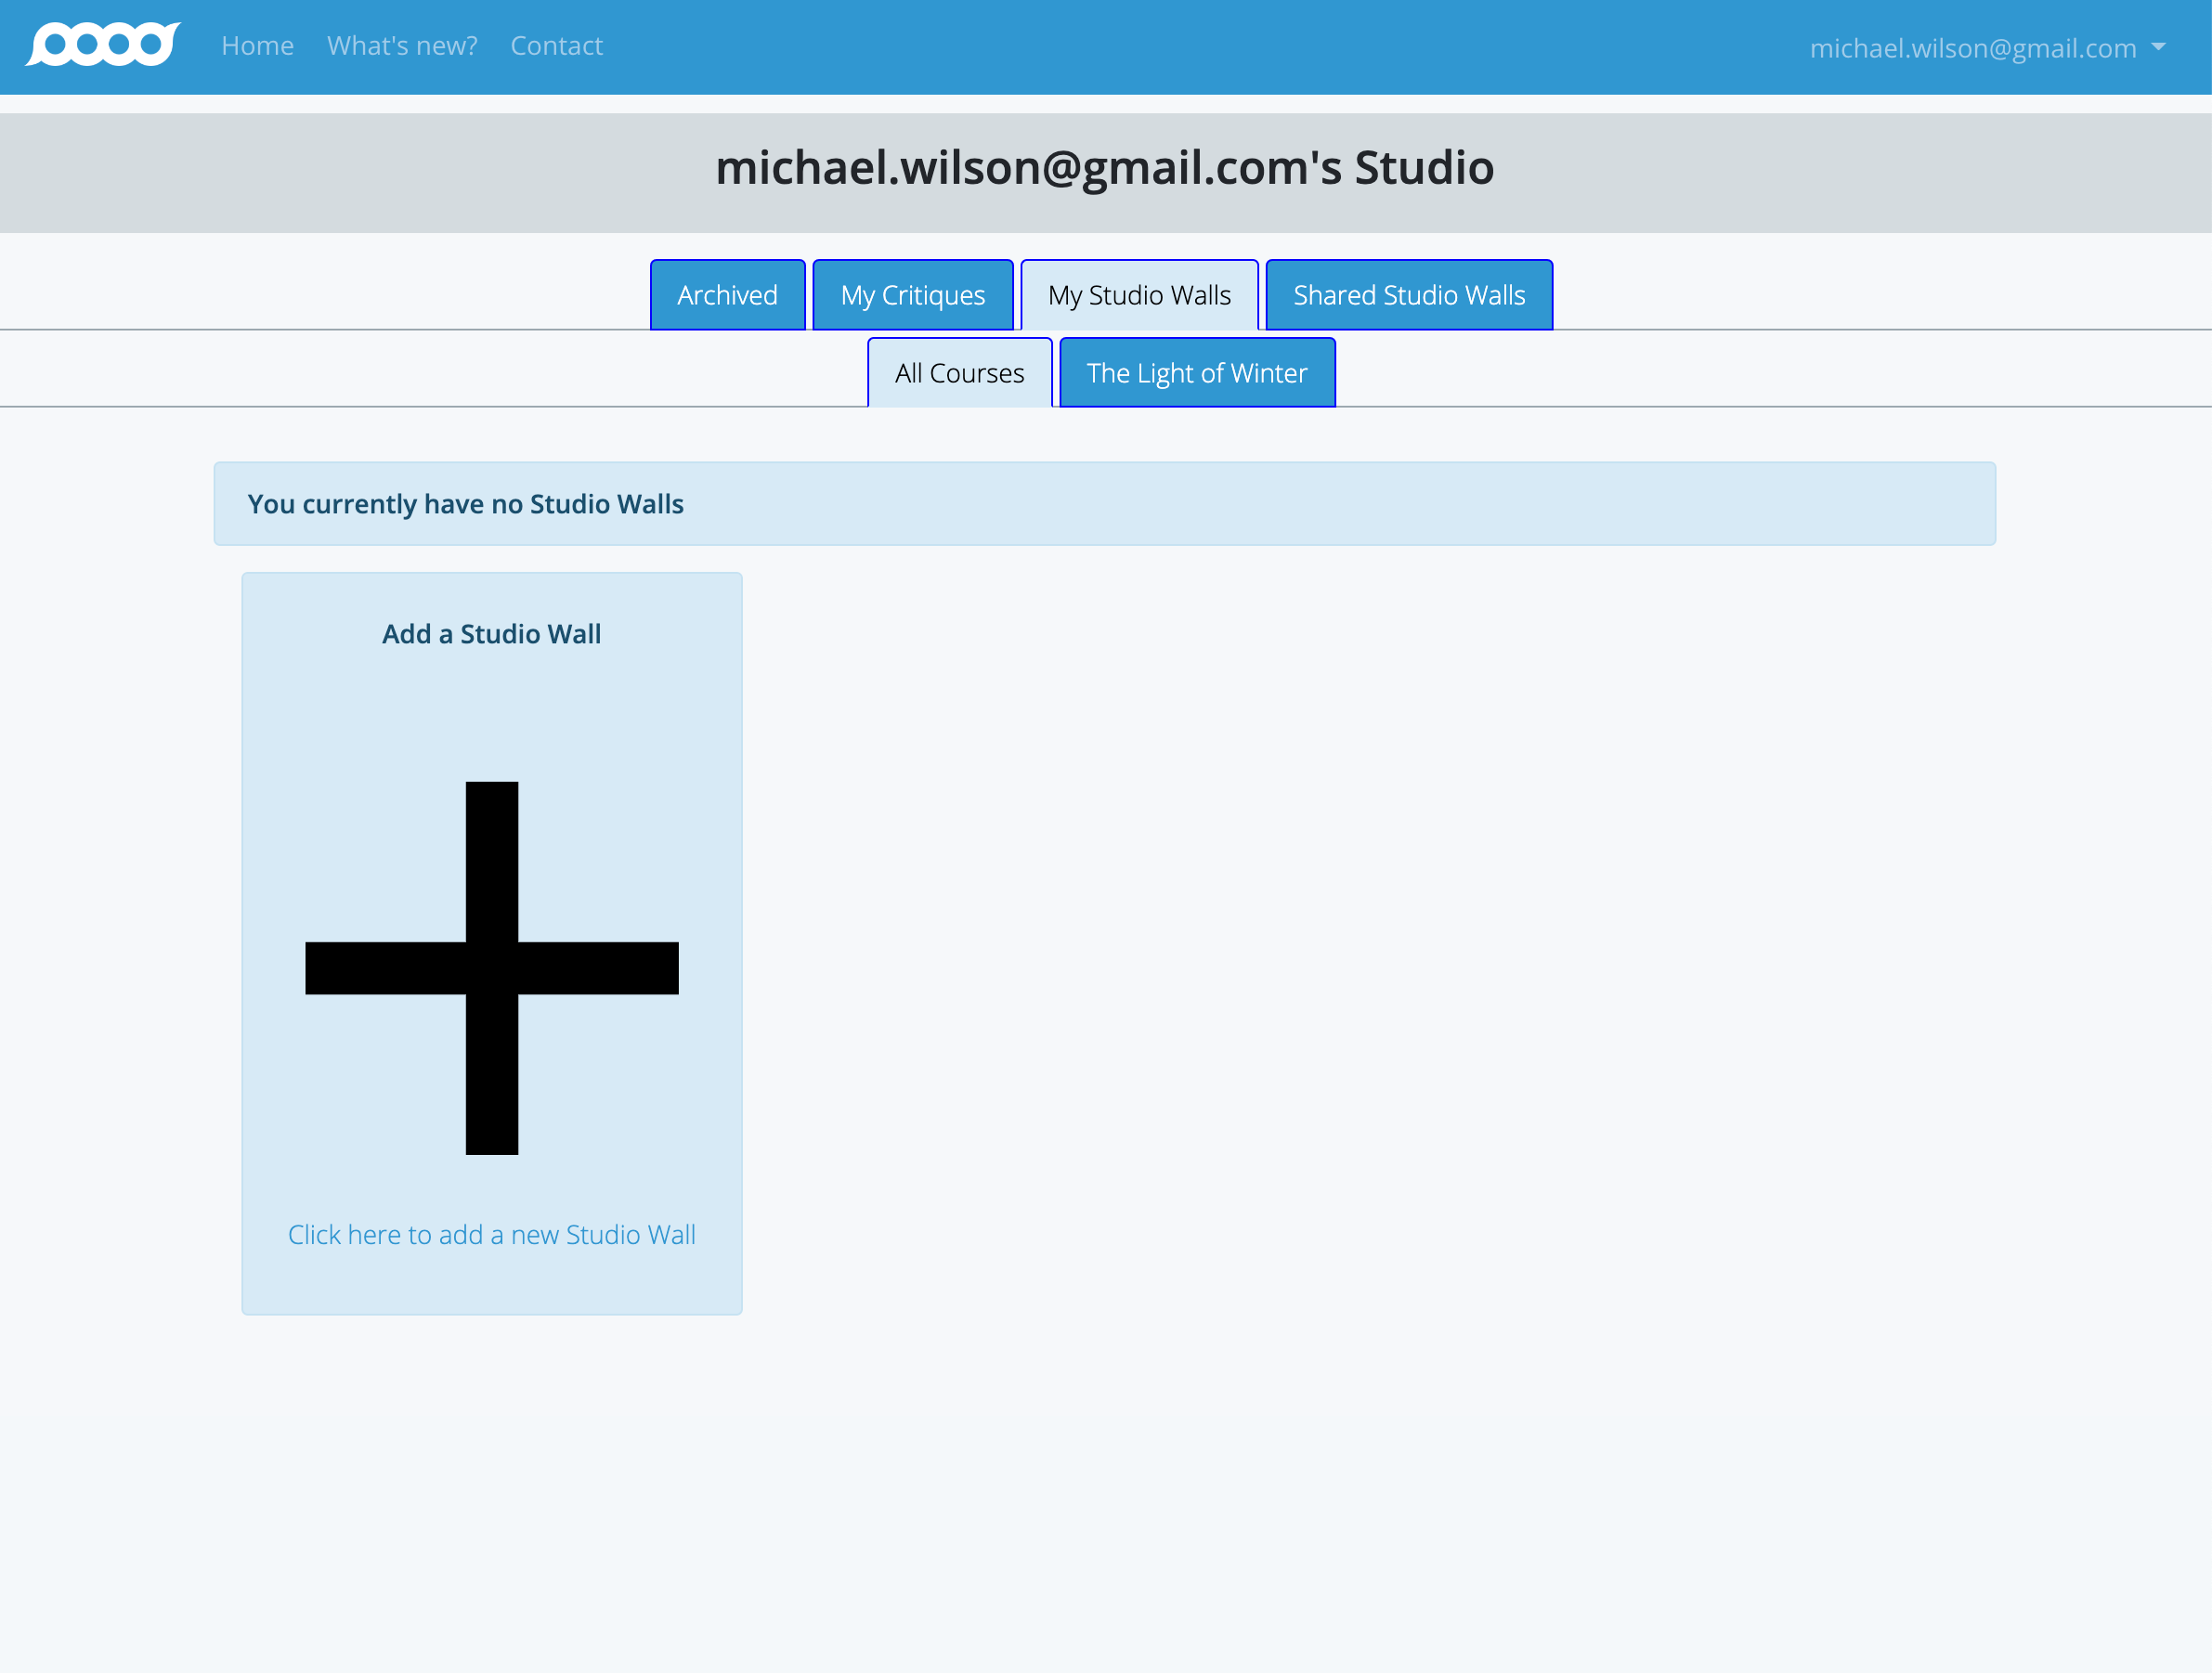
Navigate to Studio Walls: Once you log in, you'll see your Studio Page.
Click on the "My Studio Walls" tab to access your studio wall management area. -
Select Your Course: You will see tabs below for "All Courses" and one for each of your courses.
In the example above, there's one course: "The Light of Winter". Click on the tab for your specific course to view and manage studio walls for that class.
The selected tab will turn light blue to indicate it's active. -
Start Creating a New Studio Wall: Since you probably don't have any Studio Walls when you begin, you'll see a card with a big "+" labeled "Add a Studio Wall for..." followed by your course name.
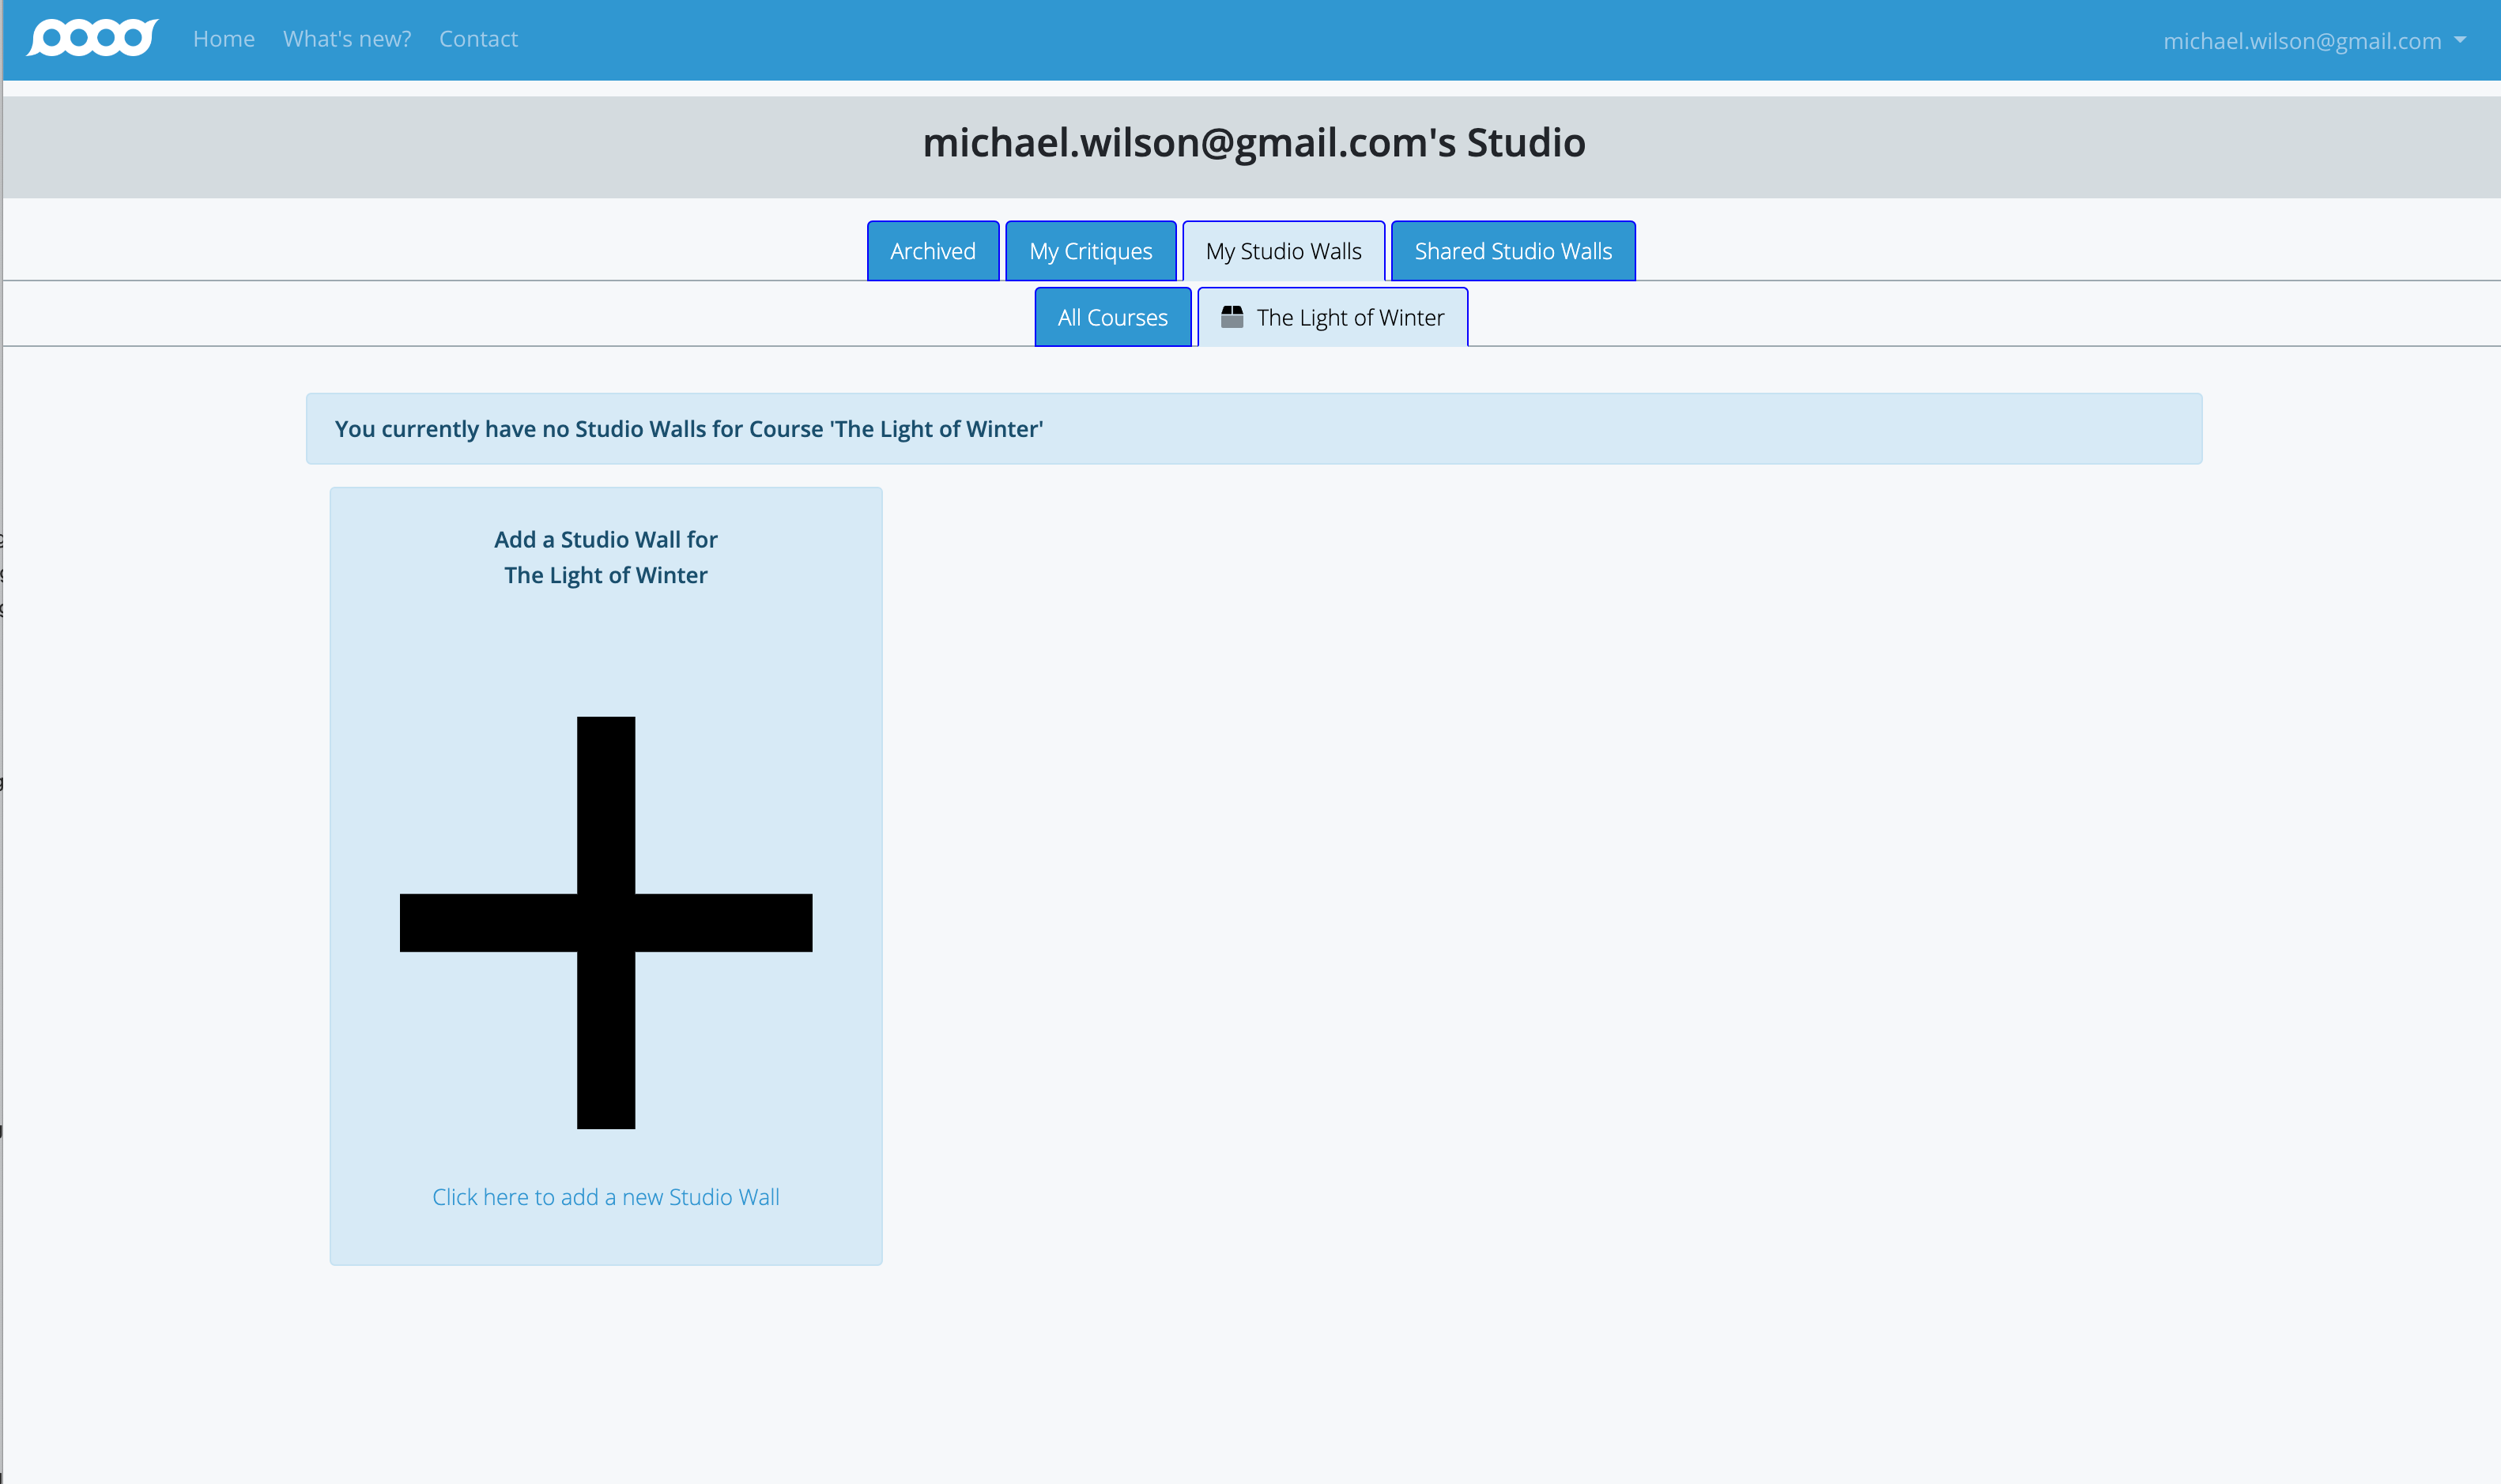
Click on this card to create your new Studio Wall. -
Configure Studio Wall Settings: When you click the card, the "Add Studio Wall" page will appear with configuration options.

At the top, you'll see "Course & Assignment" with a drop-down list showing your course. You can also choose the appropriate assignment for this studio wall. -
Set Your Studio Wall Title: Below the course selection is the "Title" field with an edit box for naming your Studio Wall.
Atget Studio provides a default title (like "michael.wilson@gmail.com's Studio Wall 06/05/2022 15:08:38"), but you should choose your own descriptive title. Triple-click in the title field to select all text, then type your new title.
Choose a title that clearly identifies the purpose or theme of your studio wall. -
Upload Your First Images: To start adding photos to your Studio Wall, click the big blue button that says "Click here to upload a JPEG, GIF, MPO, PNG, TIFF image or PDF".
This will open a file selection dialog where you can choose multiple images at once. -
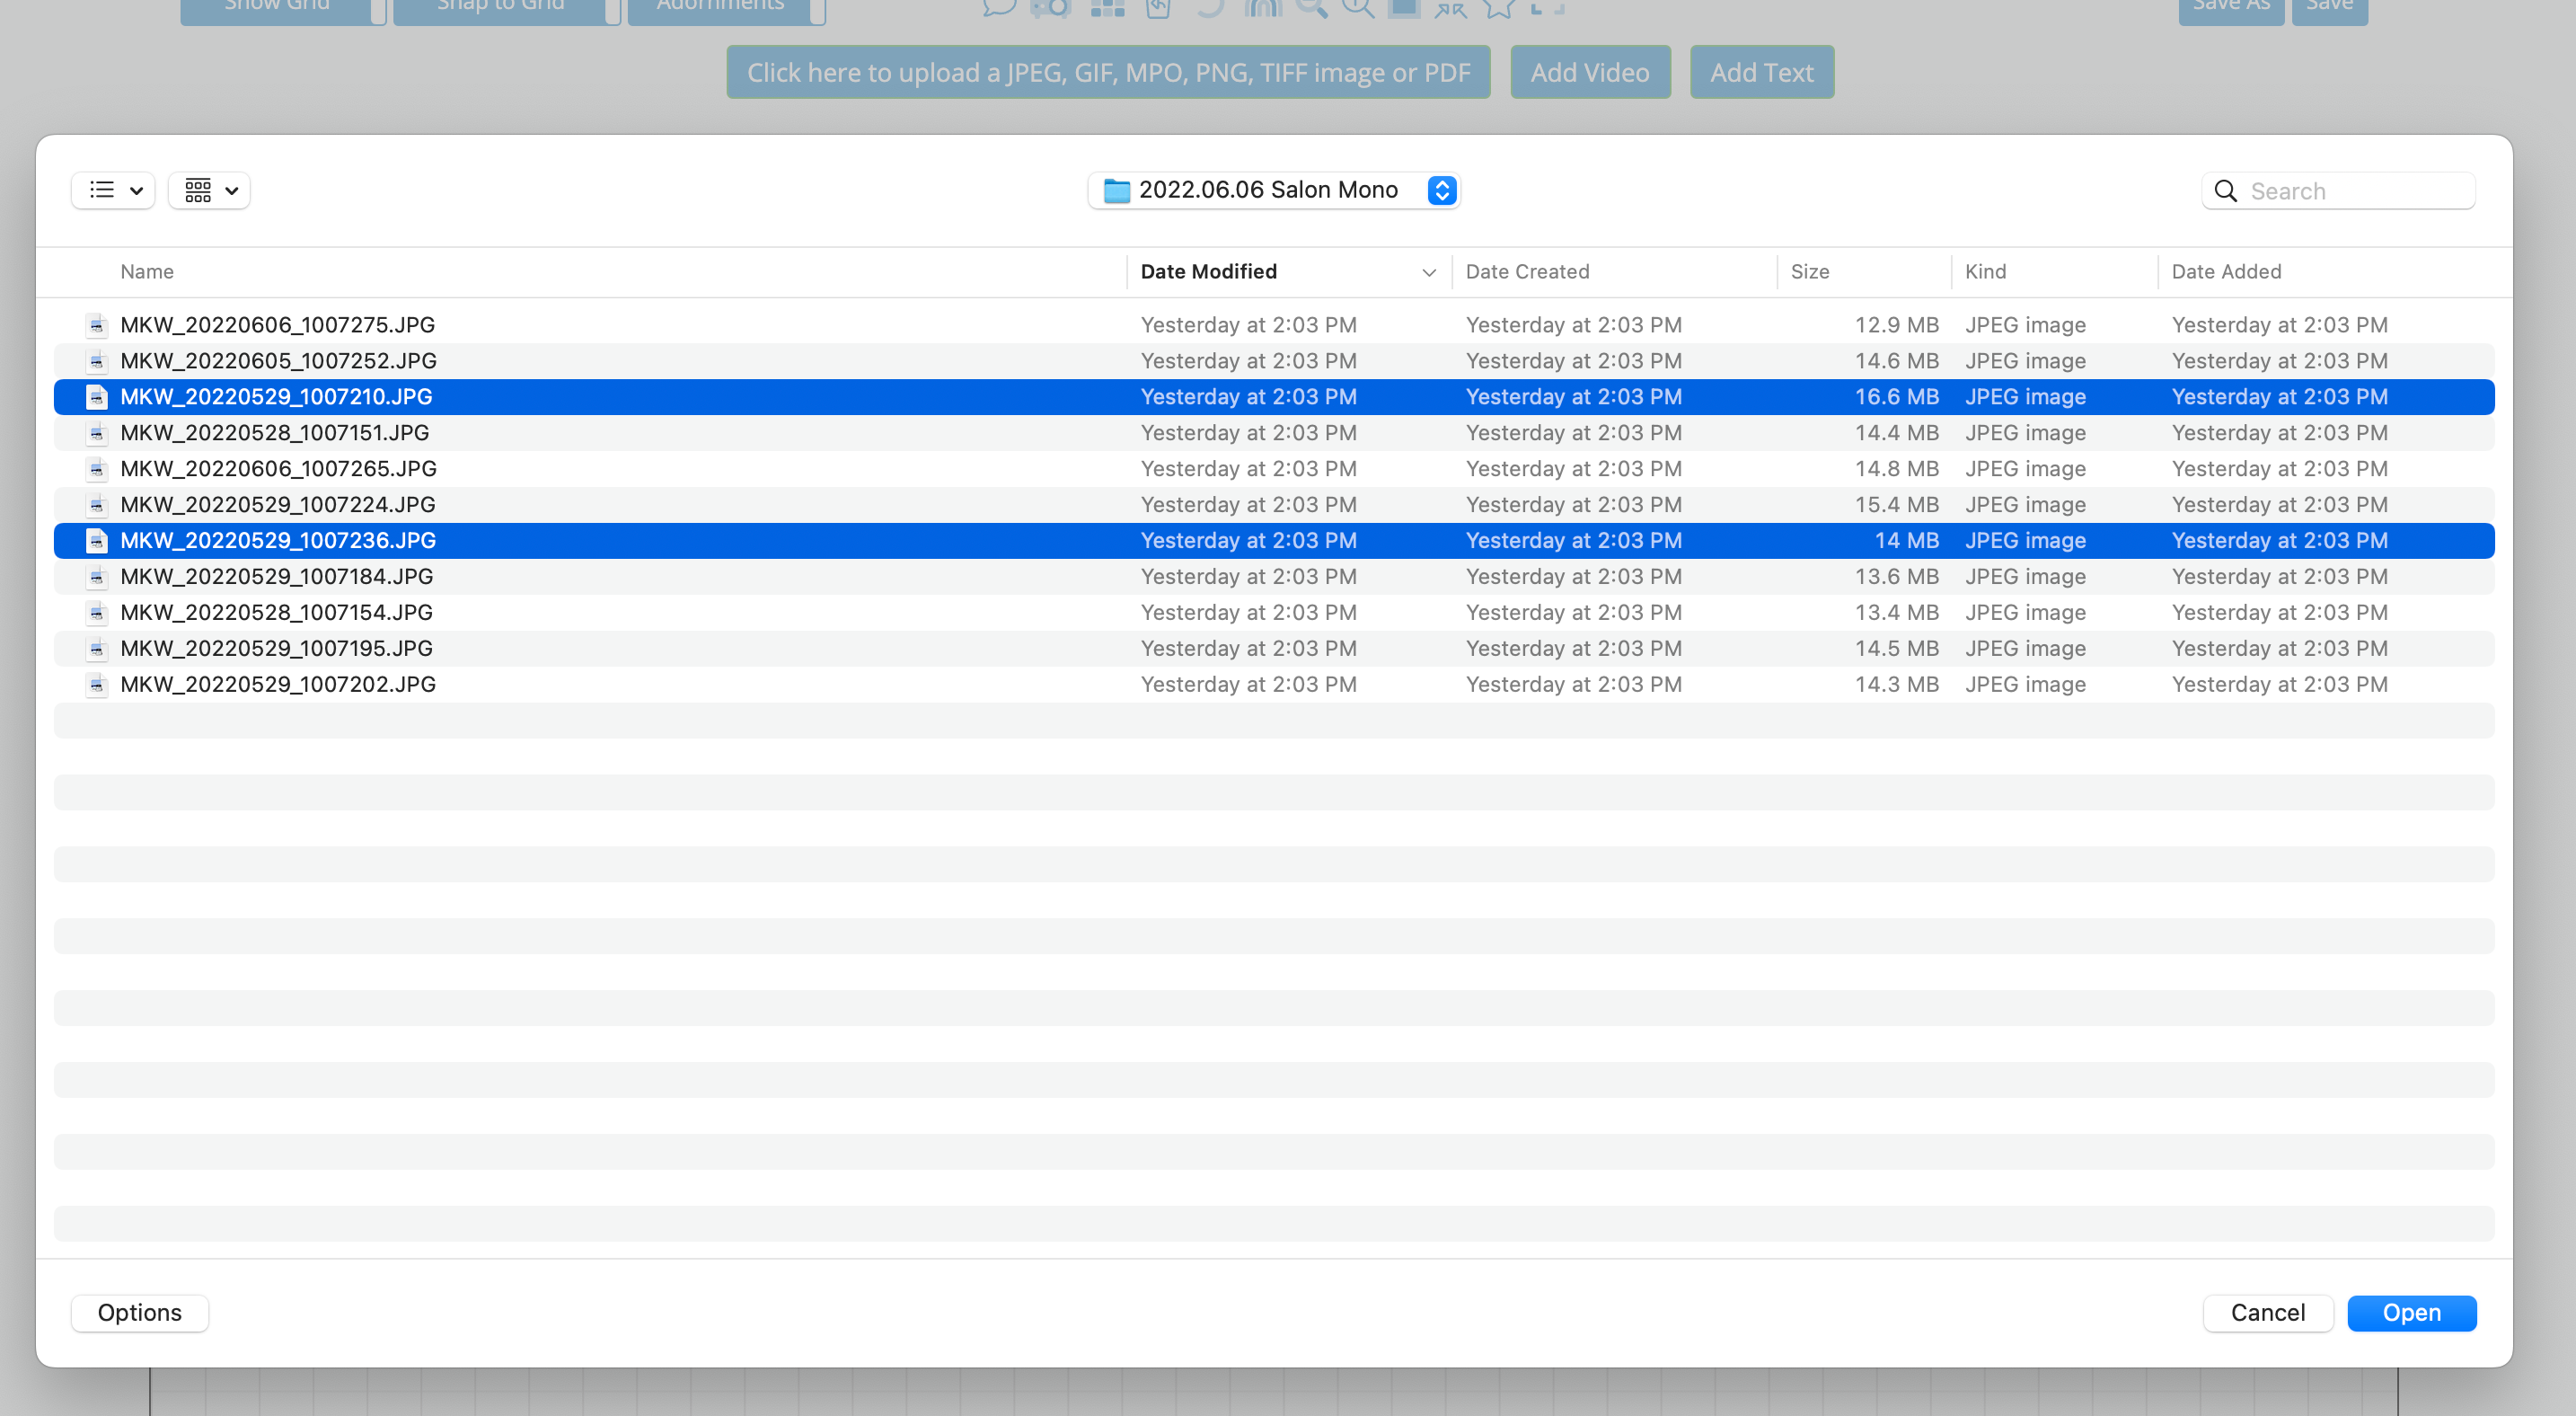
Select Images from Your Device: After clicking the upload button, you'll get a file selection box.
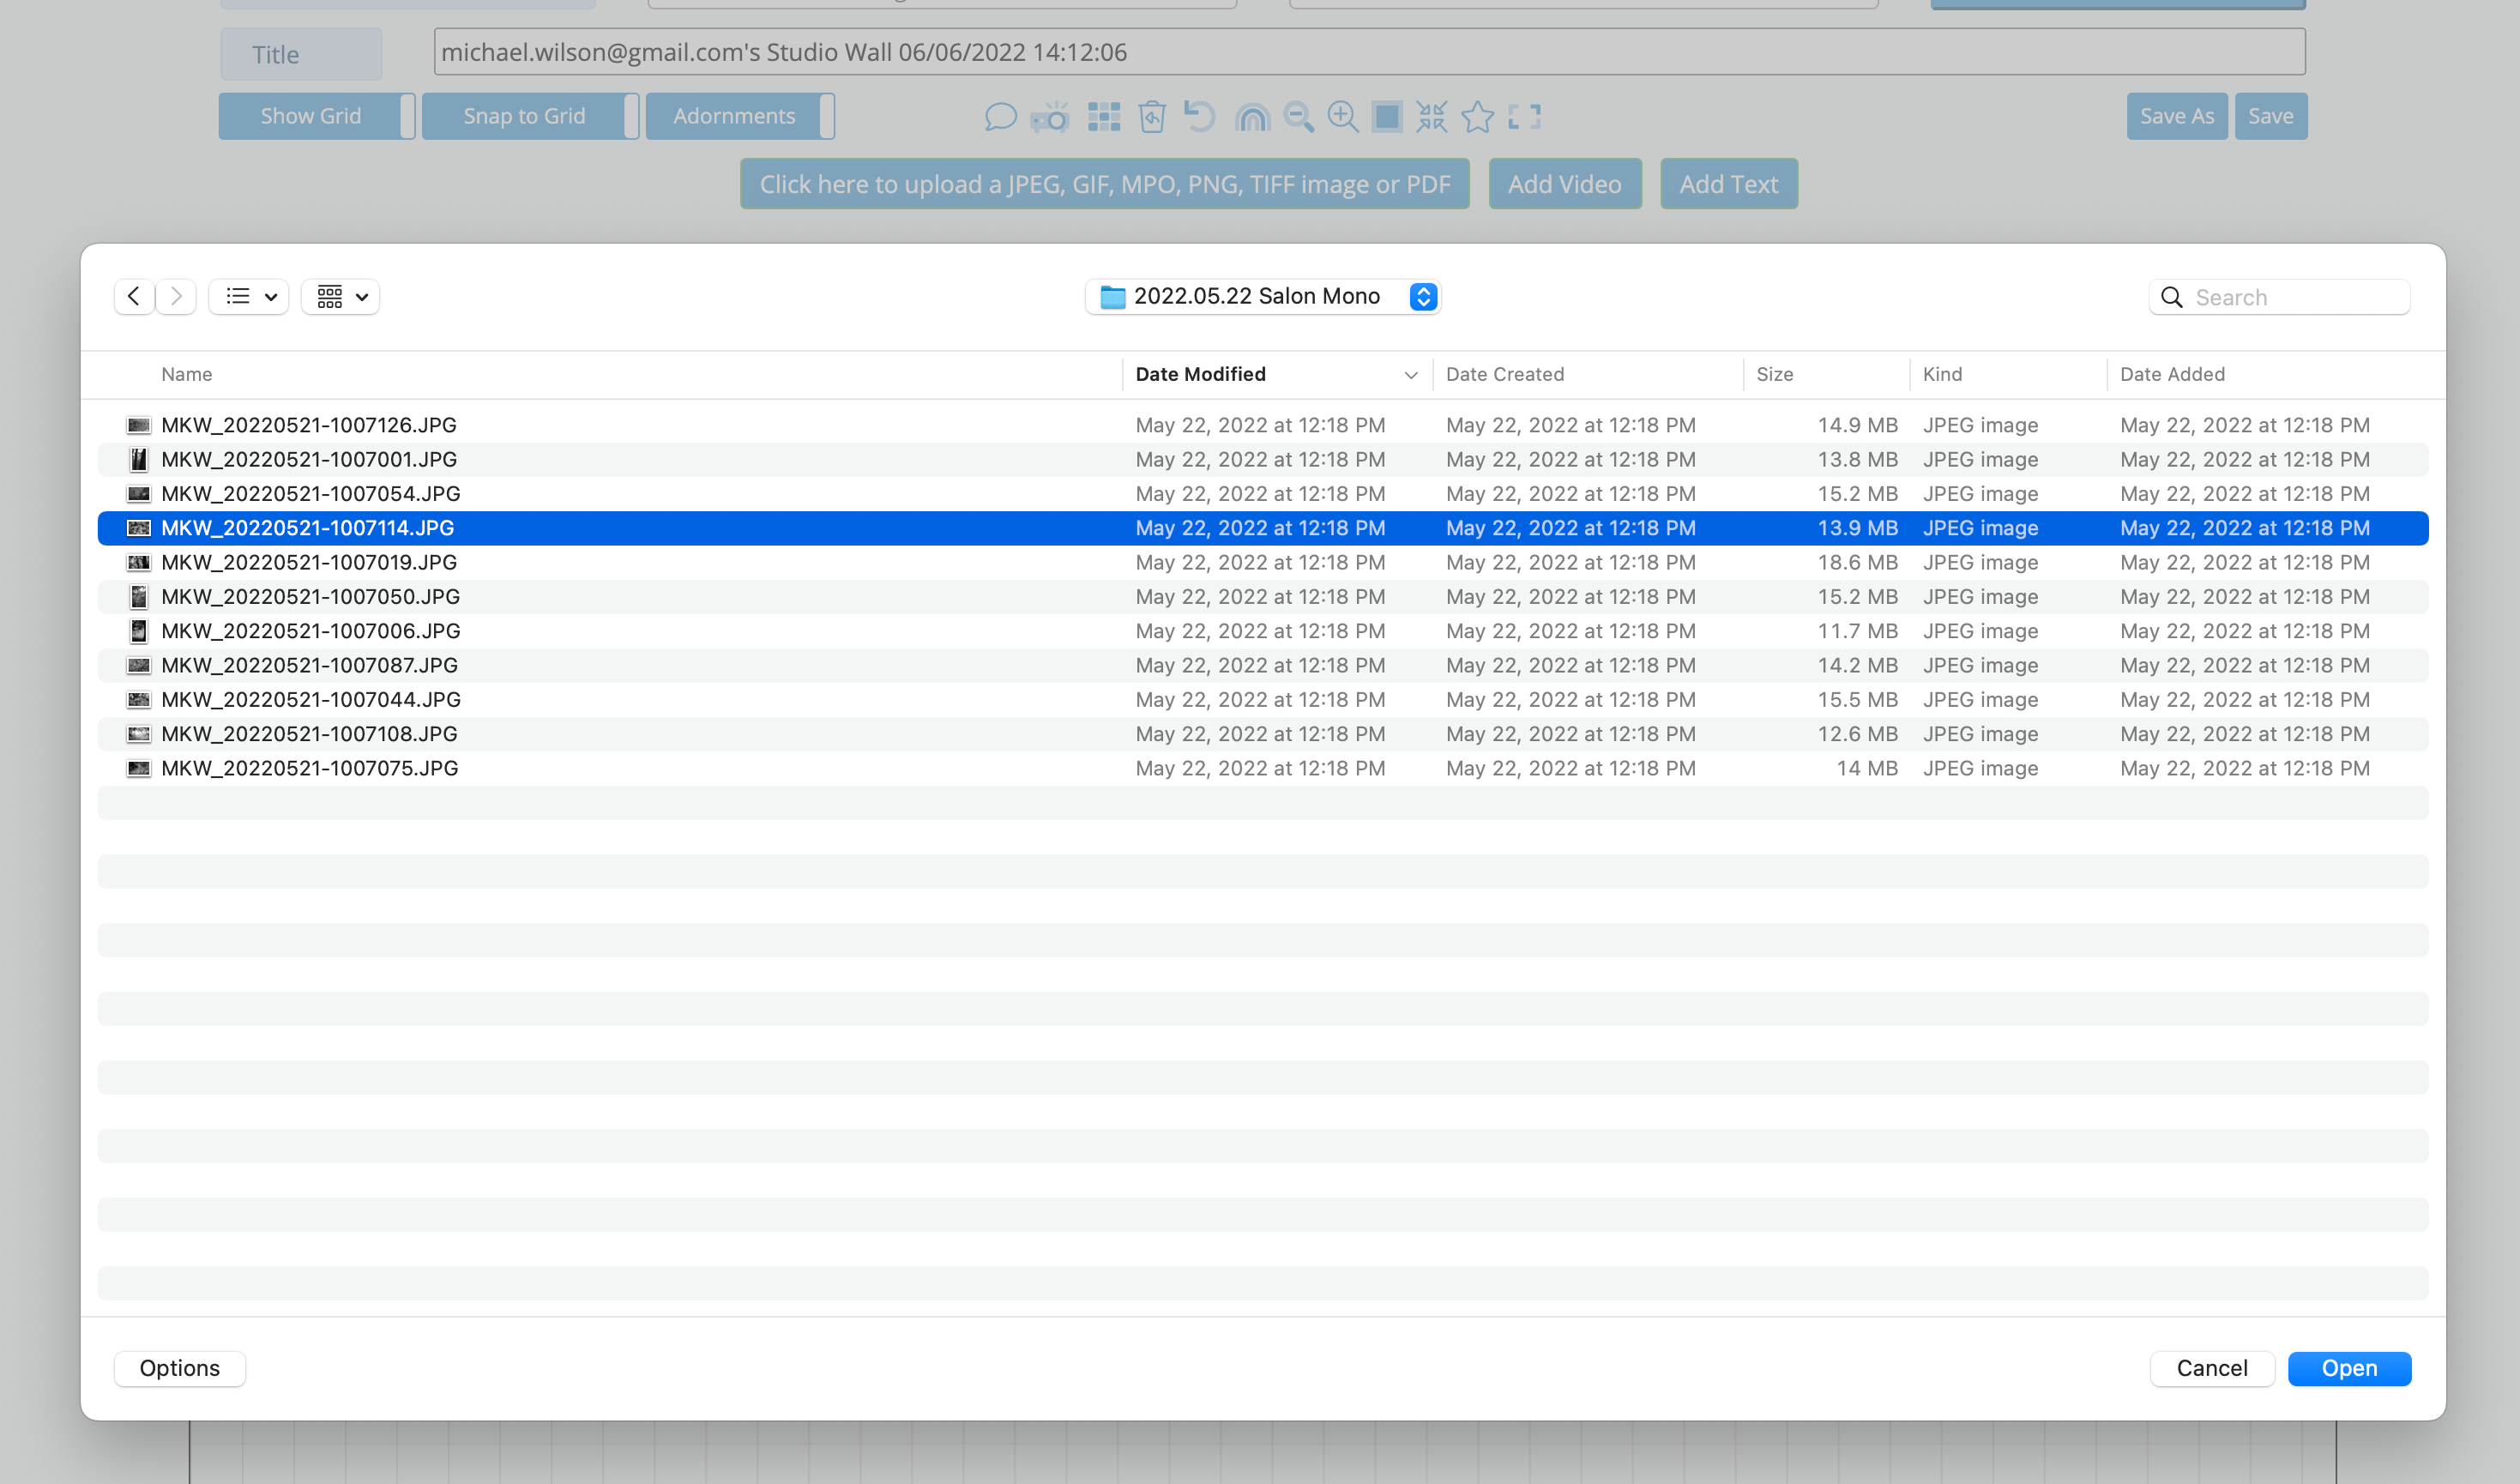
Select as many photographs as you'd like to upload and press "Open". In this example, one image has been selected. -
View Your Uploaded Images: Atget Studio will upload the image and it will appear on the Studio Wall as a thumbnail.

To continue this example, let's add more images. Click the "Click here to upload..." button again to add additional photographs.-
Multiple Image Upload: You can select and upload multiple images at once. Here, two more photographs have been selected:
-
Automatic Layout: Atget Studio automatically positions uploaded images in a grid layout on the Studio Wall:
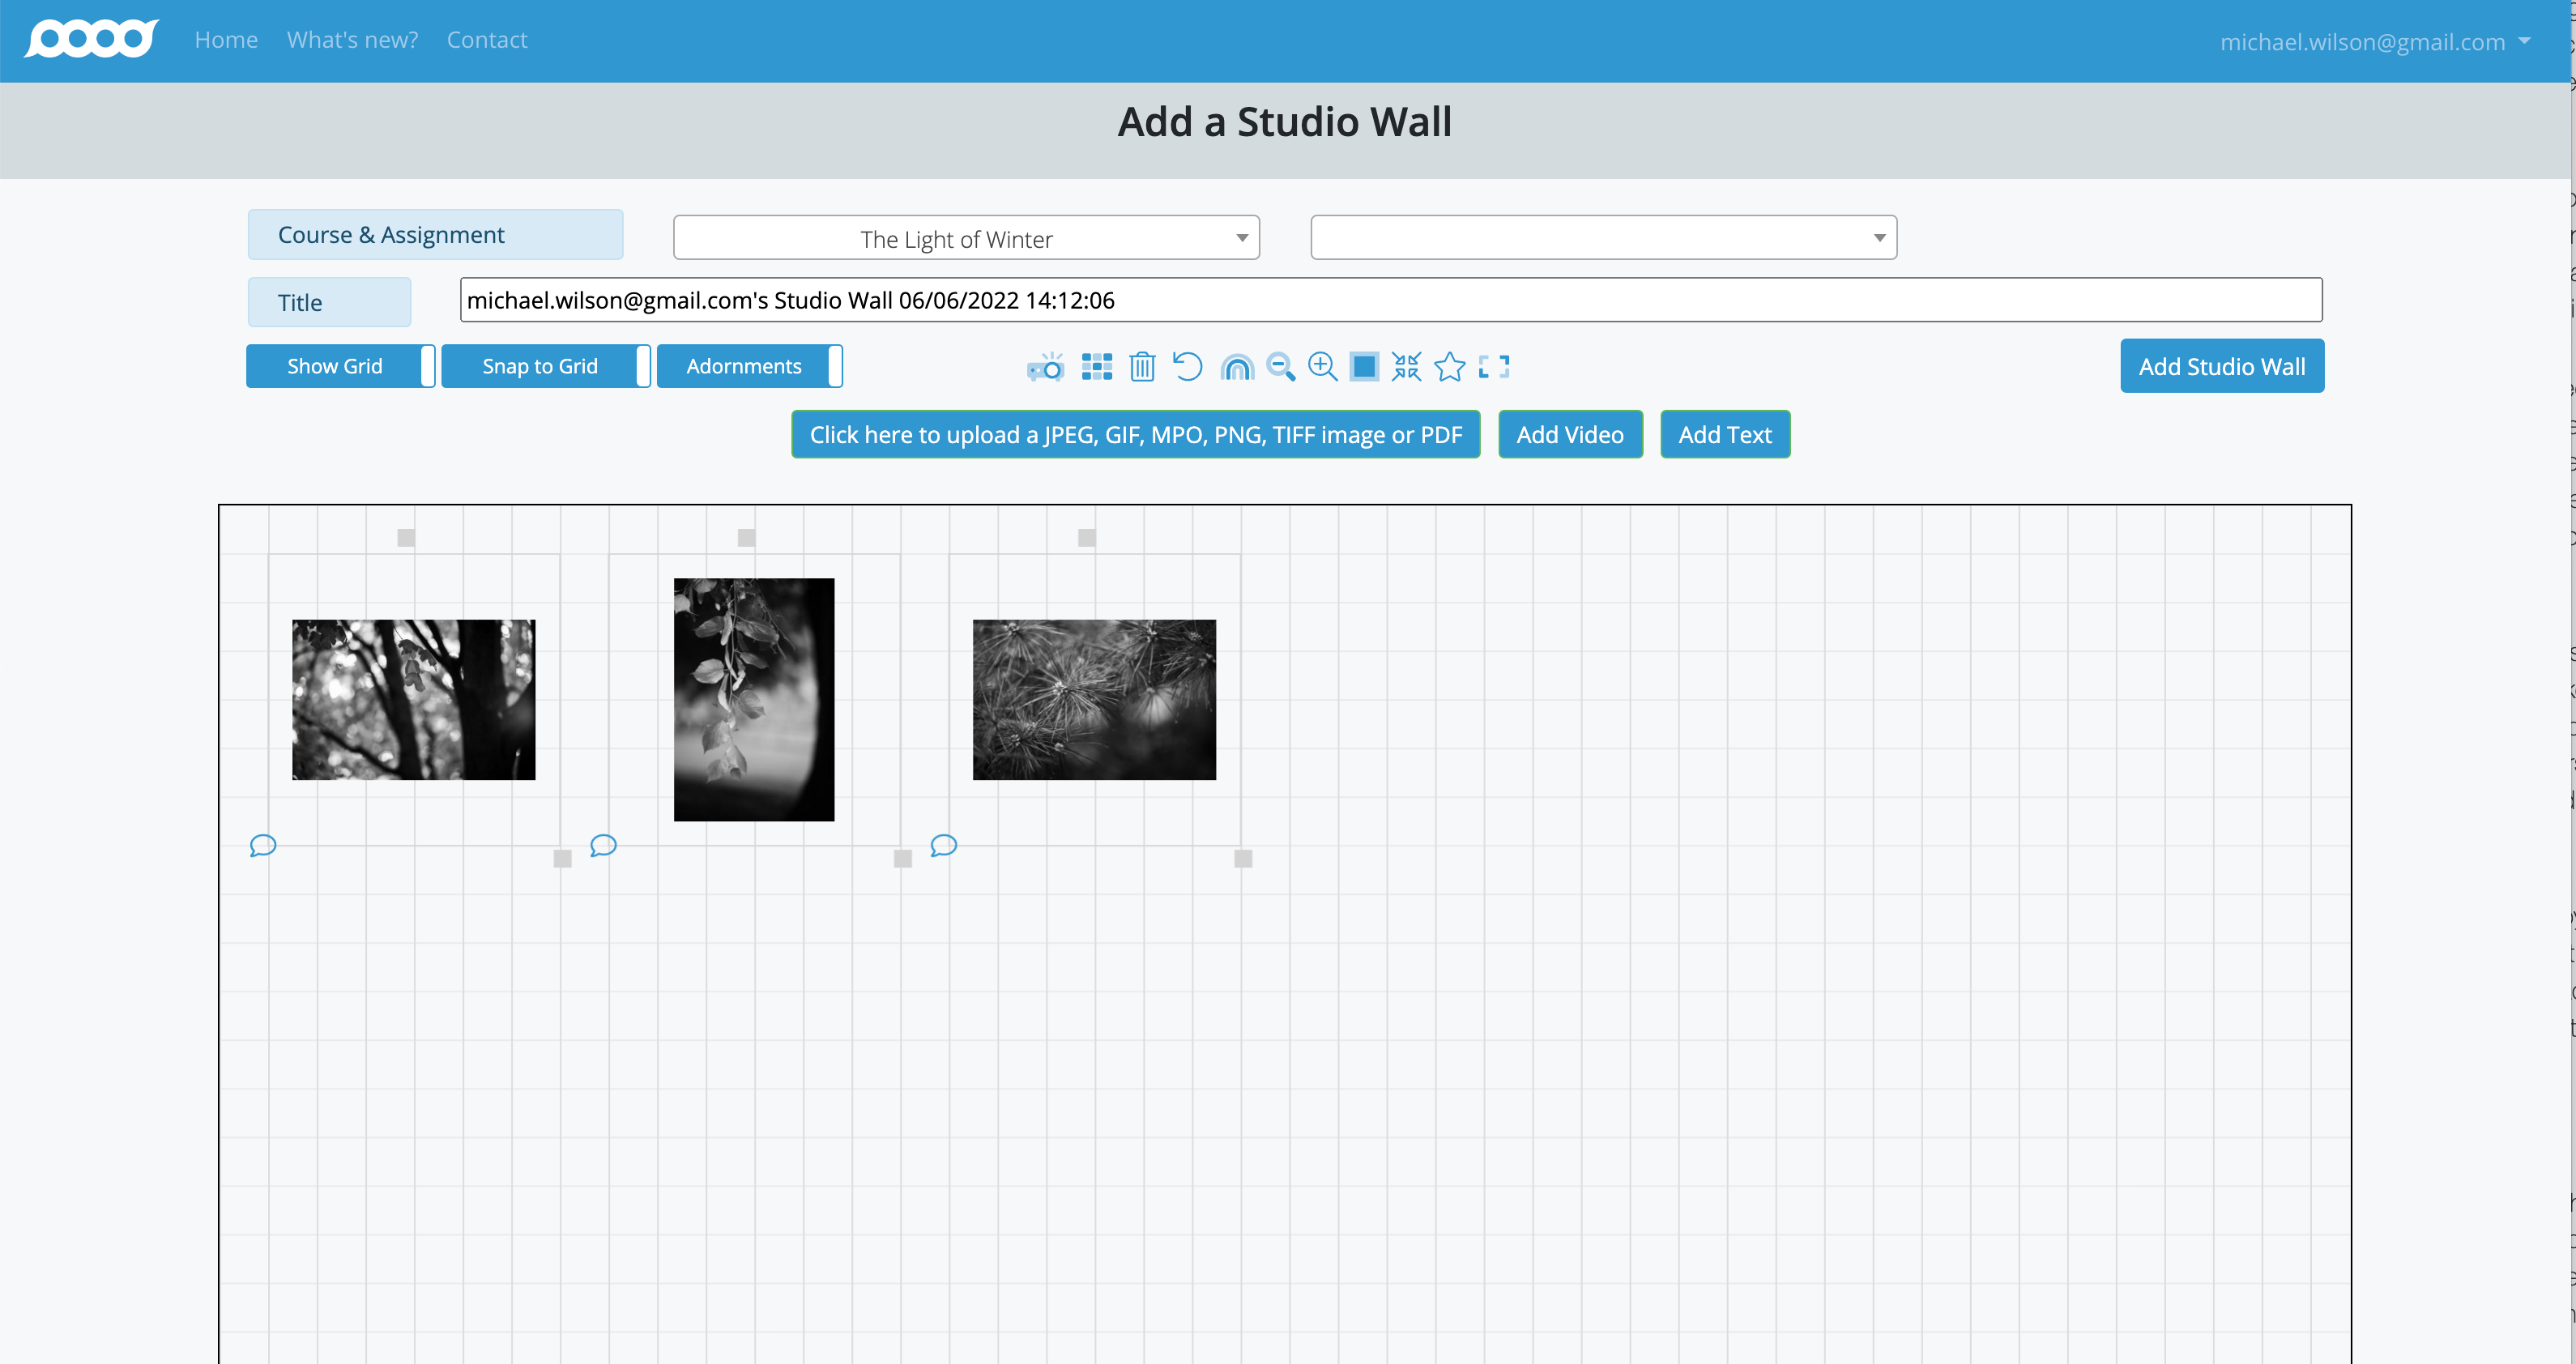
Note: Photos don't have to remain in a grid or be uniformly sized - you can customize layouts in other tutorials.
-
Multiple Image Upload: You can select and upload multiple images at once. Here, two more photographs have been selected:
-
Save Your Studio Wall: Once you're satisfied with your images, click the "Add Studio Wall" button in the top right.

You'll see a busy indicator (spinning blue dots), and once the Studio Wall is created, a green success message will appear at the top of the page.
You can always return later to add, update, or delete photos on the wall. -
Share Your Studio Wall: The final step is sharing your Studio Wall with your instructor and classmates.
Click the "Not Shared" button on the top right of the Studio Wall to open the sharing dialog.
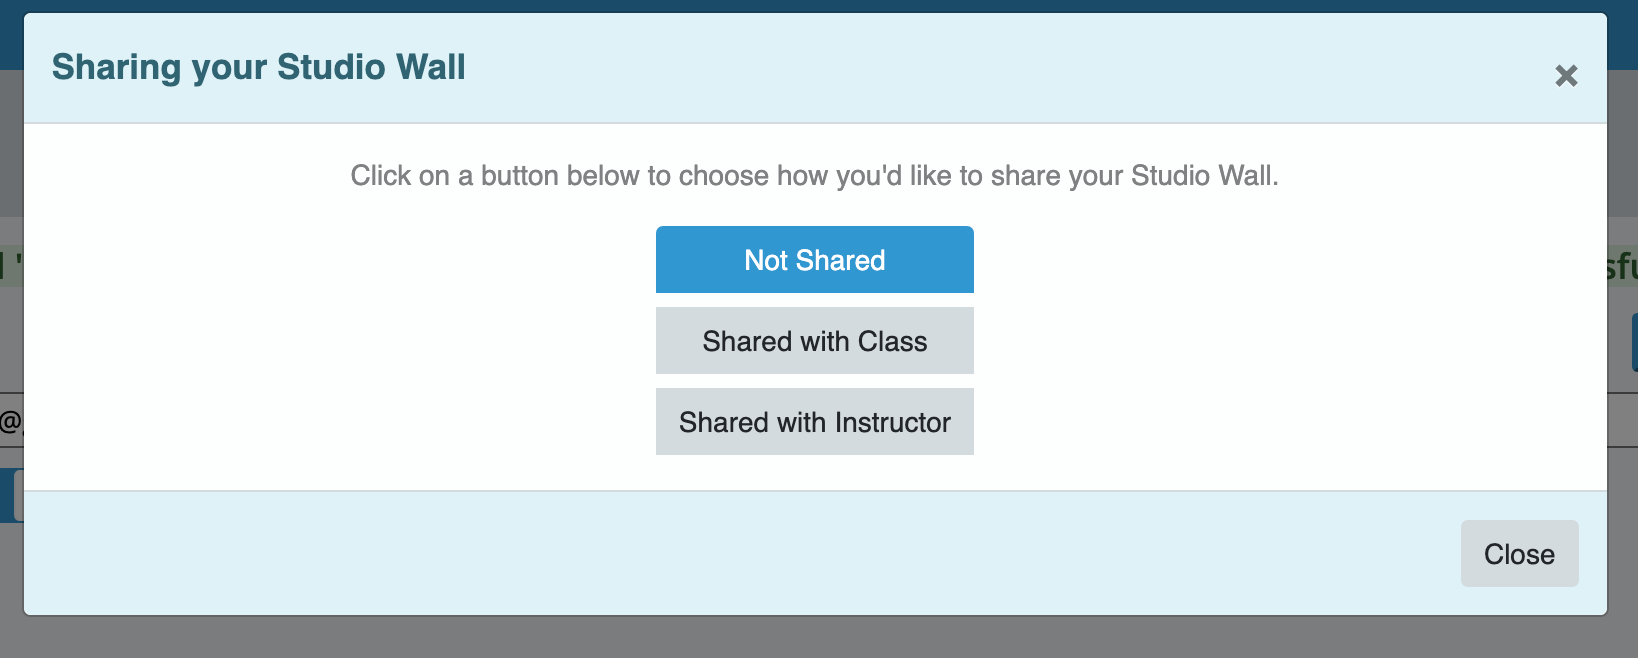
You have three sharing options:- "Not Shared": Only you can see your Studio Wall
- "Shared with Class": Your instructor and classmates can see your Studio Wall
- "Shared with Instructor": Only you and your instructor can see the Studio Wall
-
Confirm Sharing Settings: Once you make your selection, a confirmation message will appear.

Click the "Close" button in the lower right to close the dialog and return to your studio wall. -
View Your Completed Studio Wall: Click "Home" in the upper left to return to your main studio page.
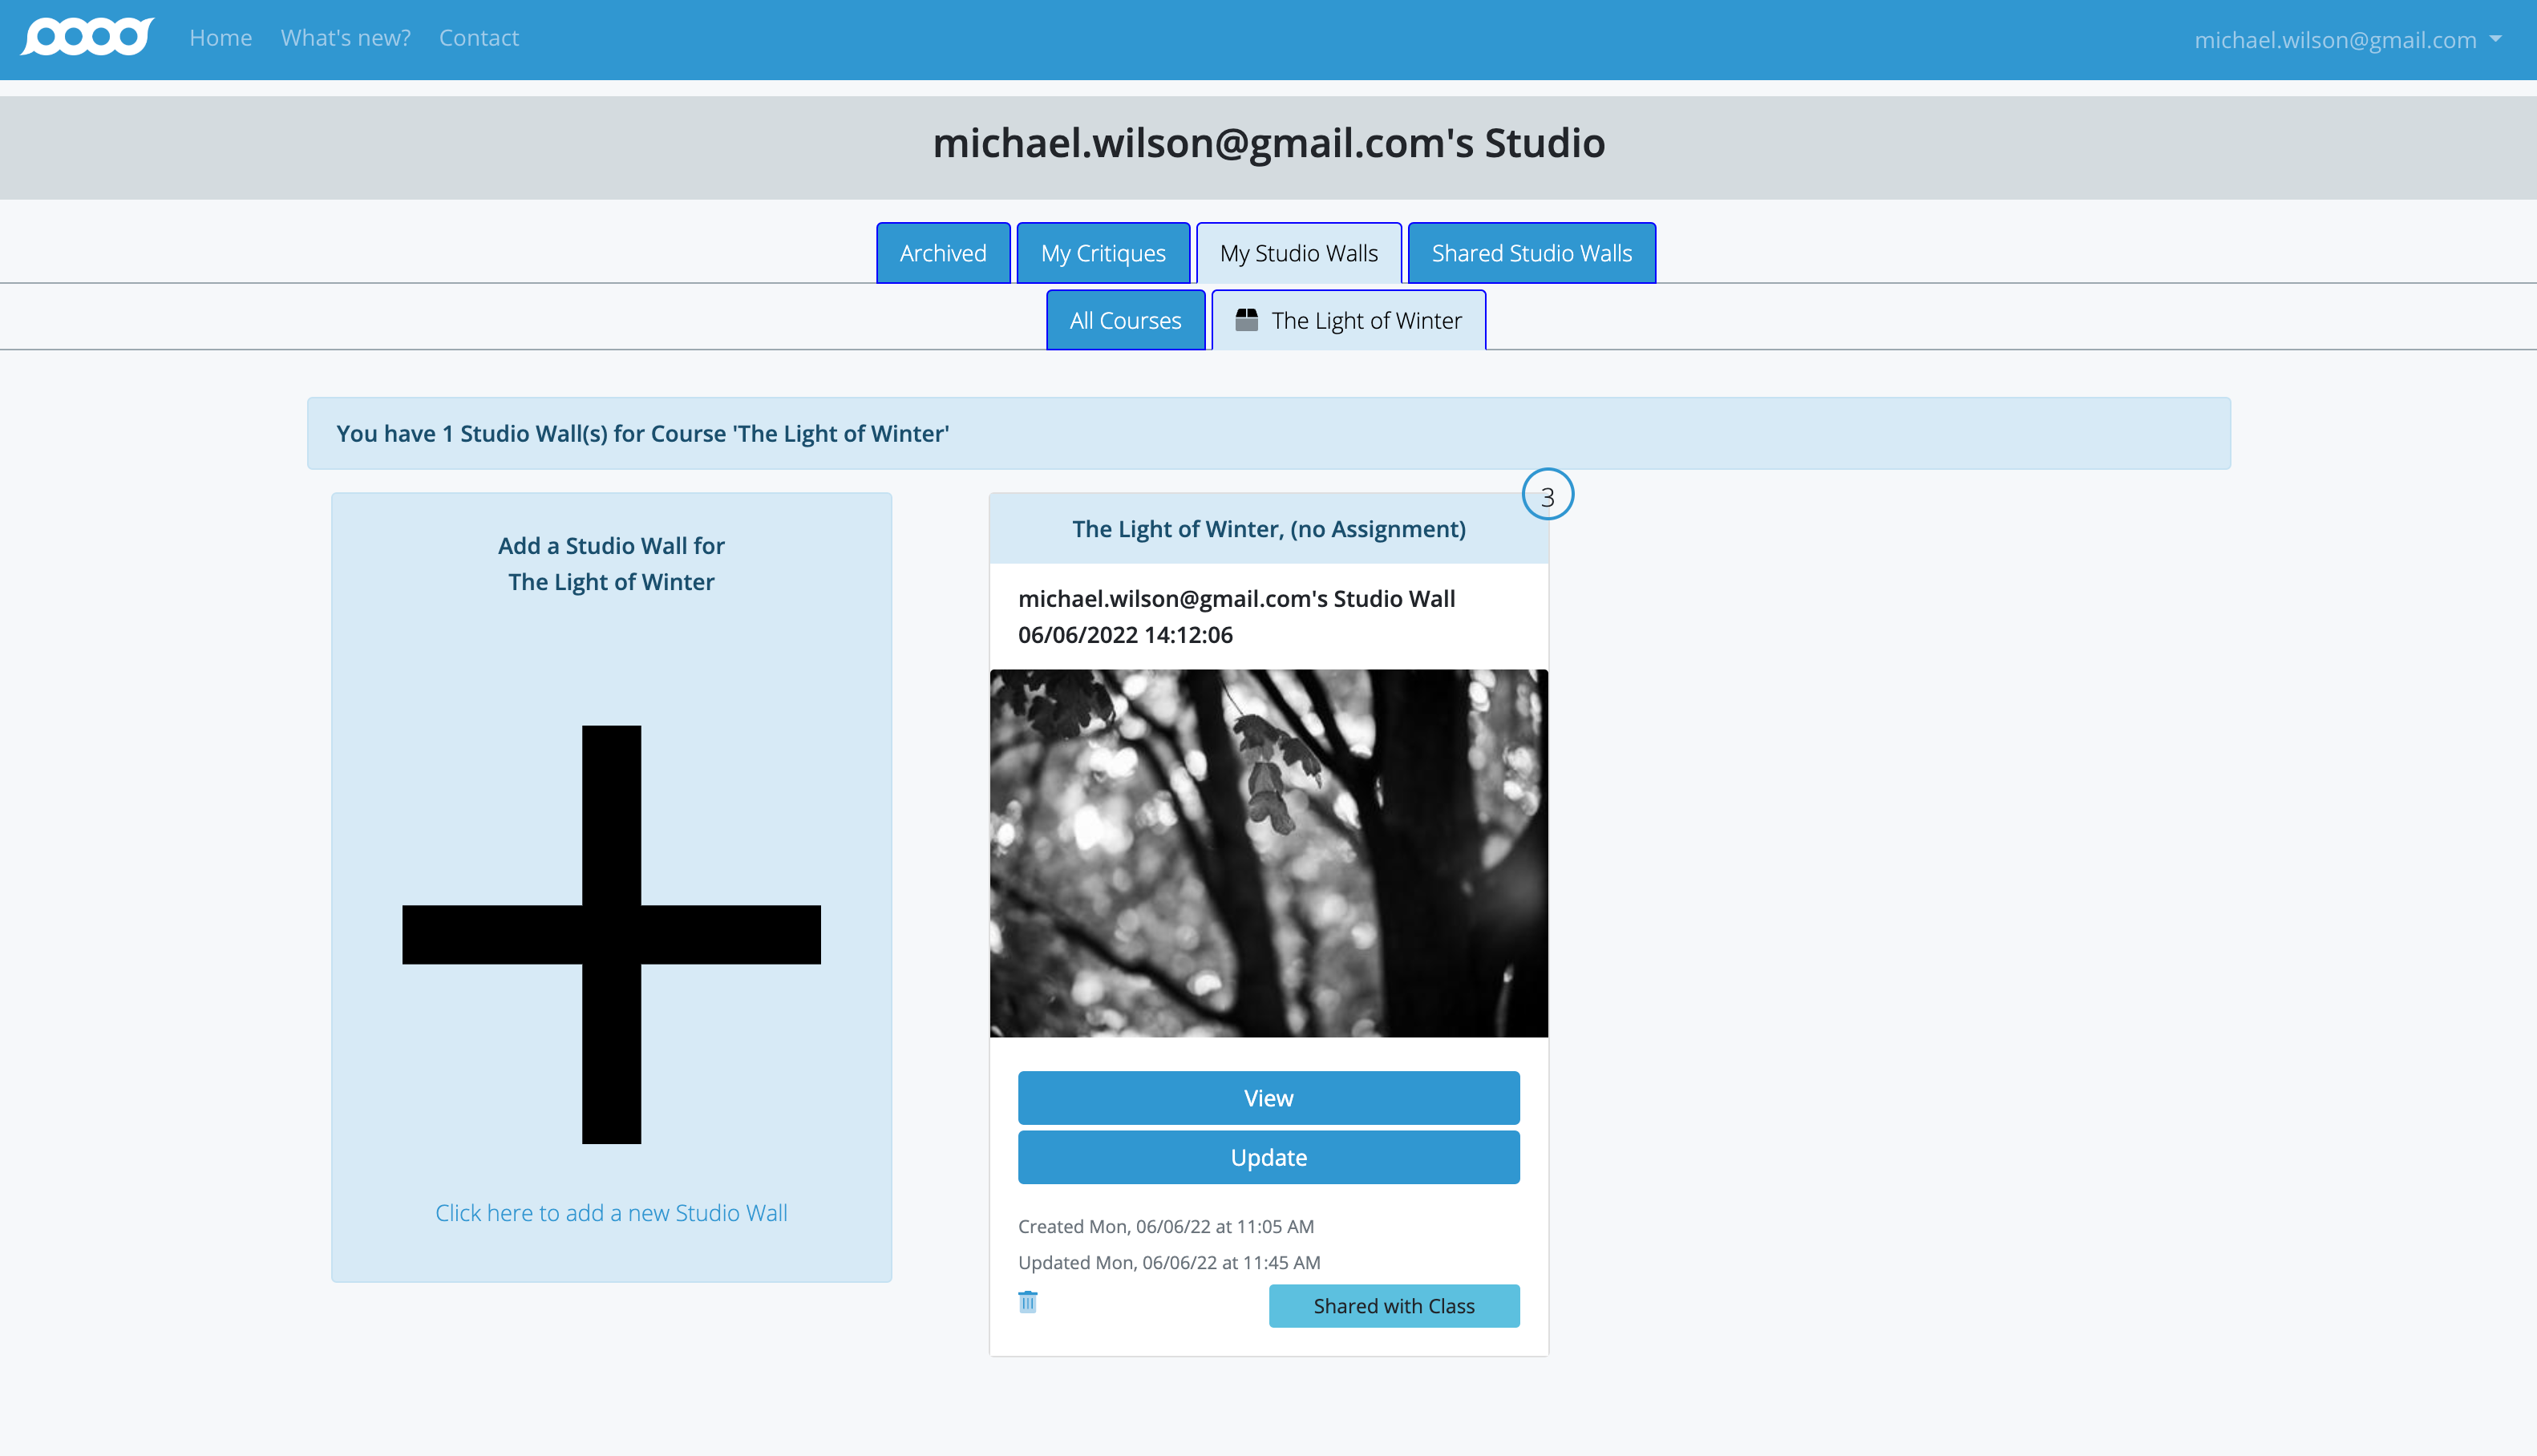
Your new Studio Wall will now appear in the "My Studio Walls" tab under your course.- Image Count: The "3" on the upper right corner indicates the number of photographs in the Studio Wall
- Hero Image: Atget Studio automatically selects the first photograph as the "hero" image shown on the card
- Sharing Status: The "Shared with Class" button in the lower right shows the current sharing status and can be clicked to modify settings
What's Next?
This concludes the Studio Wall creation tutorial. If you want to make changes to your Studio Wall, you can learn how by following the Updating a Studio Wall tutorial.